
Today I want to take a look at Warp, a terminal that aims to revolutionize software development through speed and efficiency. @Ricky already introduced us to Fig.io, which goes in a similar direction, but has since been taken over by AWS and has therefore had to “lose” many of its useful functions for the time being.
First, as usual, a few key data about Warp. Warp was founded in June 2020 by Zach Lloyd, a former Principal Engineer at Google and interim CTO at TIME. The goal was to develop a modern version of the command-line terminal, built natively in Rust. In April 2023, Warp introduced “Warp AI”, an integration of a chatbot into the terminal. In June 2023, Warp Drive was introduced to facilitate collaboration on the command line, where developers can share template-based commands with their teams using integrated cloud storage. In February 2024, Warp was officially released for Linux, with almost 98% of the underlying codebase shared with the macOS version. Unfortunately, Warp is not yet available for Windows users, but it is planned.
But enough theory for now. Let’s take a look at the features of Warp in detail. As always, it is very easy for Mac users to install the terminal.
|
|
And now we can get started. Unfortunately, with Warp it is necessary to create an account before you can use the terminal. Well, that’s definitely a minus point, but if the functionality is right, I can turn a blind eye ;-)
After Warp has started, I see the following screen:
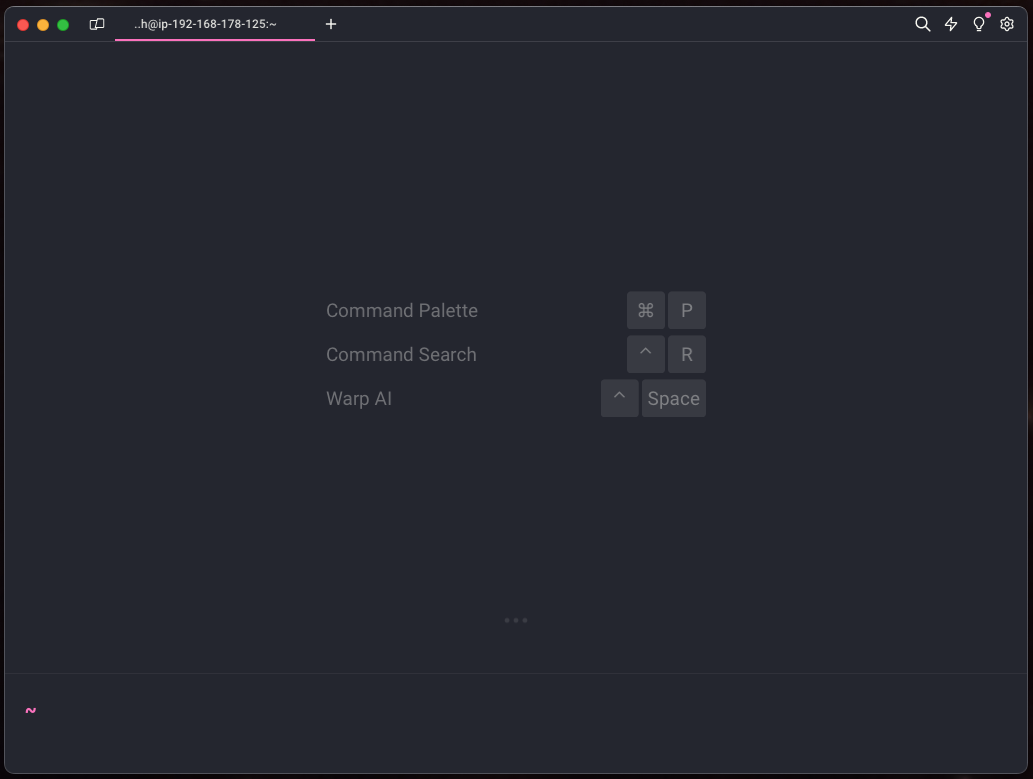
I don’t want to go into the many settings that you can set in Warp. At this point I just want to mention that you can really customize Warp to your individual needs.
Command Completions
First of all, let’s take a look at the command completions. This means that Warp can complete a command for us at the “push of a button”. You can find a list of currently supported commands here: Command Completions. The completion is activated with Tab. This takes some getting used to, because in Warp you cannot use the standard Tab function and there is no direct autocompletion. So if I enter the following command and press Tab I get this output:
|
|
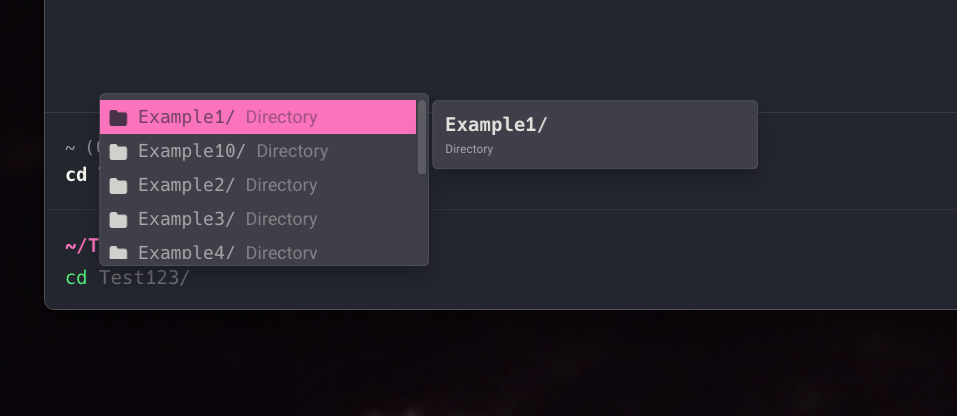
As you can see, you get a list of all folders, but I have to scroll to see them all. In the normal terminal, Example is also added directly to the command, since all folders start with this name. For comparison, here is the output in the normal terminal. I actually find this one clearer. Maybe the Warp developers can go into the improvement process again here.

However, Warp is very useful for executing a command. For example, if I want to rename my Git Origin, Warp helps me perfectly with the autocompletion.


As you can see in the picture, the command completions are not yet 100% perfectly implemented. With git remote rename the description was obviously copied from git remote rm 😉.
Window, Tabs and Split Panes
The window and tab behavior in Warp is as you are used to. With CMD + N you open a new window, with CMD + T a new tab in the window. With CMD + W you can close them again. If you accidentally closed a tab or even a window, you can restore it with CMD + SHIFT + T.
Warp also offers us split panes. So we can divide a single tab again. With CMD + D you can split horizontally and with CMD + SHIFT + D vertically. With CMD + OPTION + arrow key you can jump between the panes and with CMD + W you can simply close the corresponding pane again. A very useful feature is the synchronization of panes within a tab. This can be switched on and off again with the following key combination: CMD + OPTION + I .
Warp AI
Next, let’s take a look at the much-vaunted feature that Warp offers us: “Warp AI”. The interaction with Warp AI takes place directly in the terminal, with user input being sent directly to the OpenAI APIs without Warp interfering with the data exchange. By the way, Warp has configured the integration so that OpenAI is not allowed to use this data to train their models. This configuration ensures that users’ data remains private and Warp takes a “hands off” approach, meaning that users’ terminal input and output data is not stored on Warp’s servers.
As already seen in the first picture above (Warp start screen), we can start the Warp AI with “^ Space”, or simply enter “#”.
[!NOTE]
Locally, ^ Space didn’t work for me and I had to switch to “#”, which I think is much more practical
Now let’s try the AI. I’m trying to find a command that will allow me to delete all files in a folder that are older than 30 days. Since I’ve been working with ChatGPT (OpenAI) for a long time, I don’t expect any negative surprises here.
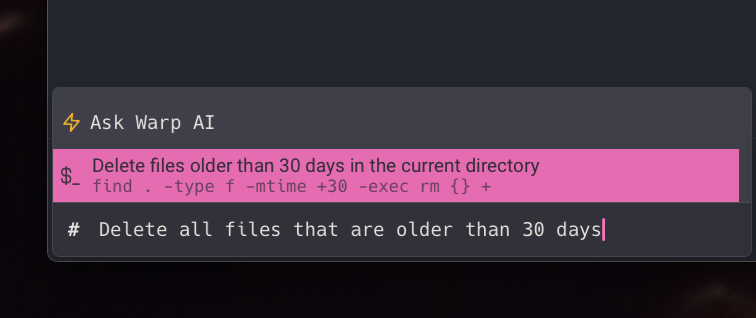
And as expected, we get a suggestion within a very short time on how we can solve our problem. Although this is a really cool feature, it’s so self-explanatory that I don’t think we need to go into it any further.
Blocks
The output of Warp is divided into so-called blocks. This is very clear, because you can see exactly which command led to which output. Let’s take a closer look at the blocks.
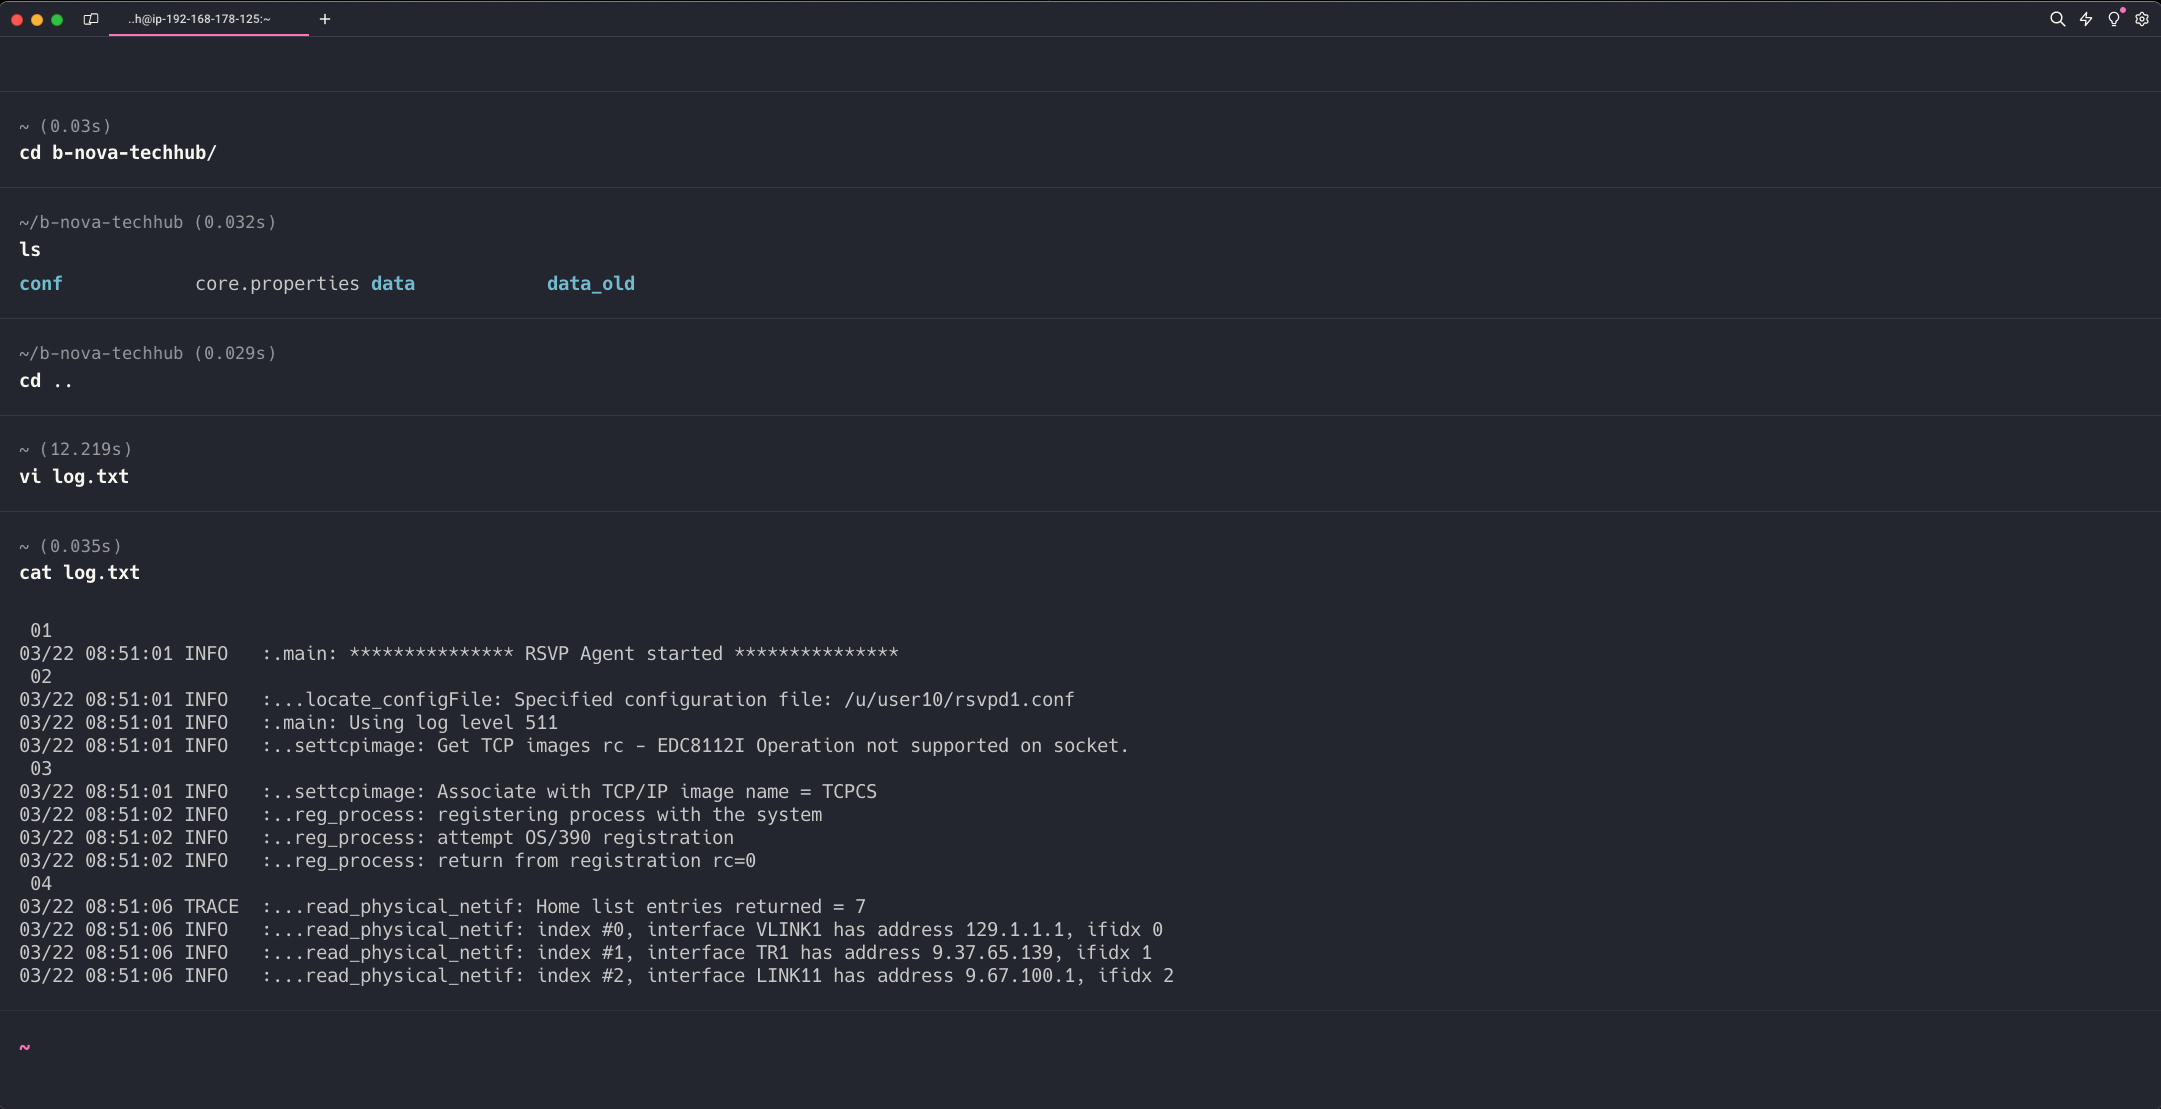
Each block is separated by a line here and I can execute functions on each block again. Let’s take the last output as an example, i.e. the cat log.txt. The block now allows us to filter this output. If I hover over the block, symbols appear in the top right corner.

If we now click on the filter symbol, an input window appears with which we can search within this block.

This is super helpful, especially since you can also search for specific log outputs in running processes.
In addition, you can also bookmark blocks so that you can find them again more quickly. The eternal scrolling around in the terminal has finally come to an end. You can also use the AI symbol to display the potential next steps that you could take after the last entry.
If we go to the extended menu, we see other very useful actions that we can do with a block.
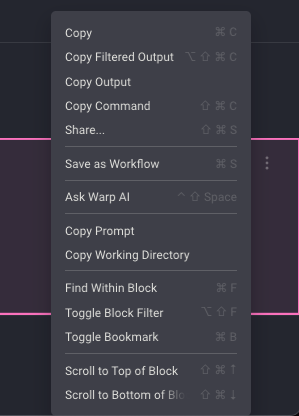
A very useful feature is “Share…”. This allows you to forward the command and/or the output to someone.
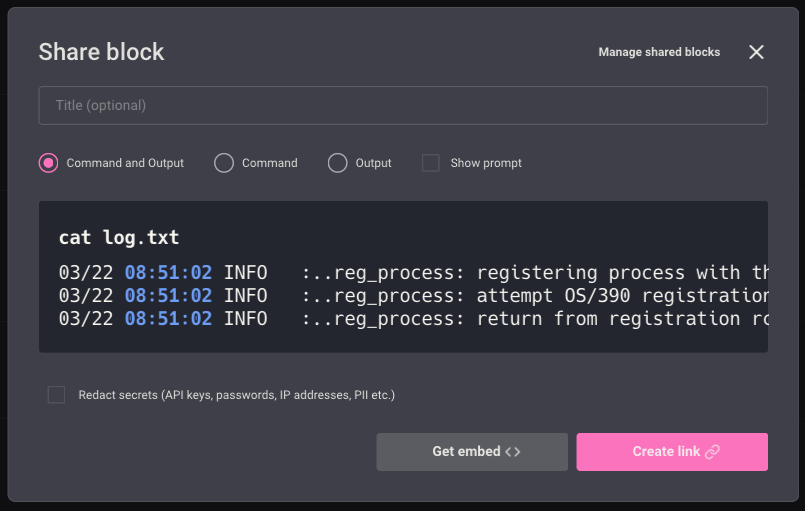
Here is an example of what such an embedding might look like.
The Flash
One last very useful feature in a block is the AI function. For example, if you get an error in a block when compiling a file or starting the server, you can simply click on the small lightning bolt in the upper corner and Warp will help you solve this error. A prompt is created with the error message asking what to do.

So you save yourself opening a browser window and writing a prompt.
Workflows
Warp offers us another great feature, the so-called workflows. This makes it possible to parameterize commands so that they can be executed more quickly. Warp already offers predefined workflows here.
To get to the view for the workflows, we first press CONTROL + SHIFT + R. This gives us an overview of all the workflows that are already on offer.
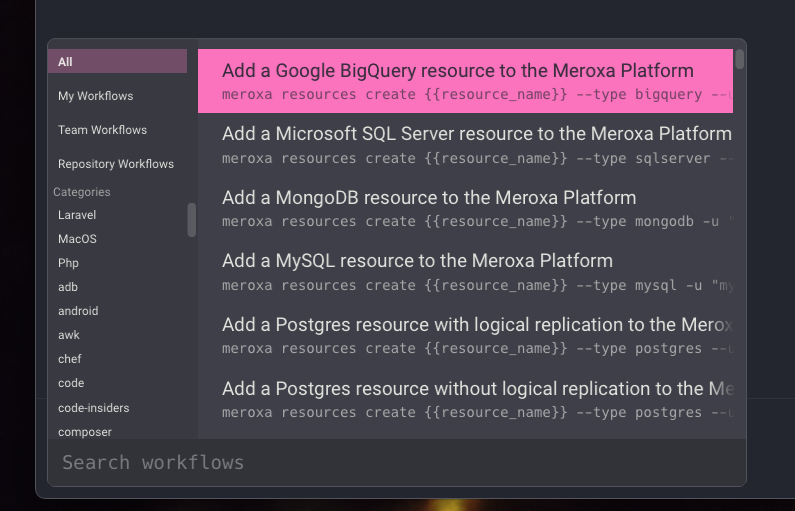
For example, I can now search for a workflow. First I want to see all processes that are running on a certain port. So I search for “List Pr” and I already get a workflow that seems to do exactly what I’m looking for:
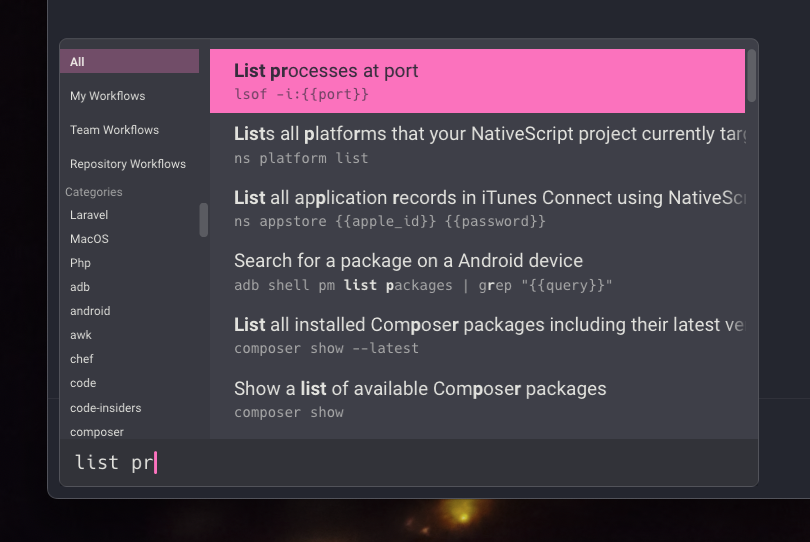
With Enter I then get to the placeholder that was defined in the workflow.

Here I just enter my port and get the desired result:

So we can now conveniently choose something suitable for our problems from the existing workflows. In most cases, however, you want to define your own workflows for more complex commands. Warp also offers us a mechanism for this.
Custom Workflows
To create a workflow in Warp, you can use different entry points:
-
Warp Drive with the option “+ > New Workflow”
-
In the block with “Save as Workflow”
-
From Warp AI results with “Save as Workflow”
-
Command palette with “Create a new personal workflow”.
In the workflow editor, you can then name the workflow, edit the command and arguments, add a description, and define arguments along with descriptions and default values. The workflows can then be easily executed via the command palette or Warp Drive. Let’s create such a workflow ourselves.
I would like to be able to simply overwrite the Python version in the terminal. I am aware that a venv is the preferred way to do this for my particular project, but I am more concerned with an illustrative example here. Currently python3.9 is set as default for me.

Now I can change this version via an alias. So I enter the following in Warp:
|
|
If I now have the version displayed again, I get the corresponding 3.11 Python version
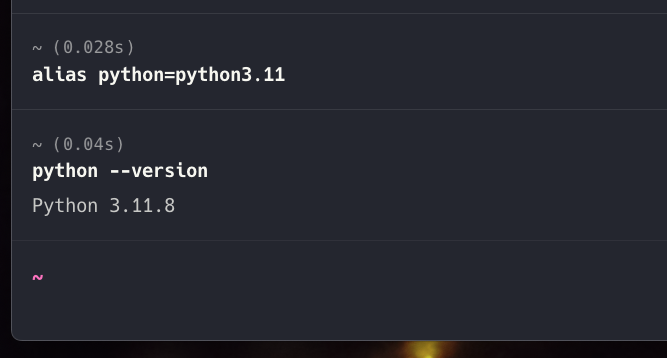
Now I can create a workflow directly from the block in which I entered the alias command. To do this, I click on the 3 dots on the far right of the block and select the menu item Save as Workflow.

Now a window appears in which I can define the name, description and also parameters for the workflow.
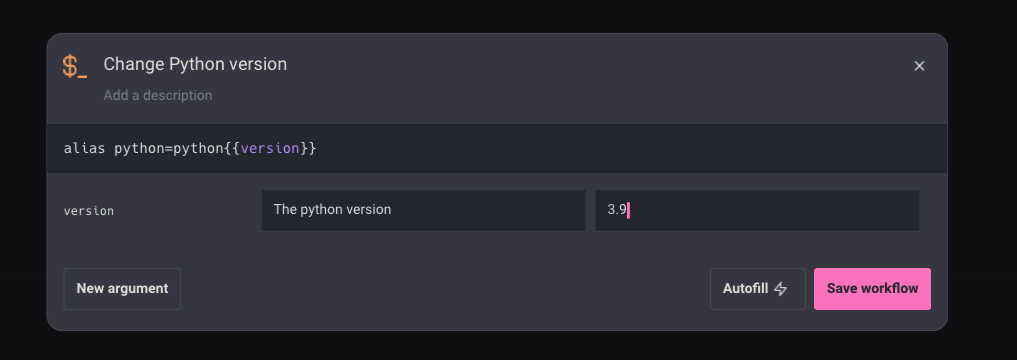
I replace the version with a placeholder and select a default version. Then I click Save Workflow.
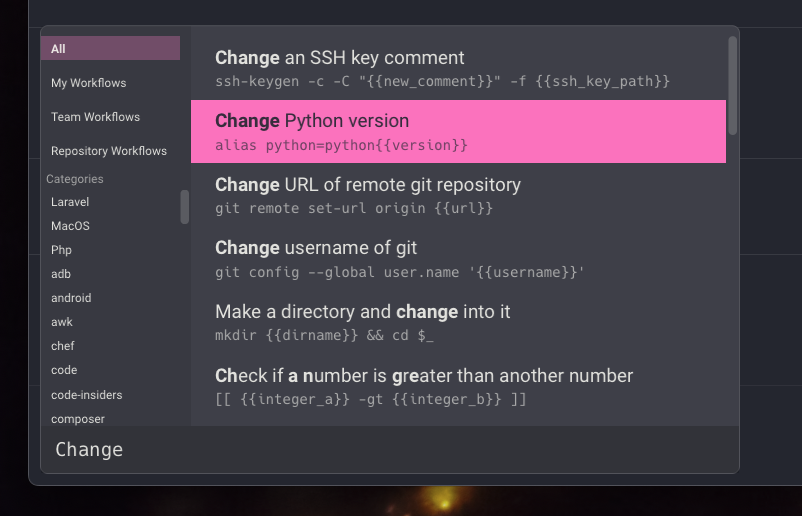
If I now go back to the list of workflows (CONTROL + SHIFT + R) and search for “Change” there, I see my newly created workflow in the list and can execute it with Enter.
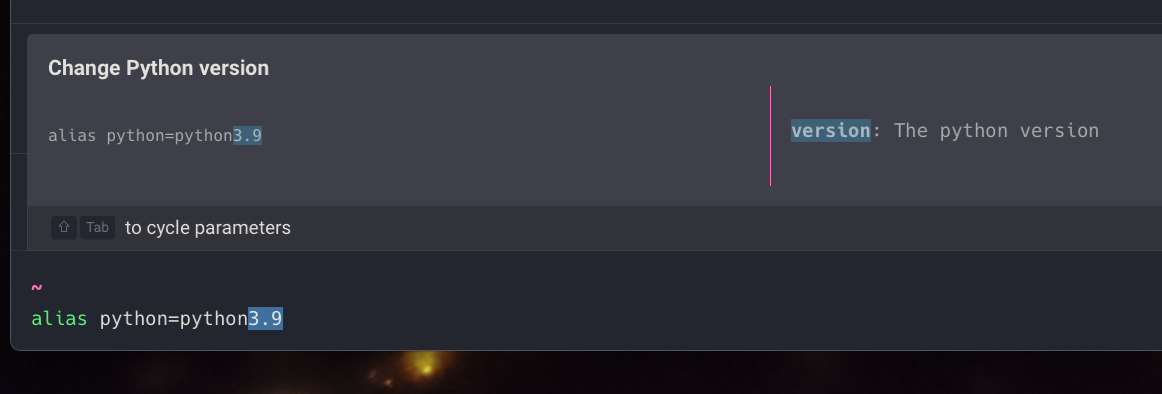
This feature is really handy when you have scripts or actions that need to be run over and over again. Of course, you could also create an alias for this, but then you couldn’t do what I’m about to show you.
Warp Drive
As I said, workflows are a pretty cool way to save and automate recurring commands. But it’s even cooler that you can now share these workflows with your entire team.
This is where Warp Drive comes in. This gives us exactly this possibility. At the top left of Warp we have a small symbol that looks like a torn book or sheet.
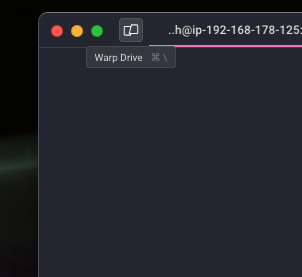
With this we can open Warp Drive and create a new team there.
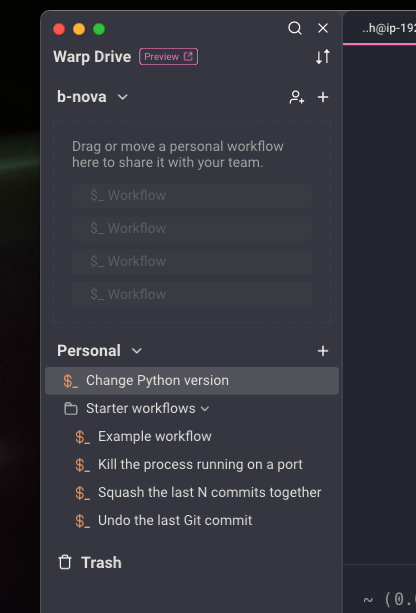
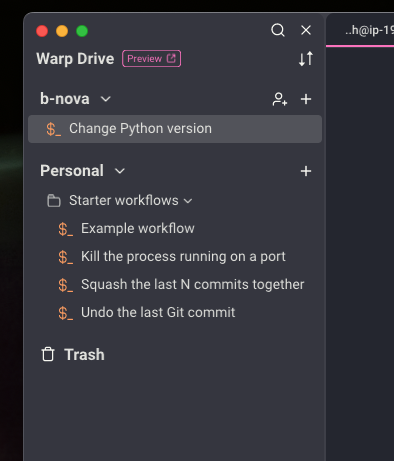
Now we can already see that the newly created workflow “Change Python version” can be seen under the Personal item. We can now simply drag & drop this to the top of the team and everyone has the opportunity to use this workflow for themselves. Pretty cool!
Tips & Tricks
With that we are already approaching the end of today’s TechUp. I’ll give you a few more things that I found very useful.
Files and Links
Warp has a file, link and script integration. For example, if we run an ls in the terminal and files and folders are listed, we can open them by holding down the CMD key and clicking on the folder or file.

The respective files and folders are opened in the program intended for this purpose by the user.
Markdown
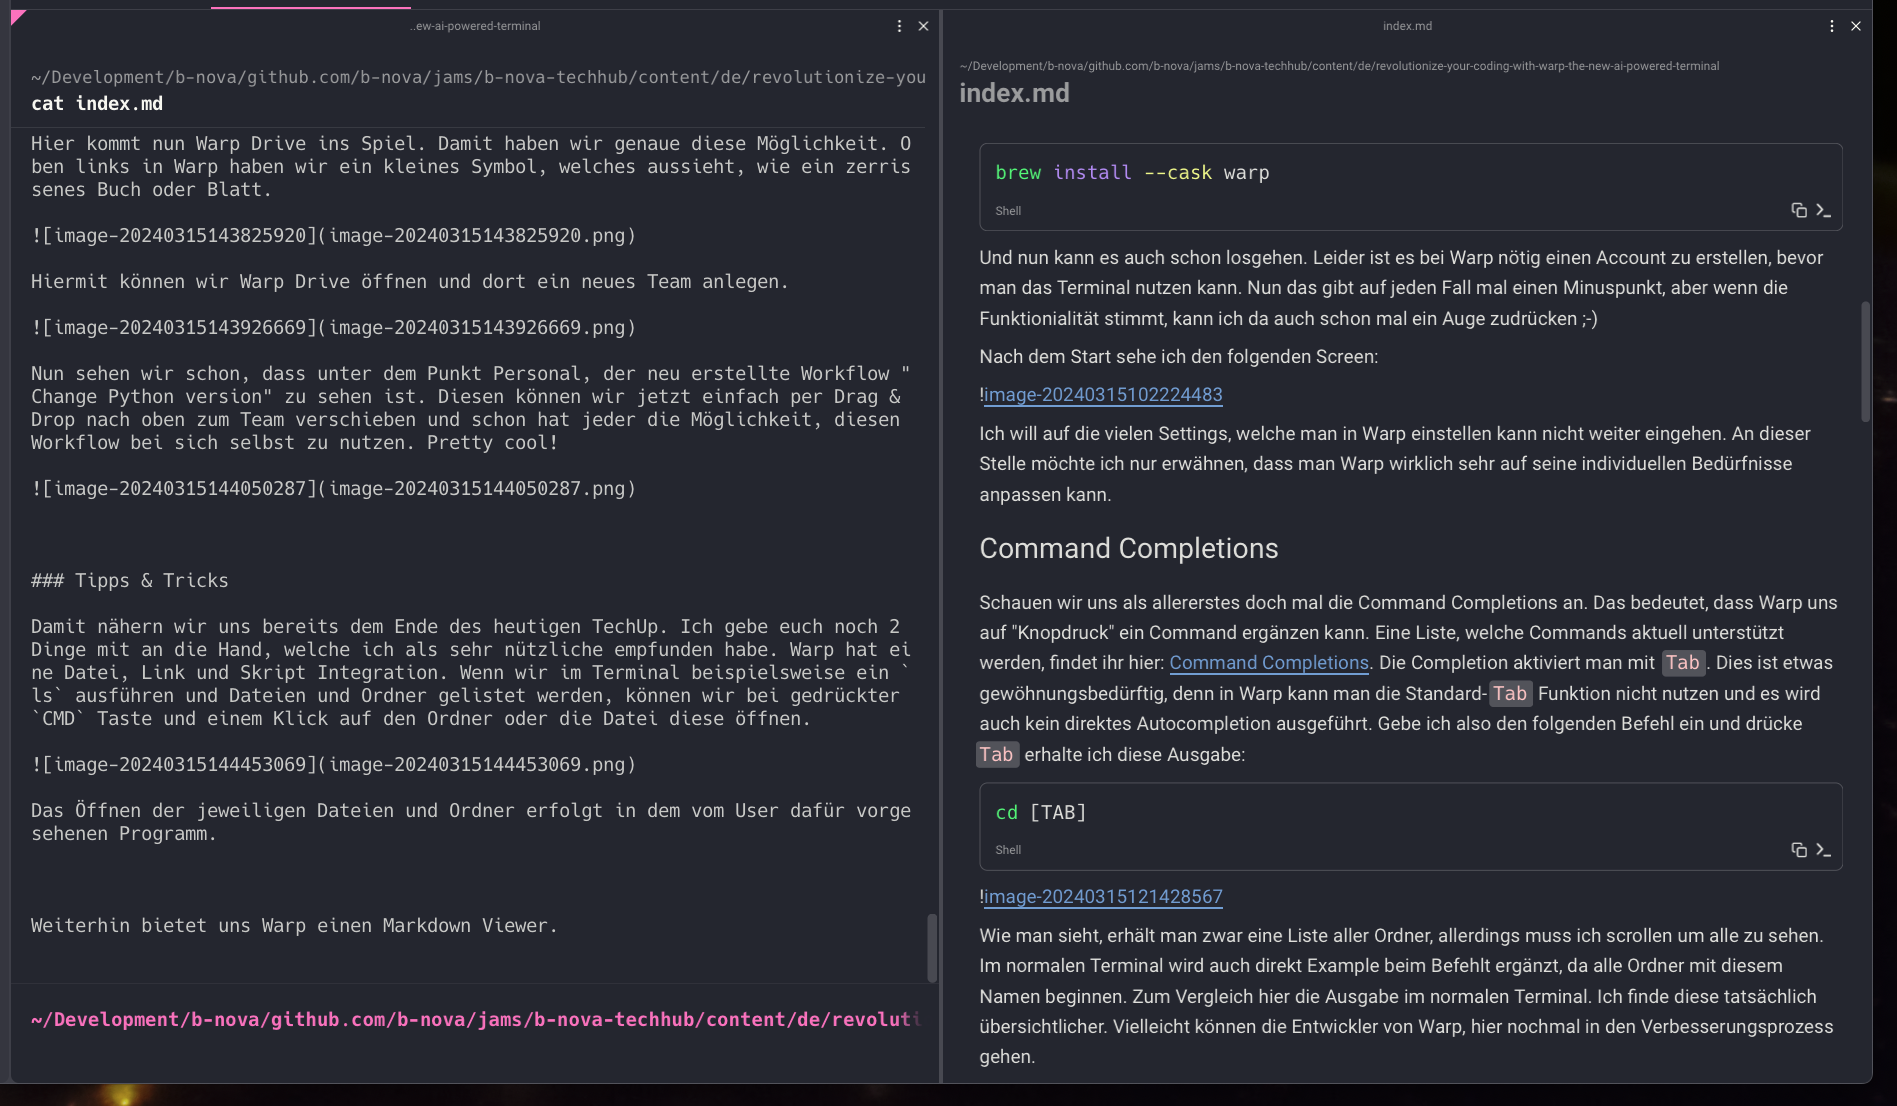
Furthermore, Warp offers us a Markdown Viewer. So if I do a cat on a Markdown file, Warp asks me if I want to view this file in the Warp Viewer
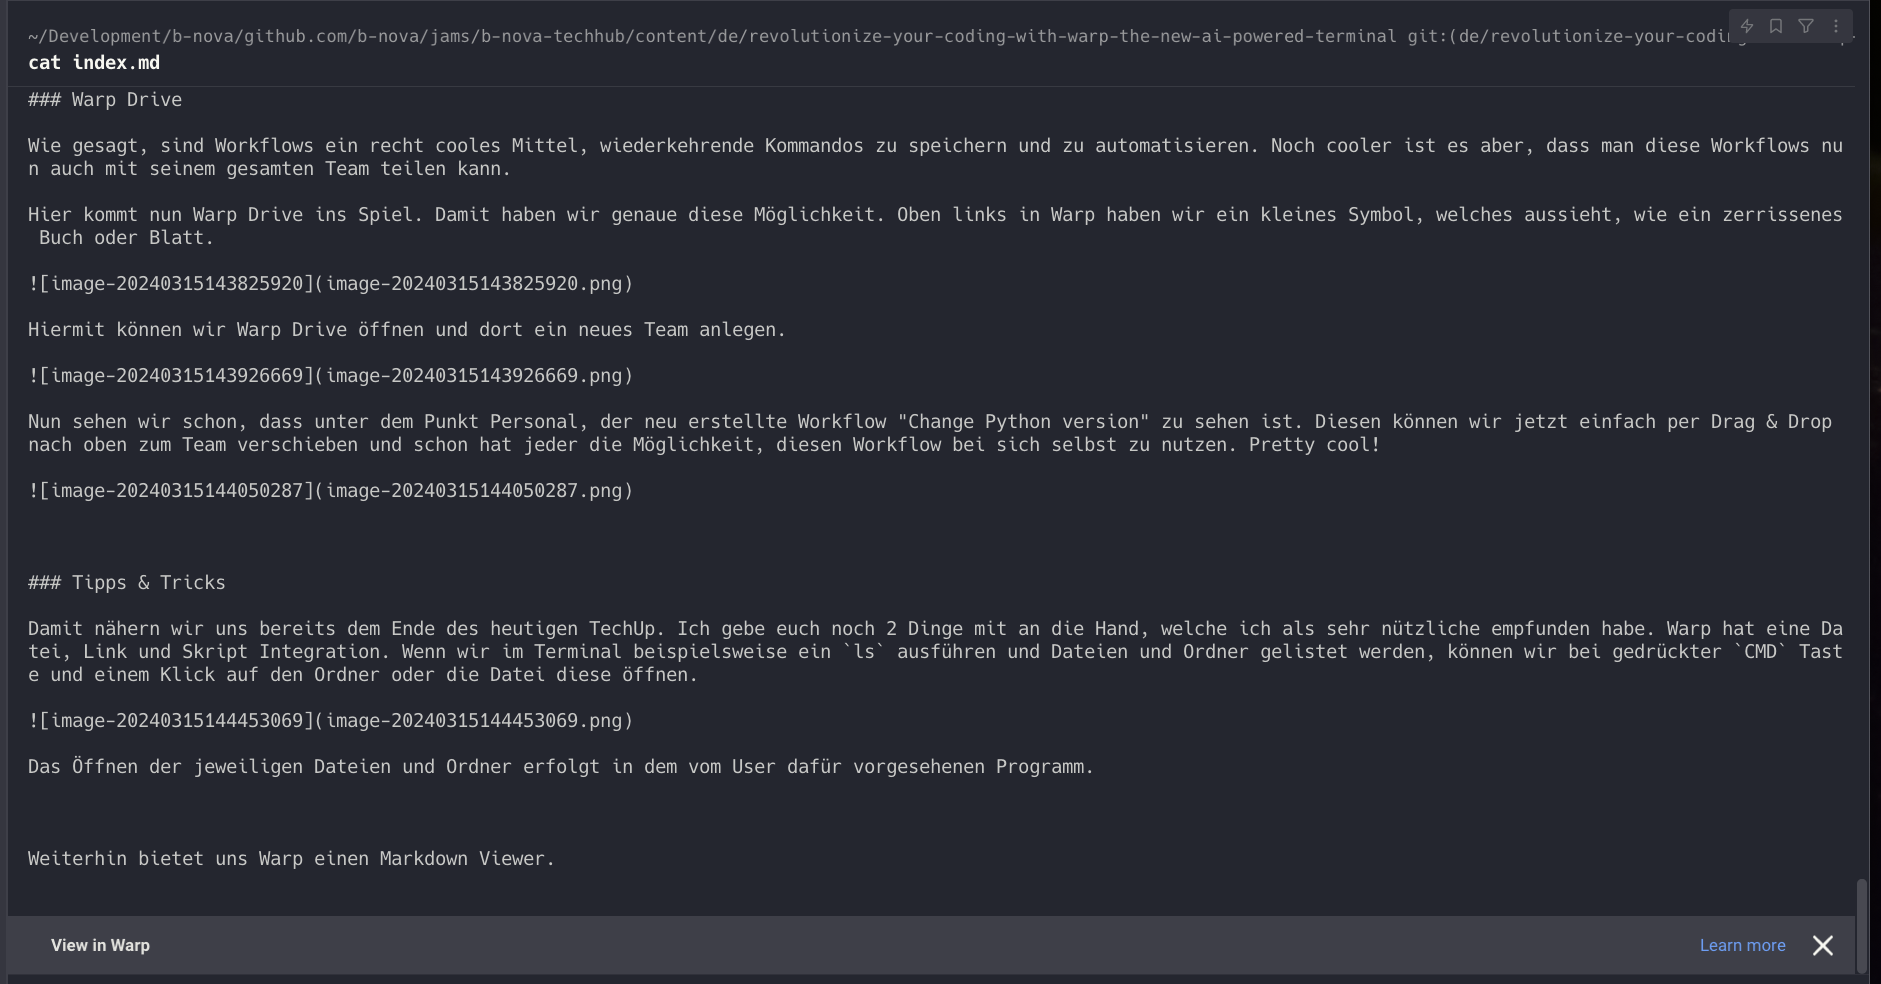
Clicking on View in Warp opens a pane with the rendered Markdown.
SSH
Warp offers us an SSH wrapper that even enables the Warp features in the remote terminal. Of course, this brings us a number of advantages, because we can manage workflows and commands for all systems in one place.
Integration in IDE
Another important point would be the integration into the IDE. It would be nice if the terminal was fully integrated there and I didn’t have to change the program every time I entered something in the terminal. Let’s see what Warp has to offer us here.
I mainly use Jetbrains IntelliJ and on the page with the existing integrations there is also a guide for the IDE. Unfortunately, Warp can only be used as an external terminal here. Fortunately, you can create a shortcut with which you can reach the terminal relatively quickly.
Conclusion
My conclusion on Warp is very good. Warp makes working with the terminal much easier. It takes a little while to get used to Warp as a terminal, but once you’ve made the switch, you don’t want to go back to the normal terminal.
The team function and thus the sharing of workflows and commands is of course also very practical.
Unfortunately, the integration into an IDE is not very satisfactory. There are shortcuts with which we can open the terminal from the IDE, but unfortunately we always have to change the window for this. Now that I luckily have 3 monitors, I can live with this circumstance ;-)
I am very excited to see how the development of the terminal will continue in the near future and what useful features Warp will come up with.
This techup has been translated automatically by Gemini