Now that we have introduced you to Angular and Vue.js, let’s continue with React. React is also a JavaScript library for creating user interfaces. This makes it possible to display a desired user interface based on the state of the application. Like Angular and Vue, React also relies on a component-based application in which the components that have been created can be used over and over again.
React was developed by or at Facebook and was used for the first time in 2011 for Facebook’s newsfeed and later in 2012 also for Instagram. As of October 2014, React officially became an open source project, but with a BSD license with an additional patent license. This led to great discussions and was then published under the MIT license from September on.
Installation
To start developing with React, Node.js should be installed beforehand.
If you want to create a React application, you can install create-react-app first.
You can do this through the terminal with the following command:
|
|
If the installation was successful, you can switch to the folder in the terminal in which you want to create your app. There you then execute the next command including the desired app name. This creates a setup of a React app that you can use to develop.
|
|
This gives you the following folder structure:
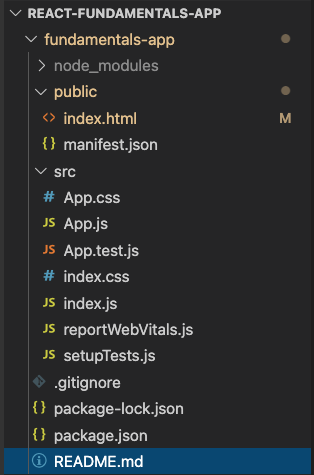
Once the build process is complete, code . can be used to open VS Code if this is your preferred development environment.
Finally, you only have to start the server within the created app folder.
|
|
JSX
Instead of using the usual JavaScript extension for files, you should rather use JSX for all files or components. In terms of syntax, JSX looks like a template language, but it can access the full range of functions of JavaScript. Furthermore, it is ensured that all elements that are opened must also be closed again.
Babbel then compiles these files in React.createElement() \ calls during the build process.
This has the advantage that it is checked during programming whether the input parameters are correct.
This helps you to program without errors.
Of course, there are also a few things to consider. As soon as the code spans several lines, these expressions must be in brackets. If you want to use JavaScript expressions, they are written in curly brackets. The same counts for CSS inline style. It is also important to know that the attributes for HTML elements are not written in the usual way; instead, the notation of the DOM element interface is used here.
Components
Components are there so that you can divide your application or your user interface into individual smaller pieces. You should make sure that these only depend on their input (the properties) so that they can also be used again in other places. There are two different types of components Function Components and Class Components.
Class Components
If you use such a component, you have to extend this class with Component.
Another difference to the Function Component is the render method.
If you want to pass properties to your component, you can of course do so.
However, you can only access it via the instance property this.props.
|
|
Function Components
This component is created as a JavaScript function.
Before React introduced hooks, this type of component was unable to manage a local state.
As a result, the component now fulfills all conditions, since it delivers either null or a React.Element as the return value.
To access properties, you can either pass the Property- name in additional curly brackets in the brackets or just enter props and access them via props. and the Property- name.
|
|
In order to use these two components, they must first be imported within the file App.js.
You can then use this within the return value.
|
|
Within the index.js file, on the other hand, the App.js component is called, which normally counts as the top component within a React application.
|
|
As you can see on line 11 above, this refers to an id root within document.
You can find this ID in the index.html file.
This file represents the final content of your application.
Your App.js is now rendered in the div element root.
|
|
Event handling
Of course, you also have the option of using events within React, such as clicking a button.
A difference here compared to HTML event attributes is that the CamelCase notation is used for them.
This means, for example, that from onclick within HTML onClick in React JSX Files.
For example, if you want to create an onClick event on a button, you have to transfer a reference to a function via event props.
For this we first create a MyButton class component with the desired button.
This button should call the function onClickHandler within its own class for a onClick event.
|
|
So the next thing you need to do is create the function. This should increase the variable counter within the state by one with each click on the button.
|
|
So that you can also use the state with the variable Counter, it is necessary to create a constructor that defines the state with the variable. Method binding is still required so that the onClickHandler can also access this state.
|
|
However, there is also the possibility that you do not have to create a constructor, but can use the class properties. You only have to define the state and write the method as an arrow function.
|
|
Styling
You can access different variants for the styling of components within React.
Inline
The first option is to make style adjustments using inline style. This could then look like this.
|
|
CSS classes
Of course, you can also simply create a CSS file in which you define your styles as usual. You then have to import this file into the desired component.
|
|
Within the CSS file, for example, you can do the styling using classes or IDs.
|
|
In order to use this styling you have to pass the className to the desired component.
|
|
CSS-in-JS
Another option would be CSS-in-JS. The usual part of CSS is written directly within JavaScript. This of course makes it possible for this component to always have exactly the same design, regardless of where it is reused. One of the most common methods is to use Styled Components. However, you must first install this via the terminal.
|
|
You can then import styled-components into your component. You can use a variable to do the styling in which you determine what kind of HTML element it should be. Once again, you determine the actual design based on CSS attributes.
|
|
You can now easily use the button within your component based on the variable name.
|
|
Now you’ve learned the basics of React. In any case, you are now ready to create a to-do list based on the next blog article.
This text was automatically translated with our golang markdown translator.