
What is eBPF? - A little reminder
GNU/Linux is widely used in the IT world and is especially popular as a server operating system. This operating system is a flagship open source project and has become popular over decades due to its innovative and wide-ranging kernel development. Here, the original developer Linus Torvalds plays a very central role, as he reviewed every merge request of the Linux kernel himself, and thus plays an important role in Linux kernel development. However, one of the disadvantages of this is that kernel development suffers from long release cycles for new features as a result.
A feature that has been rolled out since Linux version 3.18 in 2014 is eBPF. eBPF offers the possibility of executing custom logic directly in kernel space without having to patch the actual kernel itself. The code, which can be executed by eBPF on kernel level, is interpreted in its own isolated environment. This allows you to write software that can be executed directly in the kernel and thus as low-level as possible, right at the heart of the action.
There are numerous fields of application, which result from this technology. Today, however, we are not going to talk about what eBPF makes possible, but about how we can write our own eBPF programs and how they can be packaged best. If you are interested in the topic of eBPF and its areas of application, please have a look at the eBPF TechUp articles, which we’ve already made. The following TechUps are worth mentioning:
Bumblebee as a build tool for eBPF logic
What is the best way to write our own eBPF code? One way - the best I could find for this use case - is Bumblebee. Bumblebee is specifically designed to write eBPF logic, build it and then put it into a usable package format such that the written artifact can also be shared with others quickly and easily.
In its current version, Bumblebee does two important things:
- Initialization of an eBPF program on the basis of prefabricated templates: Bumblebee includes an init process that can be used to prefabricate an eBPF program in the CLI, allowing you to focus only on your own business logic.
- 2. Packaging of the build artifact using an OCI compliant format: Once custom business logic has been written and tested, Bumblebee ports the entire build artifact through a packaging process into an OCI-compliant format that can be uploaded to common container registries.
As we have just noted, Bumblebee greatly simplifies the development process of eBPF logic. Besides the template-based initialization, as well as packaging of the ready-built build artifact, Bumblebee also provides other concepts that can be helpful, like choosing:
- How the eBPF filter is triggered
- Output type: Currently there is Logging in the form of a Print type, and Metrics in the form of Count and Gauge types
These Bumblebee-specific features can be found in the official README.md. Since Bumblebee is still in development, this documentation may change considerably in the meantime. But I hope that at least the basic concepts are still valid. Now let’s take a practical look at the whole thing.
How to write an eBPF-Probe yourself
As always here at b-nova; when we look at a new technology and test it for lungs and kidneys, we like to jump right in. So, let’s write our own eBPF-Probe using Bumblebee. But before we can do that, we need to pre-install a few things.
Requirements
For this TechUp, we need a GNU/Linux environment. Since eBPF is a technology based on the Linux kernel, this will only work on Linux. Because I use a MacBook Pro as my device of choice and it does not come with a Linux kernel, I need to virtualize a Linux environment. Originally I wanted to do the virtualization with a Vagrantfile and access it with a VMWare Fusion driver. This plan was quite time consuming and combined with the installed M1 processor, as well as the new Ventura 13.0 update, I had to resort to a simpler solution to get myself a Linux system.
In the process, Canonical, the company behind the well-known Ubunutu Linux distribution, and their Multipass came in quite handy. In no time at all I was able to start an Ubuntu which was easily accessible via the MacOS terminal. So this guide is based on the assumption that an Ubuntu system is available. Although this guide is generally applicable to any Linux distribution, I only tested the Ubuntu version myself.
Creating the Linux environment via multipass (optional)
Multipass is a 1-click Ubuntu-based virtualization environment. It can be comfortably installed on MacOS with brew as follows:
|
|
Now that Multipass is installed, we simply call the application via the launcher. In the Icontray there should now be a new Multipass icon. With a right click on it, we get the possibility to open a shell directly on the Ubuntu machine.
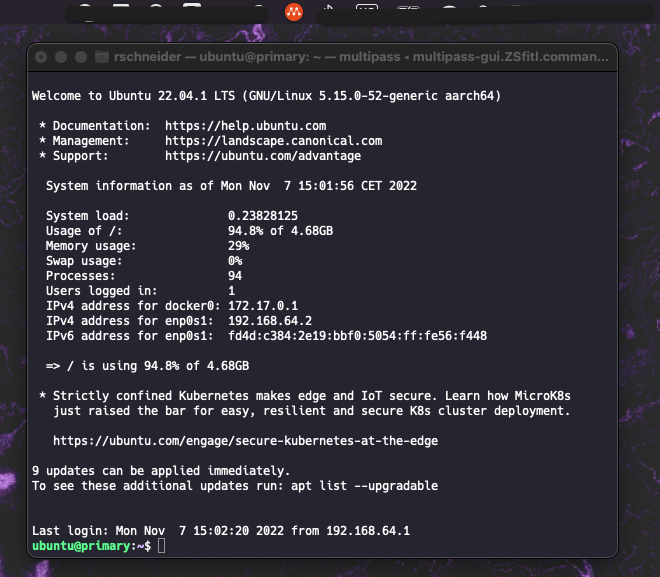
If you see this shell and the ubuntu user is logged in on the primary host, then we are ready to take the next step and install Bumblebee.
Bumblebee Installation
As with many new IT technologies, there is also a so-called convenience script for Bumblebee, i.e. a shell script that can be downloaded via a one-liner, which writes the desired software to the disk in the shortest amount of time.
To get the Bumblebee environment installed on Ubuntu (or your Linux distribution of choice), the convenience script can be run as follows:
|
|
Running it leads to a suggestion that you directly include the .bumblebee dot directory into your home directory PATH.
|
|
Since I am running on a VM and will be shutting down the machine after my test, I am not interested in persisting the PATH, so I simply do an export with the suggested value.
|
|
To test if the inclusion of Bumblebee in the path was successful, we can simply type bee version in our shell (Bee is the name of Bumblebee’s CLI tool).
|
|
We don’t get a version number, but I’ll be satisfied with the value dev, especially because bee is obviously already known to my shell.
Bee Initialization
So, now we are ready; We have a running VM, the Bumblebee environment is installed and we already got to know bee. As mentioned in the beginning, Bumblebee offers the possibility of generating a template for our Probe via the interactive CLI.
We can initiate this process with bee init. Since the CLI tool is completely interactive, I allowed myself to shoot a GIF animation of it, to make clearer what exactly needs to be done.
Of course, I’ll go through the steps of Bee initialization and show you what exactly is being done in the background at each step.
Step 1 - Programming language
After bee init, the first question pops up:
|
|
Since we only have the possibility to select C as programming language, it is superfluous what we should select. According to the developers, it is planned that Rust will be offered as a second programming language in the near future. At the time of this TechUp this is not yet possible. So you can simply go over to the next step with “Enter”.
Step 2 - Process type
The next step asks for the type of eBPF program to be written.
|
|
Basically, you have to understand eBPF as a technology a little better here, because the point of programming an eBPF filter is to inject logic into kernel space and have it evaluate certain processes at operating system runtime. Separating these processes based on network-based and file system-based accesses is a given in that eBPF considers one or the other type of access as the entry point. In other words, this is about what our logic is going to be used for. Let’s state that we want to check any network accesses at kernel level, and thus confirm the first selection option Network with Enter.
Step 3 - Map type
This step is not an obvious one. Here you are asked what kind of map should be used. The choices are RingBuffer and HashMap.
|
|
This is about the way the eBPF logic, which listens to processes on kernel level, communicates with the user level part of the Bumblebee runtime environment. That is, the information that the user faces at user level is already processed and available in a given format (here “type”). This type must be determined up front so that Bumblebee knows the correct type. For our filter we choose RingBuffer because the type is not too important for our use case.
4th step - output type
As with the previous step, a format type is selected here. At the time of this TechUp, the three types print, counter, and gauge are available for selection.
|
|
When we determined the map type from the previous step (we chose RingBuffer), it was a matter of how the Bumblebee logic communicates between kernel and user space at runtime. Here, the output type determines the format of the information that is passed via the communication channel. So here we determine what kind of information we would like to receive from the eBPF logic.
The print type provides text as output and is thus suitable as basis for any kind of logging mechanisms. counter and gauge are both number-based output formats, which are more suitable for metrics-based mechanisms. Here we choose the conventional print output form
5. the last step - naming
After confirming with Enter, there should now be a last prompt asking for the name of our source file and thus the template file to be generated. In phlegmatic software developer manner, we simply call this my_filter.c.
|
|
The Filter
When we inspect our directory, we find a new file. This is hopefully called my_filter.c, which after a cat/less/vim or similar display command should look something like this:
|
|
Hopefully you understand a little C, otherwise this file will look a little obscure. Let’s briefly recap what exactly we’re supposed to find here. We know that bee init has generated us a my_filter.c template file. Five different parameters of the CLI can be used to invidiualize the filter. These parameters determine the programming language of the template (here .c), the process type the filter responds to (Network), the communication type between kernel and user space (RingBuffer), the format type of the output in this communication (print) and finally the name of the file to be generated (my_filter.c).
So far, so good. Now let’s build this C file and see what we get.
Bee Build
Now we’ll do a bee build, which we want to parameterize a little bit. Basically, we want to take our freshly generated sample my_filter.c as the starting file and use it to build a fully OCI-compliant image that we can run with the same assumptions, similar to Docker.
Thus we give bee build the file my_filter.c as first parameter. Second parameter is the image name, simply my_filter:v1. Now we can give additional flags. I still want to define the --build-image flag, because I want to make sure that we use the same builder image and thus guarantee that we will have the same output as Bumblebee image. Its value is simply a builder image located on an OCI registry under the /solo-io/bumblebee account.
|
|
Just like with Docker (or Podman), we can view the built images using bee list as follows.
|
|
Great, the image is built and visible under the list command. I already know what most people think, bee run will execute the image…
Bee Run
As correctly assumed, the myfilter:v1 image can be started with bee run, but we still need to get OS-side permission:
|
|
This ensures that we can get the eBPF filter into the kernel space as a normal non-superuser user. Sure, you could just prefix the command with sudo if the user has those permissions, but since we built the image in the user context, the superuser would have to completely rebuild that image again. So this fix above is simpler.
Now we can initiate the run as follows.
|
|
Congratulations!
To summarize
Bumblebee is a tool for generating, writing, building and packaging eBPF probes. Bumblebee uses the OCI standard to package eBPF logic in the same way that container-based technologies such as Docker do. The whole process with Bumblebee is very close to the Docker experience and you can thus take care of the actual eBPF logic with relatively little training. There are also enough primitives provided by the development environment so that you don’t have to worry about user space anymore and can really just focus on the logic. Thus, Bumblebee is a rather successful simplification of the overall developer effort, which would be more complex and costly with conventional methods around eBPF.
I realize that the eBPF space is still in its infancy, but I am convinced that Bumblebee is a step in the right direction to bring eBPF to the average developer. The question is rather whether the development of eBPF logic will be taken over by this breed of developers at all, or whether it is not more clever, i.e. more efficient for eBPF logic to be abstracted further, in order to simplify development. As so often with newcomers, this question will be answered over time.
What’s certain is that eBPF is an interesting technology that should definitely be on the radar in 2022 and that we should take a look at the individual developments, such as Bumblebee. It remains exciting.
References and additional sources
https://github.com/solo-io/bumblebee
https://github.com/solo-io/bumblebee/blob/main/docs/concepts.md
https://github.com/solo-io/bumblebee/blob/main/docs/getting_started.md