What is Scully?
Basically, Scully is a static site generator, or SSG for short. Although there are several other implementations of the static site generators like Gatsby, Hugo, Jekyll or Zola are available, Scully is the first for Angular applications.
Compared to the conventional Jamstack, however, this tool has a few more goals:
- for Angular projects (without a big effort)
- Support for Markdown
- Plugin System & Ecosystem
So Scully is used to pre-render every page of your Angular application into a purely static one with generated HTML & CSS. Scully is developed by HeroDevs, at the end of 2019 in an alpha version released. Using Scully eliminates the need to have any JavaScript files need to be downloaded on the client. For this reason, the download size compared to a normal Angular application is a lot less.
Jam stack
We at b-nova have often dealt with the topic of jam stack. Raffi has already done this and also wrote a blog article. In spite of everything at this point I would like to point out the most important points again. The goal of Jamstack is to render all content once before it is displayed. It is also possible to use the advantage of a CDN in which the data is practically very close to the end user and loading times can be shortened. This can also produce enormous cost savings. The security aspect is also increased, since it is only a static page.
The Scully Trial
Basically, in the first step Scully is responsible for analyzing the app and the collects and writes information in static files in order to be able to display the necessary states, pages and routes.
plugins
Plugins are used wherever Scully needs help. For example, when finding or determining
all routes. A plugin always returns a async function or a promise as a return value. There are
different standard plugins:
allDone
These are called as soon as Scully has completed all processes. This is useful when you are still doing something after the page was created.
routeDiscoveryDone
These are only called when Scully has collected all routes and all Router plugins are ready. This can for example be useful if you want to create your own RSS feed. Since the plugin is only called when all the above tasks have been completed.
fileHandler
This plugin is used by the contentFolder plugin during the render process. This is responsible for processing all folders with Markdown files or any other format you wish. Scully offers a Markdown plug-in and an asciidoc plug-in as standard. For example, if you have csv files you want to process, this is your suitable type.
router
Once your Route parameter is used, you’ll need to use a router plugin. So Scully can know which
content must be presented. A small example is the best way to explain this.
|
|
The first three examples Scully has no problem recognizing the routes and rendering them accordingly.
However, with the last one Scully will have a problem with the parameter blogId. In this case, a plug-in is required that contains a list with
makes blogIds available and these can then also be rendered.
Requirements
Depending on which version of Angular you are using, you have to pay attention to which version of Scully you are using.
-
Angular 9, 19, 11 → Scully V1.1.1
-
Angular 12 → from Scully V 2.0.0
-
Node.js 14 or newer
So that Scully can also be used, at least one route is required within the app, so the app will be imported into the router module.
Scully in action
First, you need to create an app. When making settings here, it is important to remember that Scully Routing needed. So it makes sense to add this right at this step.
|
|
Then switch to the app directory. Scully offers a package with different angulars schematics. You can install this so that your app is initially bootstrapped and configured automatically.
|
|
This will give you some new files and give you that folder structure. This includes the scully folder, which
contains the configuration file scully.scully.config.ts.
With these settings alone you are ready to Scully use.
|
|
At this point you can now use the build to create the static pages with Scully and then start the server.
|
|
You can then access the page of an Angular app at the address http://localhost:1668/,
this is the variant that provides the result of ng build.
Under the adress http://localhost:1864/ is the variant from the one created by the Scully
dist folder.
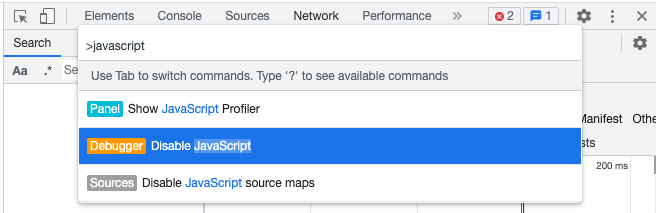
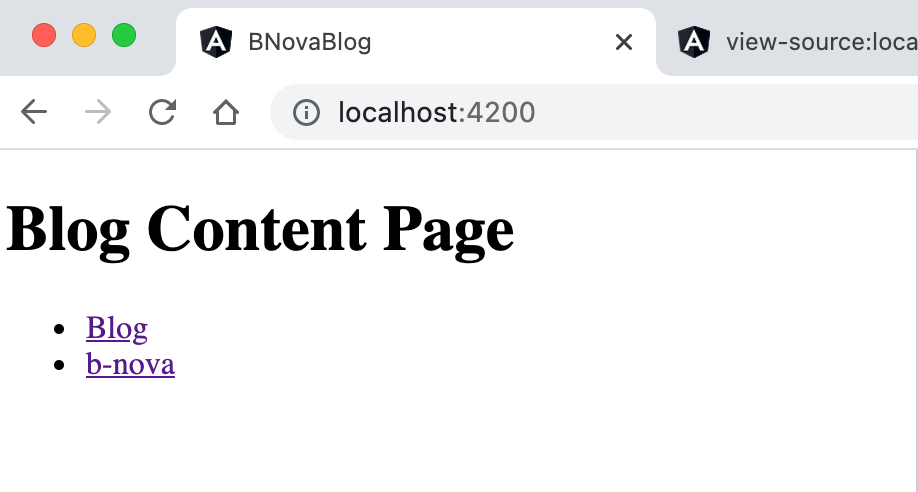
In order to really prove that it is a static page, you can do this within the browser.
Simply deactivate JavaScript and check whether the page still looks the same after a refresh.
If you have Chrome you can use the command field (Control+Shift+P oder Command+Shift+P) within the developer tools to deactivate Javascript and vice versa.
Now let’s add a little more content to our site. First, there are new components necessary that you need for an app.
|
|
Now your previously created components must be made available for the Angular App within app.module.ts.
|
|
So that your app knows which routes it should make available, new routes must now be created. This is done
within the app-routing.module.ts file.
|
|
So that you can now see the content and switch back and forth between pages, you have to
create a list of links under app. component.html, as well as the router-outlet tag for the content of your
provide different routes.
|
|
For test purposes, you can simply use the names as output heading.
In this example it is in the files: not-found.component.html, bnova.component.html
and blog.component.html.
|
|
Of course, you can also start the server during development to check whether your changes have also been made successful
|
|
As described earlier, you can now try Scully for the first time with your own content.
|
|
After the scully command you get a new structure within the dist folder. It should be noted here that
within the static folder there are now three index.html files which contain the static content.
|
|
Scully as a blog
Before that we showed you how you can use a normal Angular app. Static side genarators often come in connection with blogs. So Scully’s innate choice here is one that you definitely will get to know.
You will also create a new project for this.
|
|
Out-off-the-box there is a Scully command that adds the blog function:
|
|
This will give you all the necessary routes and a folder with a blog component right away.
|
|
If you don’t want to use the default settings, you can add them using another command, which asks you for some settings:
|
|
Conveniently, there is also a command that directly creates a blog post for you:
|
|
You can find this article as a Markdown file in the folder blog:
|
|
A standard header is specified within the Markdown file and a h1 heading is added. Afterward you can write your content within this file using Markdown format.
|
|
At the same time, it is usually useful to have a page that provides an overview of all available blog articles. Therefore, you need to create another component.
|
|
Then the logic has to be implemented that only shows blog articles which are public = true. This will
be done within bnova.component.ts. In this case, Scully offers a ScullyRoutesService Observable available$ to filter for.
|
|
Of course, you can also determine the content you want for the overview. This happens
within bnova. component.html
|
|
If you click on the link This way, you want to be redirected to the corresponding blog article page.
For this you have to make another adjustment within blog-routing.module.ts for the empty
Path.
|
|
The contents of your Markdown files will be rendered within the blog.component.html file.
In case you want to make style adjustments, you can do this within blog.component.css.
|
|
For both examples you can find the code on GitHub: Standard Variante and Blog Variante.
Conclusion
In this TechUp post, you’ve now seen two ways how you can use Scully. For many use cases the blog function will be very interesting, since you can have your own pretty blog quickly and without much effort. Of course, in both cases it must be clear that the technical knowledge is requiered to provide an Angular application. As soon as you successfuly kicked off, you can take full advantage of Jamstack.
This text was automatically translated with our golang markdown translator.