You are not familiar with the very popular, client-side JavaScript framework Angular? Take a look at our Angular b-nova To Do List Tutorial.
In this blog post we want to expand our To Do List a bit, we create a second component and want to “feed” it with data and react to events.
b-nova To Do List Item
Let’s go, as you already know from the tutorial, we create a new component with ng, this should represent a single to-do item.
|
|
Fortunately, Angular already references our new component in the app.modules.ts file via their CLI tool, so we can integrate them directly.
As with other components, we do this via the selector, our ToDo item should be included directly in the ngFor loop of the To Dos component.
|
|
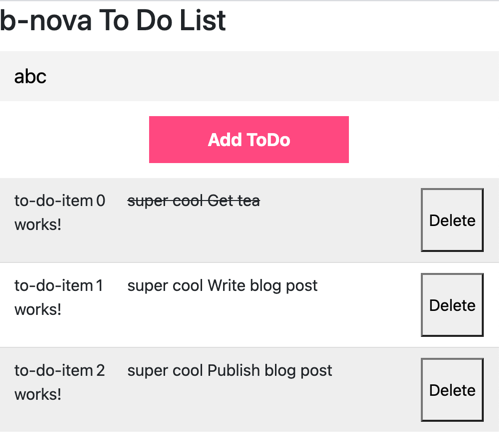
Now our component should look like this, the standard text “to-to-item works!” should be issued more often.
Of course, this is only half the magic, now we want to have the HTML of the To Do Item also effectively in the To Do Item Component.
Just move? Try it!
Oops, now our to do list is broken and we have a bunch of bugs in the console. But how can we send the data from one component to another?
input bindings
Here, too, Angular offers a simple but powerful solution, so-called input bindings. These allow us to receive and use data in a component.
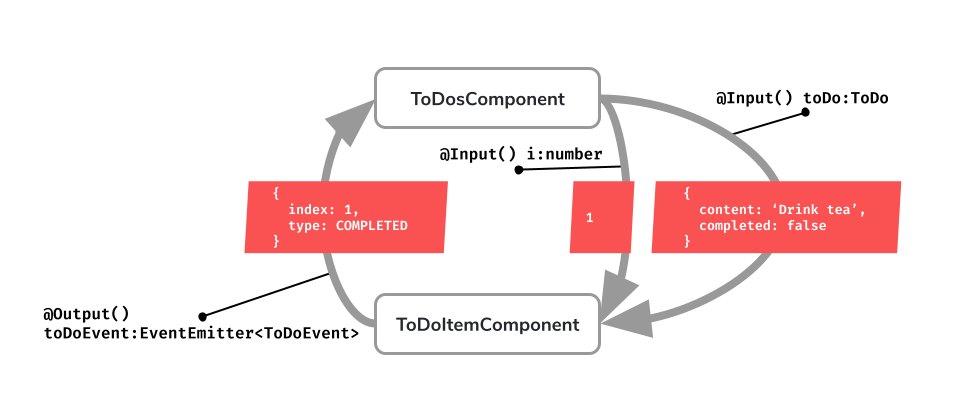
Let’s take a closer look at the HTML of an To-Do item, we need two input variables, once the toDo itself and once the variable i which stands for the index.
|
|
Now we just have to give the data to the component accordingly, via a so-called Binding.
|
|
Here we set the variable toDo from the ToDosComponent to the input parameter toDo of the ToDoItemComponent.
Our application now looks almost the same as before, unfortunately there are still errors that the methods for checking off and deleting an item cannot be found.
We would like to keep this functionality in the ToDosComponent, so the ToDoItemComponent must somehow be able to inform the user about such an action.
Another big advantage of this architecture is that data only has to be loaded once.
In summary, we are sending data from the parent to the child component.
Output bindings
The so-called Output Binding allows us to send our own event with data from one component to the outside for other components.
After a quick look at our item component, we noticed that we have two events, once an item was marked as done and once an item was deleted. Of course, we could deal with this in two separate events, but we would like to keep this ’lean’ and only use one event with one parameter.
For this we need two new files, a new model and a new enum with two predefined values:
|
|
|
|
Now we have a “vessel” for our event, we know what type (Complete or Delete) and which To Do Item (because of the index) it is.
Similar to the input binding, we can also use an annotation here:
|
|
The class EventEmitter from the @angular/core package allows us to create custom events and to fire them.
Now we have to add three more methods to our ToDoItemComponent, which call our EventEmitter and ‘published’ the respective event.
First we implement the two methods that are called directly from the template.
Then we write a private method for the emit of the event. Since this is not visible to the outside we cannot call it directly from the template.
|
|
Last but not least, we want to receive the event in our ToDosComponent and react accordingly:
|
|
|
|
The method handleToDoEvent of the ToDosComponent is now always called when an item is done or deleted in the ToDoItemComponent.
In summary, we are sending data from the child to the parent component.
The finishing touches
Our component is now fully functional, unfortunately it no longer looks like it did before.
The reason for this is that the markup has changed and the CSS rules in ToDosComponent do not apply to the HTML elements from ToDoItemComponent.
In the first step we want to remove the div.todo from the ToDosComponent or replace it directly with the ToDoItem selector.
|
|
Here we loop through our ToDos on one line, give the result the class ’todo’ and use input and output bindings, cool right?
Now we style our ToDoItemComponent by inserting the following CSS code:
|
|
Last but not least, the visual feedback is missing whether an item has already been checked, here we use a data binding to an HTML property, namely the single class binding.
|
|
Angular allows us to enter a Boolean expression directly when defining a class, so the value done is only written into the HTML element class if the expression from toDo.completed is true.
Now our b-nova To Do list looks nice again and is fully functional! :-)
Slowly again
Phew, there were a lot of changes and new features, we want to briefly recap:
- With
Inputwe receive data from another component - With
Outputwe send our own events including data to the outside world
Visually we now have the following structure:
The complete b-nova To Do List project can be found on GitHub.
Stay tuned!
This text was automatically translated with our golang markdown translator.