While researching for my TechUp on the Dex IdP and Stefan’s TechUp on Ballerina, I stumbled upon Dev Containers and wondered what it is and if it’s any good.
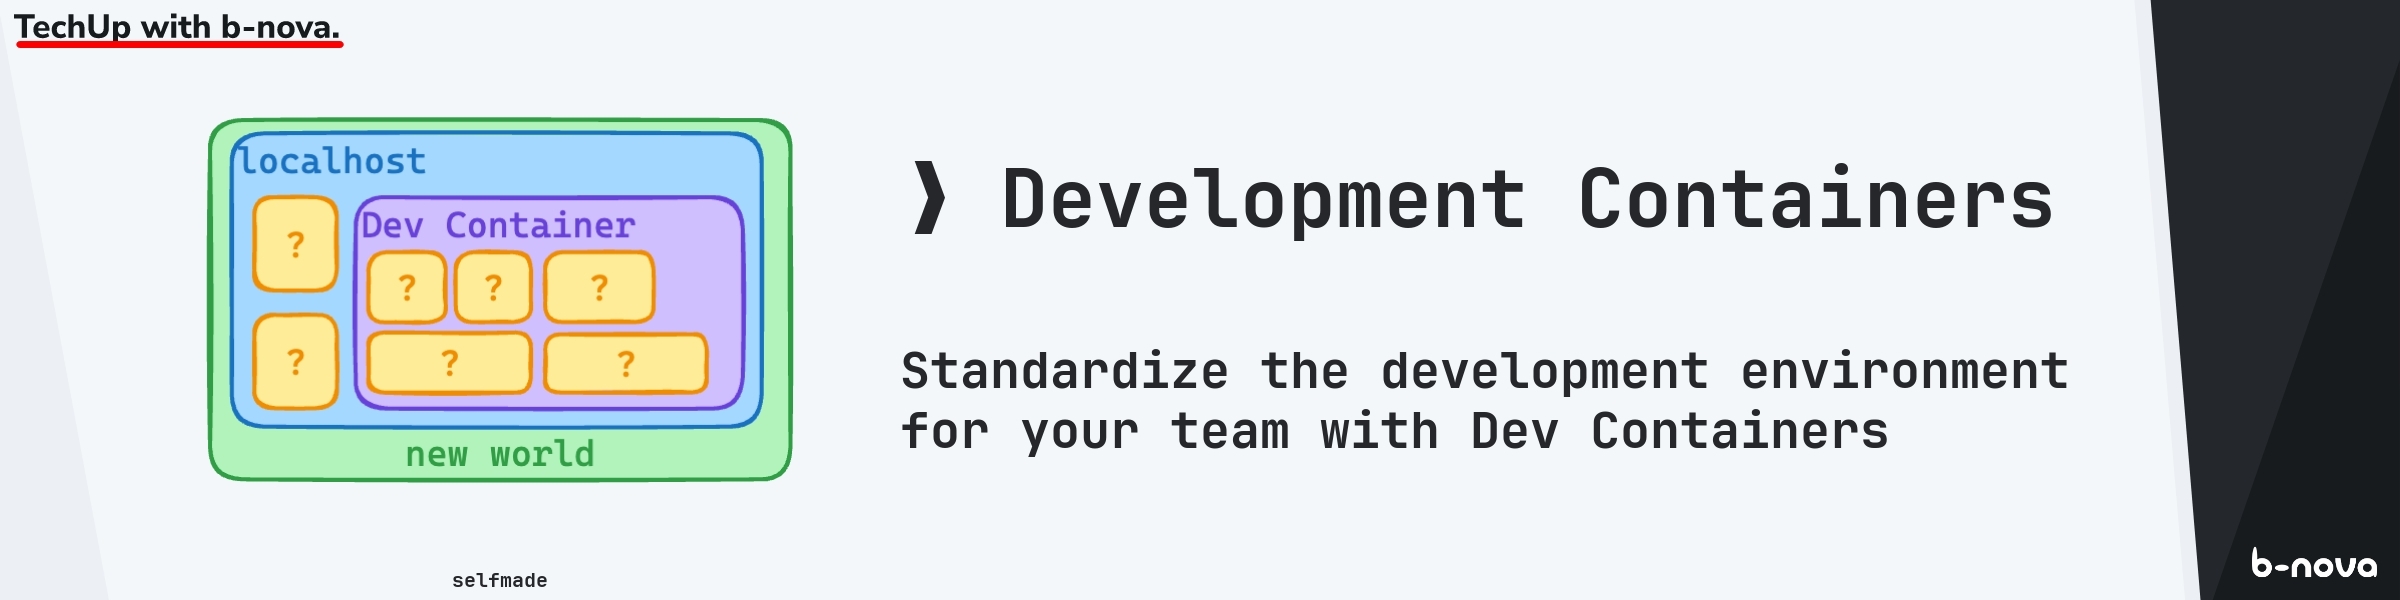
Therefore, this time we want to take a closer look at Development Containers (Dev Containers for short).
As always, I ask myself the following questions:
- What are Dev Containers❓
- Why do I need Dev Containers❓
- How and with which IDEs can I use Dev Containers❓
- Dev Containers Hands-On❓
- What are the advantages of Dev Containers❓
- What are the disadvantages of Dev Containers❓
What are Dev Containers❓
At first glance, it becomes immediately clear that Dev Containers are containers that have been specifically created for software development. These containers contain all the necessary tools, libraries, and dependencies needed for software development. Primarily, it’s a specification that is not❗️ another orchestration tool or another container platform abstraction. The specification is a standard that enriches existing formats with metadata, allowing certain settings, configurations, and tools to be defined. This is purely about the development process and not about running containers.
The specification is written in JSON with Comments (jsonc) in a configuration file and offers the possibility to define so-called Dev Container Features. More on that later!
Technically, Dev Containers require a Docker container runtime to start certain containers and thus isolate them from the local system.
Why do I need Dev Containers❓
Dev Containers are about specifying and standardizing the Inner Loop and the Outer Loop. This ensures that all developers, regardless of their system, whether Windows, macOS, or Linux, have the same development environment. The “Works on my machine” problem is thus a thing of the past!
What exactly does that mean? Dev Containers package and standardize the complete development environment with all necessary tools, plugins, IDEs, dependencies, and configurations in a container. This container can then be started on any system, so that all developers have the same development environment.
A Dev Container looks like this:
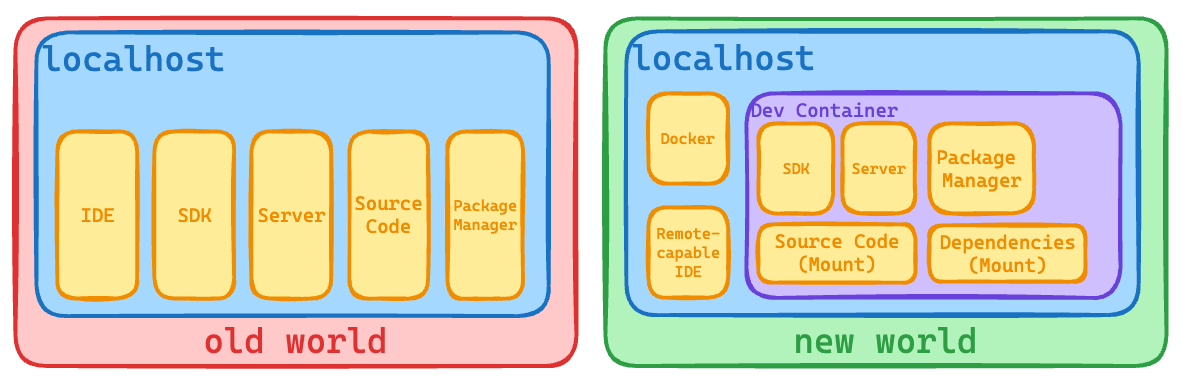
The picture shows that in the “old world”, everything is installed and set up directly on the system, the localhost.
In the new world with Dev Containers, only Docker and a so-called Remove-Capable IDE, such as Visual Studio Code or IntelliJ Idea, are located on the local system.
The Dev Container itself then contains all SDKs, server installations, and package management tools. The actual source code as well as the dependencies and package downloads are stored in volume mounts so that they do not have to be reinitialized every time the container is started.
How and with which IDEs can I use Dev Containers❓
Again, the website provides a clear answer; in general, the homepage is very simple, straightforward, but super informative!
Currently, the IDEs Visual Studio Code and IntelliJ Idea are supported. It is important that the IDE has the Remote Development capability in order to use Dev Containers.
Other supported tools:
- GitHub Codespaces
- CodeSandbox
- DevPod
- and more
The CLI specification with a reference implementation is also very useful. This allows Dev Containers to be easily integrated into a CI process, for example with the existing GitHub Action or the Azure DevOps Task.
Dev Containers Hands-On❓
Now we want to get our hands dirty and try out Dev Containers!
Since it is primarily a specification with reference implementations, we search in vain for a Hello World example.
VS Code Rust Hello World
So let’s first look at using it with VS Code, where you can find a Dev Container Tutorial.
I won’t go through the tutorial step by step, but only highlight the most important steps. You can find the finished project here.
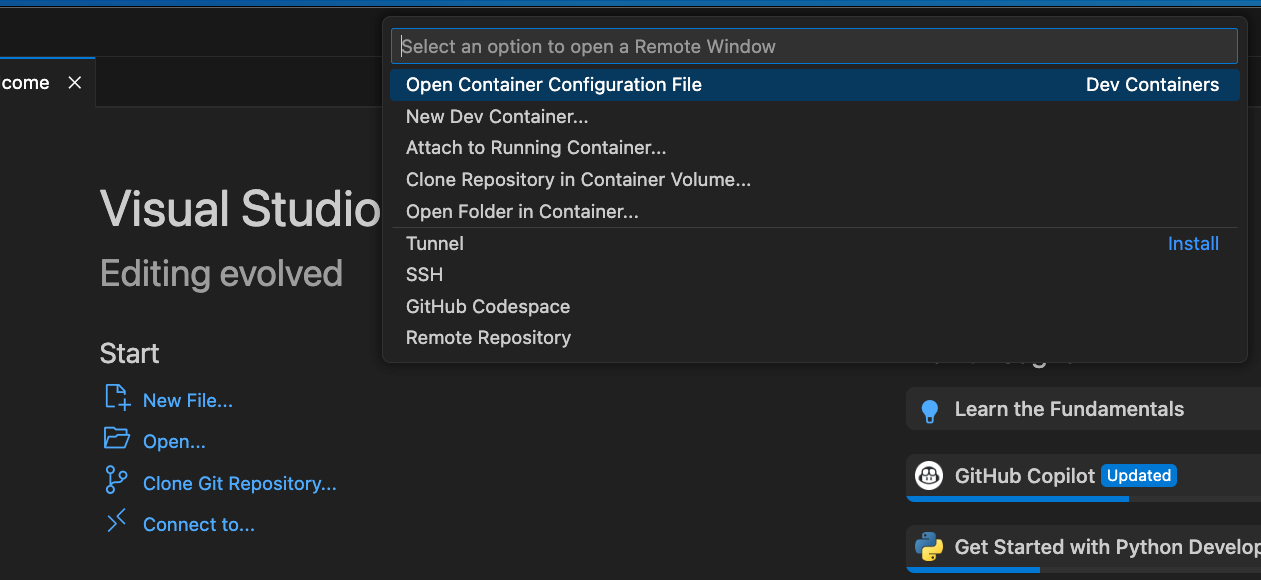
After we have installed the VS Code extension Dev Containers and started Docker, we can switch between the local and remote context at the bottom left via the blue icon. Remote here refers to the Dev Containers context.
We can then choose from a long list of so-called templates what kind of Dev Container we want to use.

I chose Rust because I haven’t had much contact with Rust yet and it’s not installed on my local system.
This is an official Rust template from Dev Containers.
After a short wait, our Rust Dev Container project is created and we can explore it in detail. You’ll immediately notice that my VS Code instance is now also running in the container, as my local extensions are not available. That’s the whole point; we want a clean development environment.
Let’s take a quick look with Warp at which Docker containers have been started:
|
|
It’s nice to see that a pre-built container from Microsoft is being used, which probably already contains the basic framework for Rust and VS Code Remote.
Now let’s take a closer look at the generated project!
|
|
Not much has really been created, unfortunately the Rust project has not been created either, only the configuration for the Dev Container.
In the .github folder we find a dependabot.yml file, which shows us that Dependabot is already configured. Dependabot automatically creates pull requests when dependencies need to be updated.
In the .devcontainer folder we find the configuration for the Dev Container. In this case, the devcontainer.json file is located here, which we want to take a closer look at.
|
|
We see many commented-out lines that give us hints for further configuration.
Two properties are defined, name and image. The name is self-explanatory, the image is the Docker container that is used.
If we open the VS Code terminal, we are directly in the container and thus also in the isolated file system.
For example, if we run rustc --version, we see that Rust is already installed. And even with the latest version!
Now to the actual implementation, we create a main.rs file and write a simple Hello World program.
|
|
If we save the file, we can compile and run it directly in the terminal.
|
|
And we see that our Hello World program was executed successfully! 🚀
Short recap:
- VS Code runs in the container
- Rust is already installed in the container
- We wrote and ran a Hello World program in the container
Short digression, humans are creatures of habit…
Such a blog post is (unfortunately) not always written in one go, so I sat down again a few days later to work on the Dev Containers TechUp and, motivated to the core, wanted to continue exploring and writing down the worlds of Dev Containers. As usual, I opened my folder structure with Warp and was amazed, where did my Dev Containers project go? 🤔 After some annoyance, frustration and self-doubt, I then realized that it is a containerized variant and therefore I am no longer in my local file system, at least not in my usual folder structure. 🤦 Fortunately, Dev Containers projects can also be found via the
Recent Projectsin VS Code, lucky me! 😅
Now we can save our entire project in a Git repository and share it with other developers. They can then open the project directly in their VS Code and have the same development environment as us.
As usual, we create a repository on GitHub and push our project. Fortunately, Dev Containers mounted our credentials so we don’t have to authenticate again. Very pleasant!
You can find the repo here.
Setup on another Developer’s Machine
Now let’s take a quick look at how another developer would set up this project locally.
We now have a completely blank setup, we don’t have a running Docker container, but we already have Dev Containers installed in VS Code.
|
|
Of course, I deleted all volumes beforehand with docker volume rm $(docker volume ls -q).
On the VS Code home page, I can now select Connect to... and then Clone Repository in Container Volume. Here I enter the link to my GitHub repository and select the Dev Container.
And boom, our project is ready! 🚀 A new Docker container has been started. Can I now compile and run the Rust project directly?
|
|
It works, very cool!

And here again, I can directly commit and push changes without having to authenticate again.
Of course, there is also a cool link to the project, which does the setup directly automatically! This link prepares VS Code accordingly and opens our project directly, very elegant! Especially helpful for use in IDPs (Internal Development Portals / Platforms), as a landing page or similar.
Our Hello World project is complete!
Java Rest API with IntelliJ Idea
Now let’s look at another example, this time with IntelliJ Idea and a Java Rest API.
Let’s assume we have an existing project, a simple Quarkus Rest API, which we now want to run in a Dev Container. The Dev Container setup has not been done yet, so we are porting an existing application into a Dev Container.
First we need to open IntelliJ and switch to the Remote Development window. Here we can create a new project and select a Dev Container template.
Here we select Dev Container.
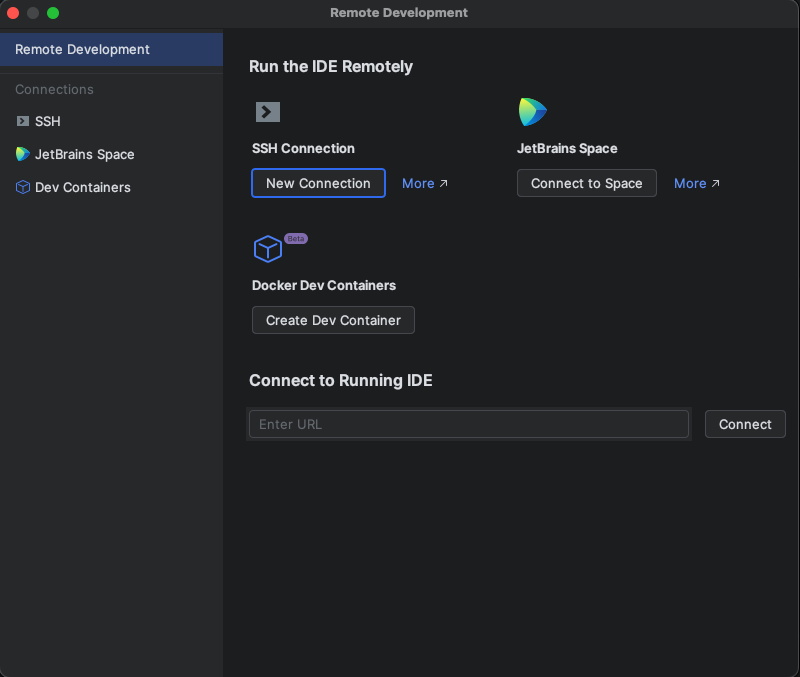
Then we can create a new Dev Container project from a Git repository. We select Docker as the runtime environment, specify our repo and the corresponding branch.
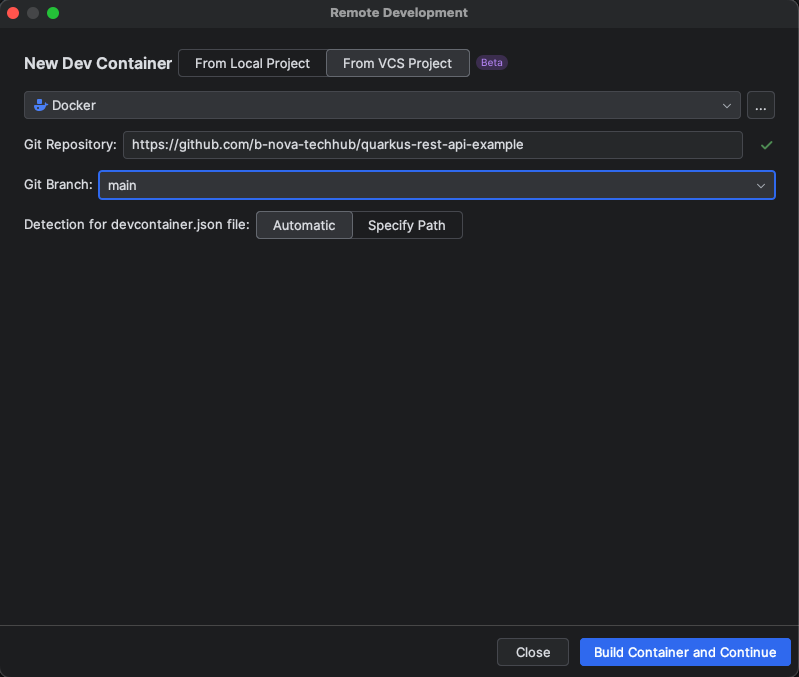
Then we can select a template, in our case Java in version 21. Additionally, we want to install Maven in our container.
And then we are in our Dev Container project! 🚀 The project has been checked out and IntelliJ Idea has made the appropriate settings.
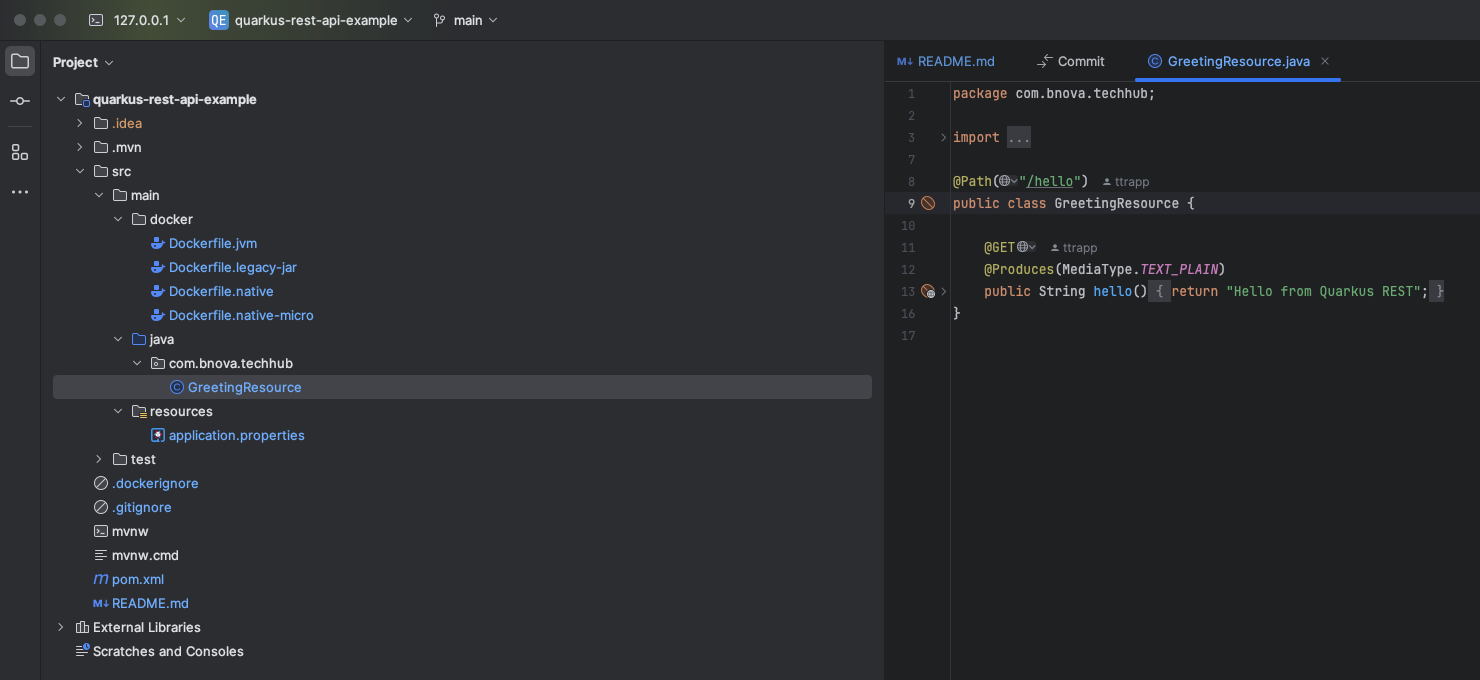
Can we now start the project directly without prior Dev Container configuration? Unfortunately not, our JAVA_HOME is not set and therefore IntelliJ Idea cannot start the Java application.
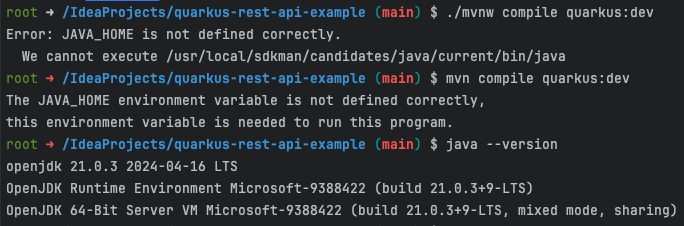
However, Java itself has been successfully installed in the Dev Container.
Surprisingly, the Maven targets can be executed via IntelliJ using the Maven plugin, apparently something else is specifically configured there. But it fits our use case, so let’s start the Quarkus server.
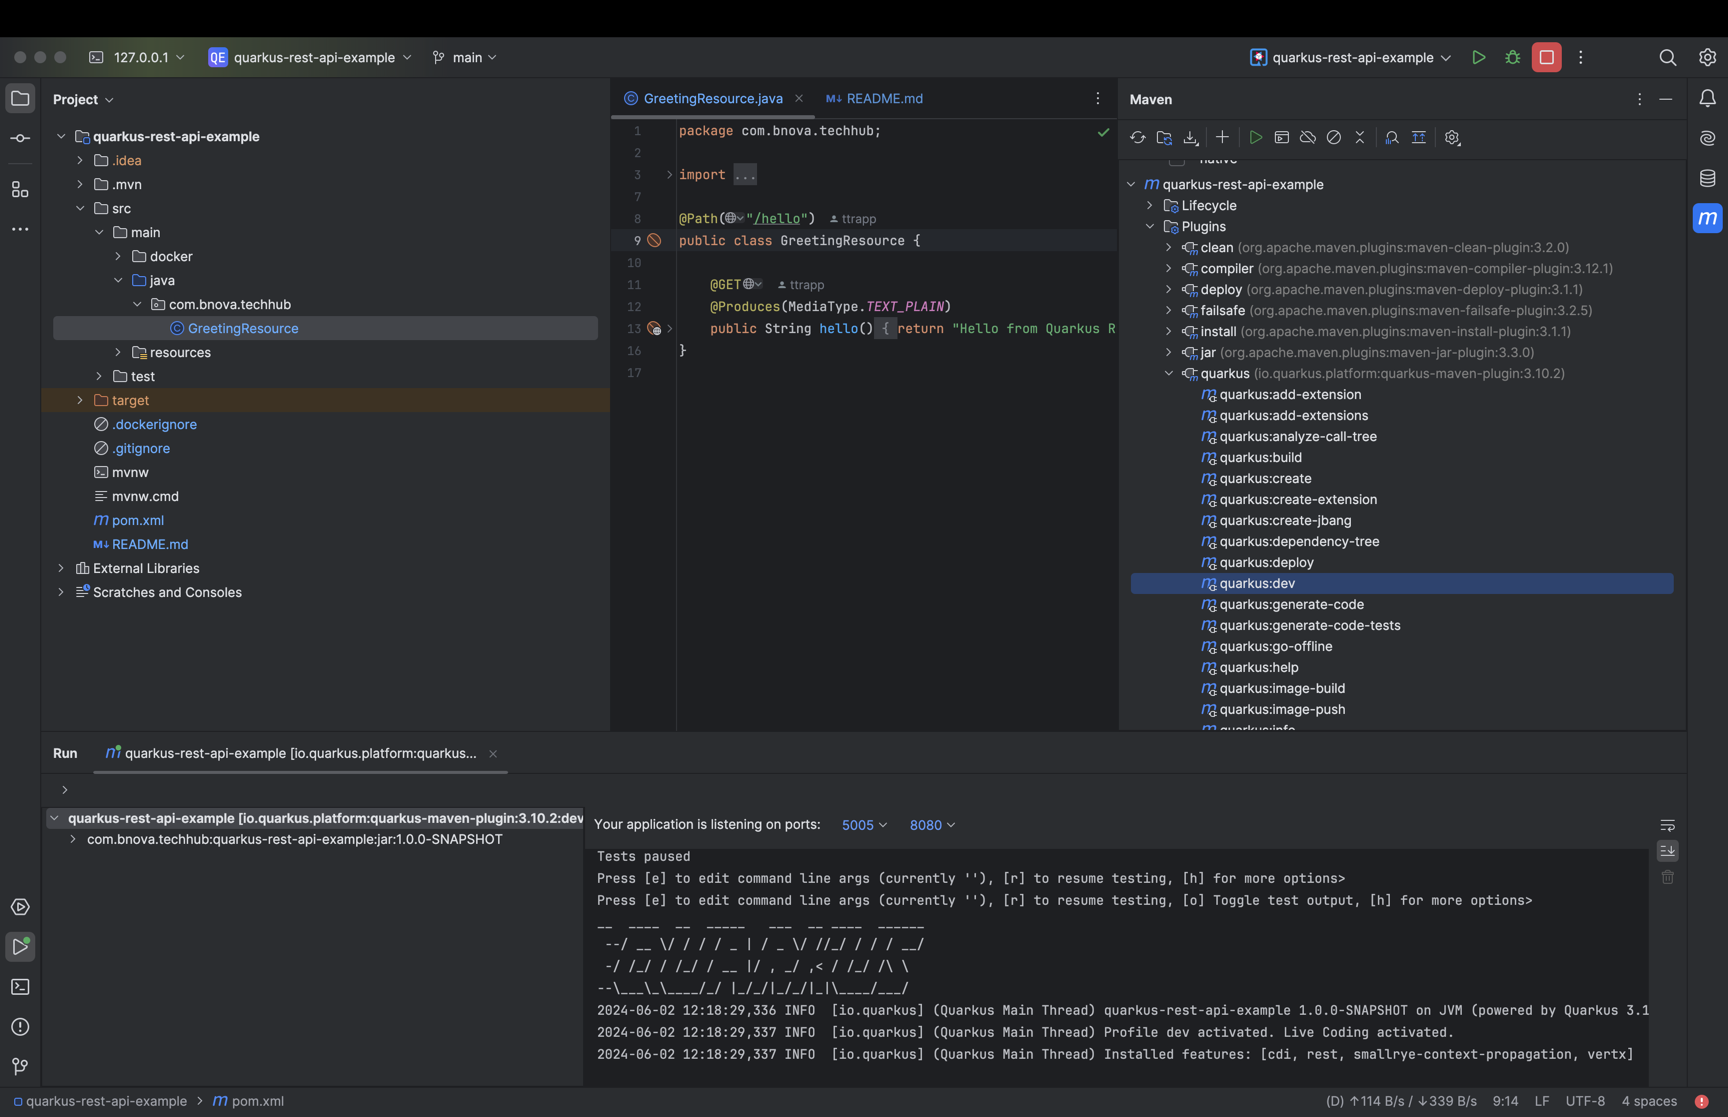
And the Quarkus server starts successfully! 🚀
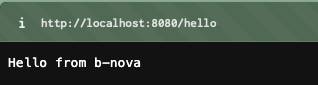
Hmm, but there is nothing to see under localhost:8080, what’s going on? 🤔 Thinking briefly, we have the Quarkus running in a container, but how should our container know that the port should be mapped to our host system?
According to the documentation, this is quite simple, but unfortunately our project does not have a devcontainer.json file that we could customize.
Let’s try importing it again, maybe we forgot a check mark somewhere.
Long story short, no unfortunately not, the file cannot be found, according to Jetbrains documentation it should be there.
Even the find command does not find the file, too bad! This is quite stupid, because we can’t really do any customization.
If you read the documentation again carefully, you will notice that it says The project to which you are referring should have a devcontainer.json file that contains the dev container configuration..
Of course, that explains why there is no devcontainer.json file.
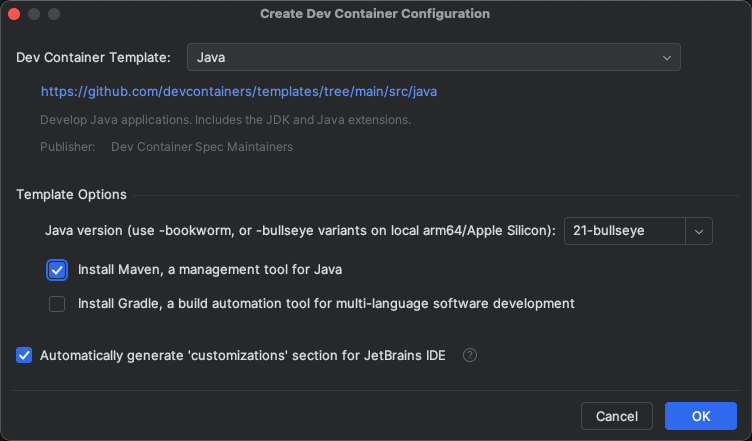
In our Remote Development project, we can create a new configuration file via new --> Dev Container.
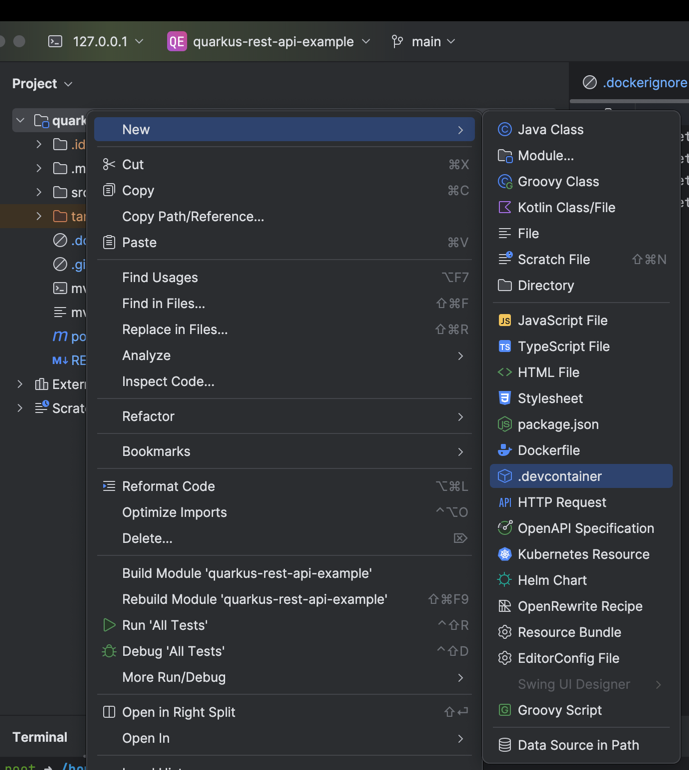
Now we choose the same configurations as when we started initially, and boom, we have a devcontainer.json file.
|
|
The configuration looks very standard, we have a name, an image, and other image-specific configurations like Maven and Gradle. Finally, it is specified that IntelliJ should be used.
Ok, let’s move on, we can now insert "forwardPorts": [8080], (uncomment) so that the port is mapped to our host system.
Good, and now? 🤔 How do I update the Dev Container configuration? 🤔
Let’s just restart our container via IntelliJ. We see that unfortunately the port is still not mapped.
|
|
IntelliJ offers us a magic hammer in the Remote Development window that we can use to perform a rebuild and rebuild the container.
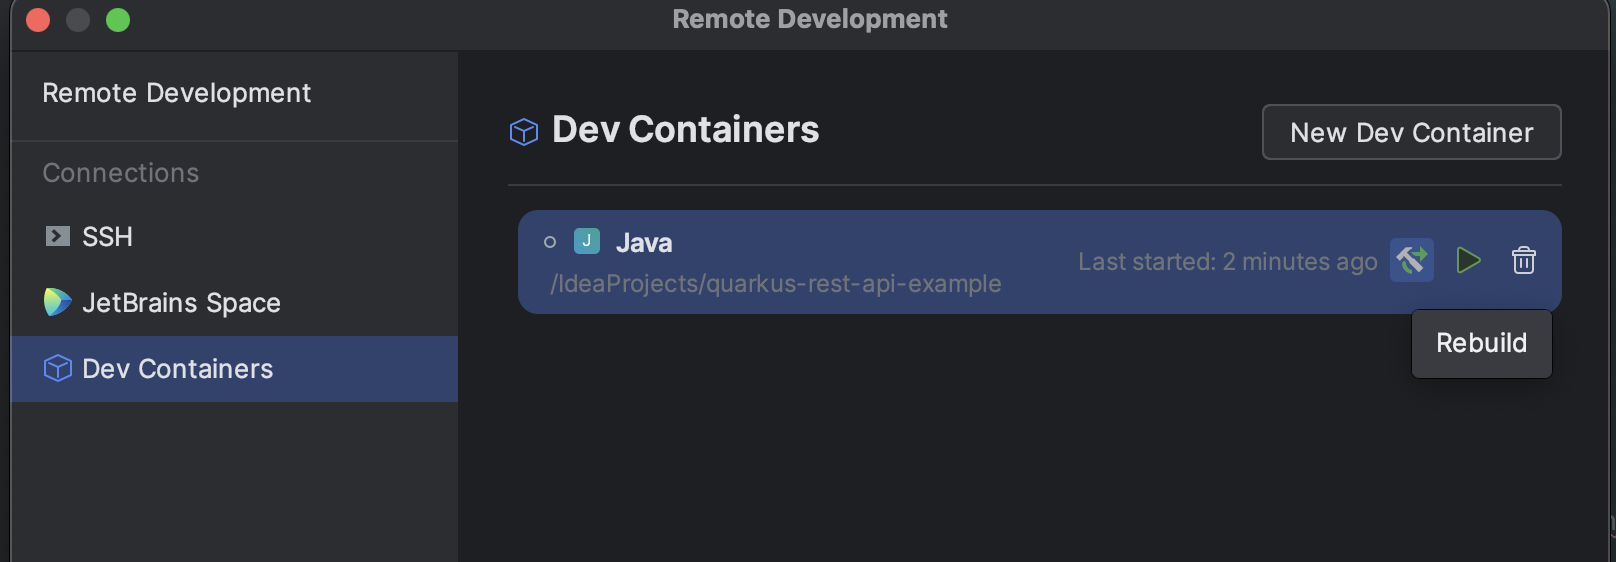
And, sobering, the port is still not mapped. 🤦
Let’s try to commit the devcontainer.json file and then start all over again, completely fresh. Minus points for IntelliJ, my Git credentials are not mapped, I also have to authenticate again.
Even after a complete restart of the project, unfortunately no success, the port is still not mapped.
VS Code? 🤔
There we can choose Clone Remote Repository in Dev Container Volume and check out our project.
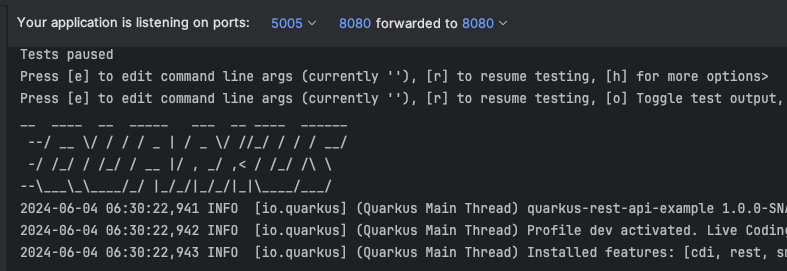
There comes a small pop-up showing us the mapped ports, 8080 was mapped to 8081 by VS Code, through which we can access our application.

However, when IntelliJ was restarted, it also worked with IntelliJ without further changes.
But it is exciting to see that the container port mapping is not visible via docker ps. 🤔 This suggests that the port mapping needs to be mapped again within the container.
We can now also make a change to our project and test it locally.
Good, done! That was much more cumbersome with IntelliJ than with VSCode.
What are the advantages of Dev Containers❓
From my point of view, the standardization and the portability of the development environment are clear. Works on my local should therefore be a thing of the past.
Dev Containers also make it much more pleasant to work with several projects at the same time that have different dependencies. Thanks to the isolation of the containers, we can be sure that the projects do not influence each other, keyword Node.js or Java versions.
With Dev Containers you can set up your IDE perfectly and tailor-made for one project with settings, plugins, code styles, etc.! And you can also share it with all other developers in the team.
What are the disadvantages of Dev Containers❓
The support in IntelliJ certainly has potential, but the VCS approach is still in beta. It would certainly be exciting to see how it behaves with huge monoliths, whether the containers are still performant. I also wonder what it’s like when you want to work with multiple projects at the same time and then have multiple containers running, how the performance is there.
Conclusion
Exciting topic, we will definitely follow it up. From my point of view, the next steps would be an internal project, for example to devcontainerize our homepage and see how it works.
In addition, we would then connect Dev Containers directly with Daytona.
Now, what if the Dev Container ran in a similar way not locally, but in the cloud? 🤔 Stay tuned!
This techup has been translated automatically by Gemini