Doesn’t everyone who reads readme files wish they could directly execute and test the corresponding code? This is exactly where Runme.dev comes in. The goal is to improve the execution and management of runbooks by making them truly executable. This allows users to follow step-by-step instructions - an ideal solution for runbooks, playbooks, and documentation that require interactive, executable steps.
With the combination of interactive notebooks and Markdown, users can execute instructions, check intermediate results, and ensure that the results meet expectations. This provides users with the necessary confidence to successfully complete the steps. Developers can also define reliable ways for tasks such as local setup and document this for other developers.
Runme is like a terminal session and supports a variety of programming and scripting languages and is fully compatible with CommonMark. This allows not only readmes, but all Markdown documents to be used with Runme. Runme works everywhere, regardless of the environment - whether on a local laptop, in a VM, a cloud development environment, or connected to a remote host via SSH. Runme is comparable to a Jupyter Notebook only with many more possibilities.
However, all the features are best demonstrated in a practical demonstration. So let’s get started!
Hands-on
There are several ways to use Runme, which I will now demonstrate.
VS Code
One possibility is the installation via Microsoft Marketplace. This allows Runme to be used directly as an extension within VS Code. The following examples will also be performed with VS Code, as this is where you have the greatest range of functions.

If you now open a README.md file, you will immediately notice that some new functions are now available via different buttons. The most important ones are +Code and +Markdown to define corresponding code blocks.

For our first example, we first use a Markdown block that describes something. The second block then contains our first command. This could then look like this:

CLI
If we now click on the play button on the left side, a terminal opens directly below, in which the corresponding command is executed.

To check if the installation from our example was successful, we first create another Markdown and code block. This should simply execute a ping against Google.

Next, we open a terminal and execute the command runme. This will open our README file by Runme and show us all the code blocks we have defined.
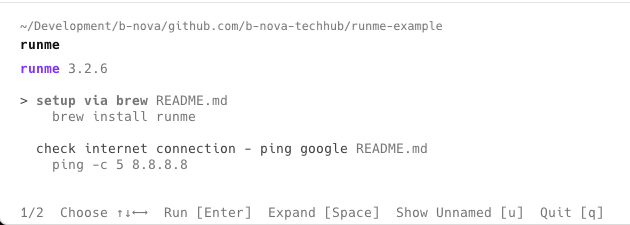
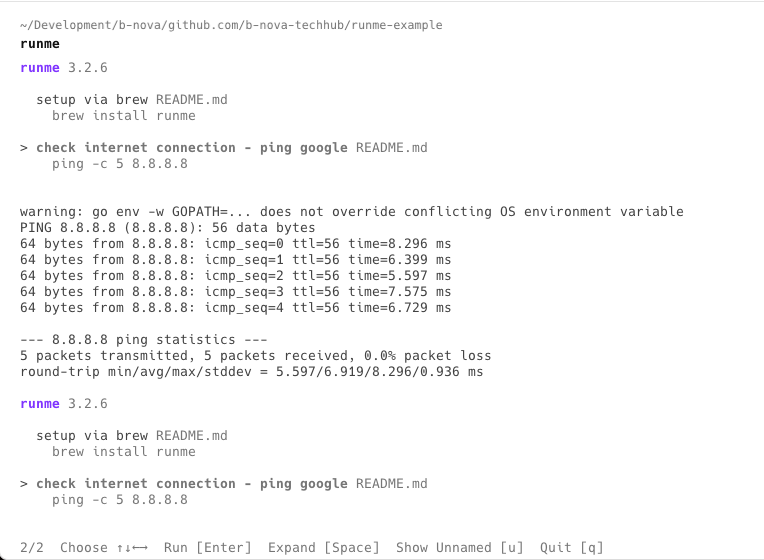
First, we want to run the ping example via the terminal. You can simply select the desired code block with the arrow keys and execute it with the Enter key. You will then see the result directly in the terminal below the executed command.
Webserver
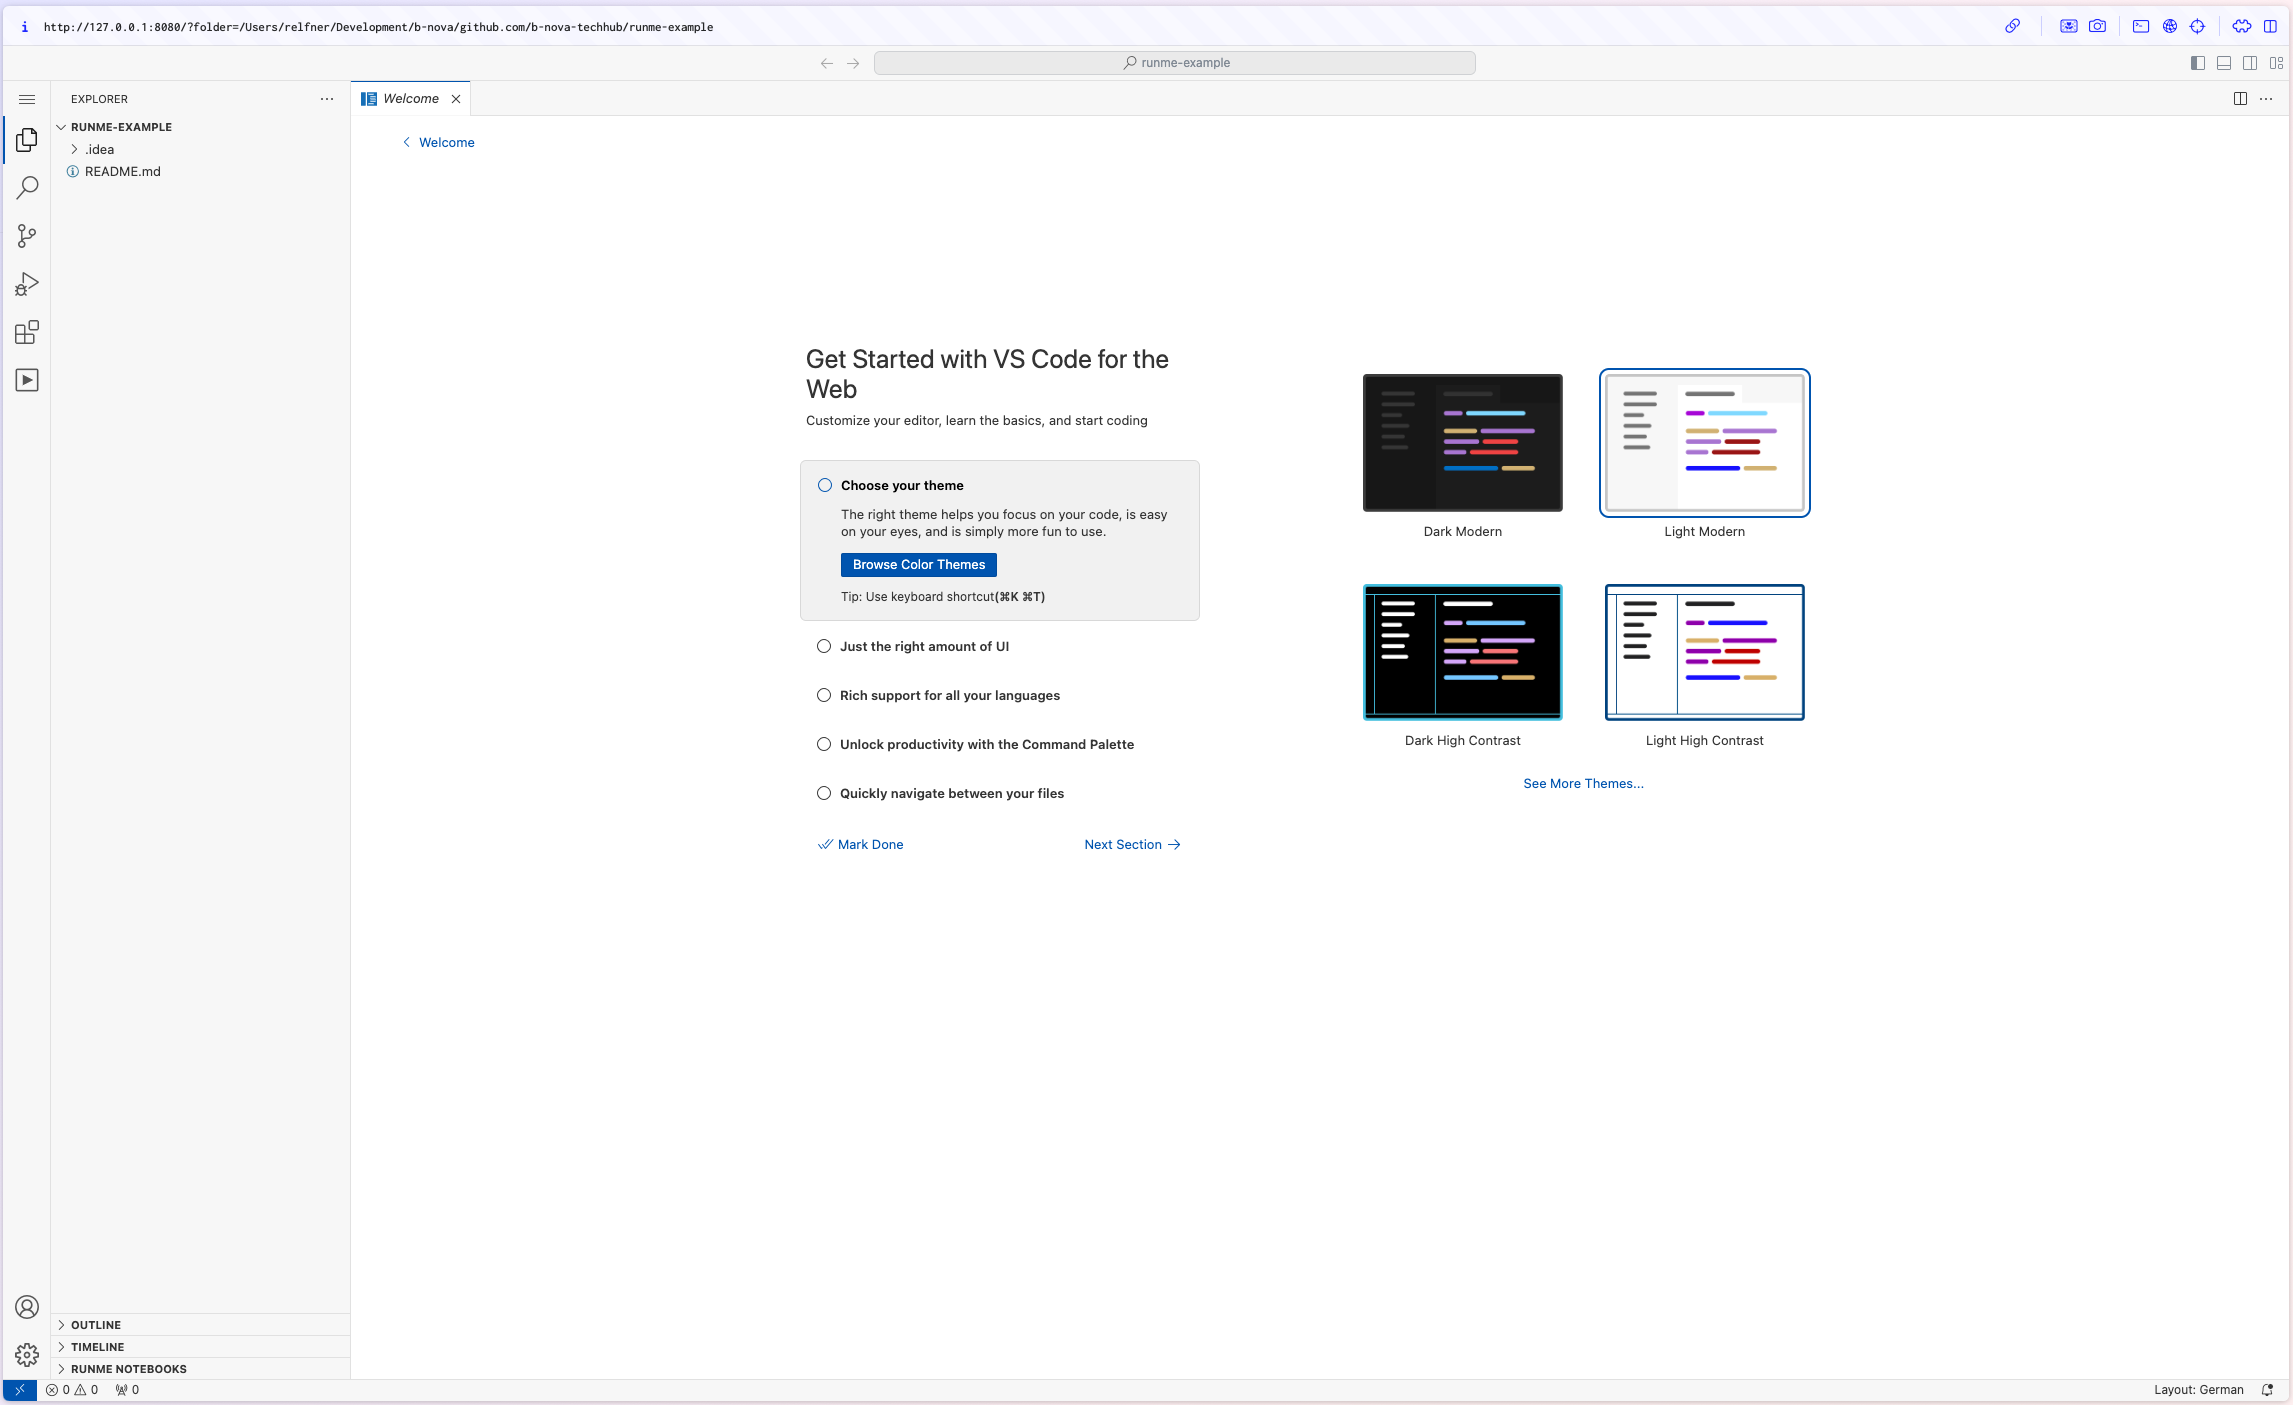
Runme also offers the possibility to start itself as a local server. However, this requires a successful installation of the CLI. If this is given, you can start with the command runme open. If the code-server is not installed, you will get the following message and need to perform the installation:
|
|
After completing this installation, Runme will automatically launch in your default web browser.
Basics
When you define a code block in VS Code, there are several setting options available that we should take a closer look at. These are divided into general and advanced settings.
General

name
The first setting option is name, which is used to identify the corresponding code block. In Runme, these code blocks are called cells and are unnamed by default. As we have already seen, all code blocks are displayed in the CLI when you run runme in the terminal. The name we define in the settings under name is also the one that is displayed in the CLI for each code block.
cwd
The cwd setting adjusts the current working directory. It is important to note that if the working directory is set for both the entire document and individual cells, they do not overwrite each other - the values simply combine. So if you set the cwd to /tmp/dummy for the document and .. for the cell, the resulting path is /tmp.
promptEnv
In each code block, specific environment variables can be used, which can even be entered during execution; this is done via the promptEnv setting. Users have the option to set this setting to “Yes”, which will cause the system to wait for user input. If set to “No”, the system will automatically use the values defined within the code block. The “Auto” option automatically adjusts the behavior depending on whether a variable has already been defined or not.
interactive
Runme cells can be configured as interactive or non-interactive cells. Interactive cells (interactive=true) allow the user to provide input during execution. This is particularly helpful when the user needs to react to the output or change settings before continuing the code. Non-interactive cells (interactive=false), on the other hand, do not expect user input and output their results directly to the notebook. They are particularly well suited when the output is to be used as input for subsequent cells.
Advanced
Now let’s take a look at the Advanced tab in the settings to explore further configuration options. This area offers additional options that allow you to customize the functionality and behavior of code blocks in more specific scenarios.

background
Depending on the command, it may be sufficient to run it in the background, for example when initially setting various environment variables or doing other setup tasks. To do this, you can simply activate the background option.
mimeType
Another useful feature is defining the mimeType. There are different possibilities here, as can be seen on the official documentation page. The default value is text/plain. Without adjusting this value, for example, the following output would be displayed for a command:

However, if you change the mimeType parameter to image/svg+xml, the corresponding image will be displayed:

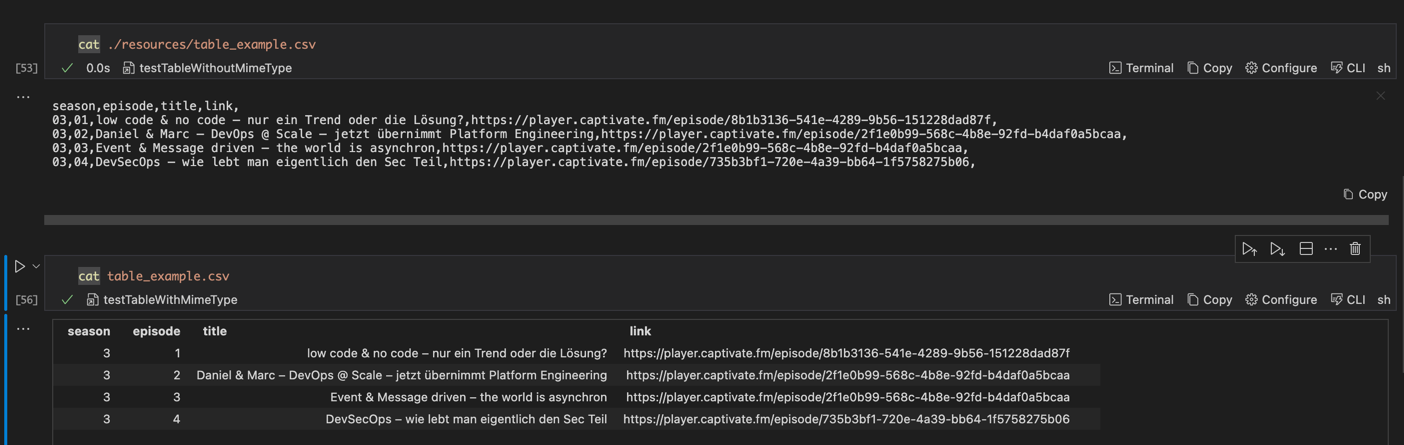
Another example of using MIME types is the use of text/csv in combination with the Data Table Renderers extension from the VS Code Marketplace. This extension allows the graphical representation of tables. I have created two examples for this: The first example uses the default MIME type text/plain and simply displays the contents of the CSV file. The second example, on the other hand, uses text/csv as the MIME type, which causes the contents of the file to be displayed in the form of a clear table.
Interpreter & Shebang
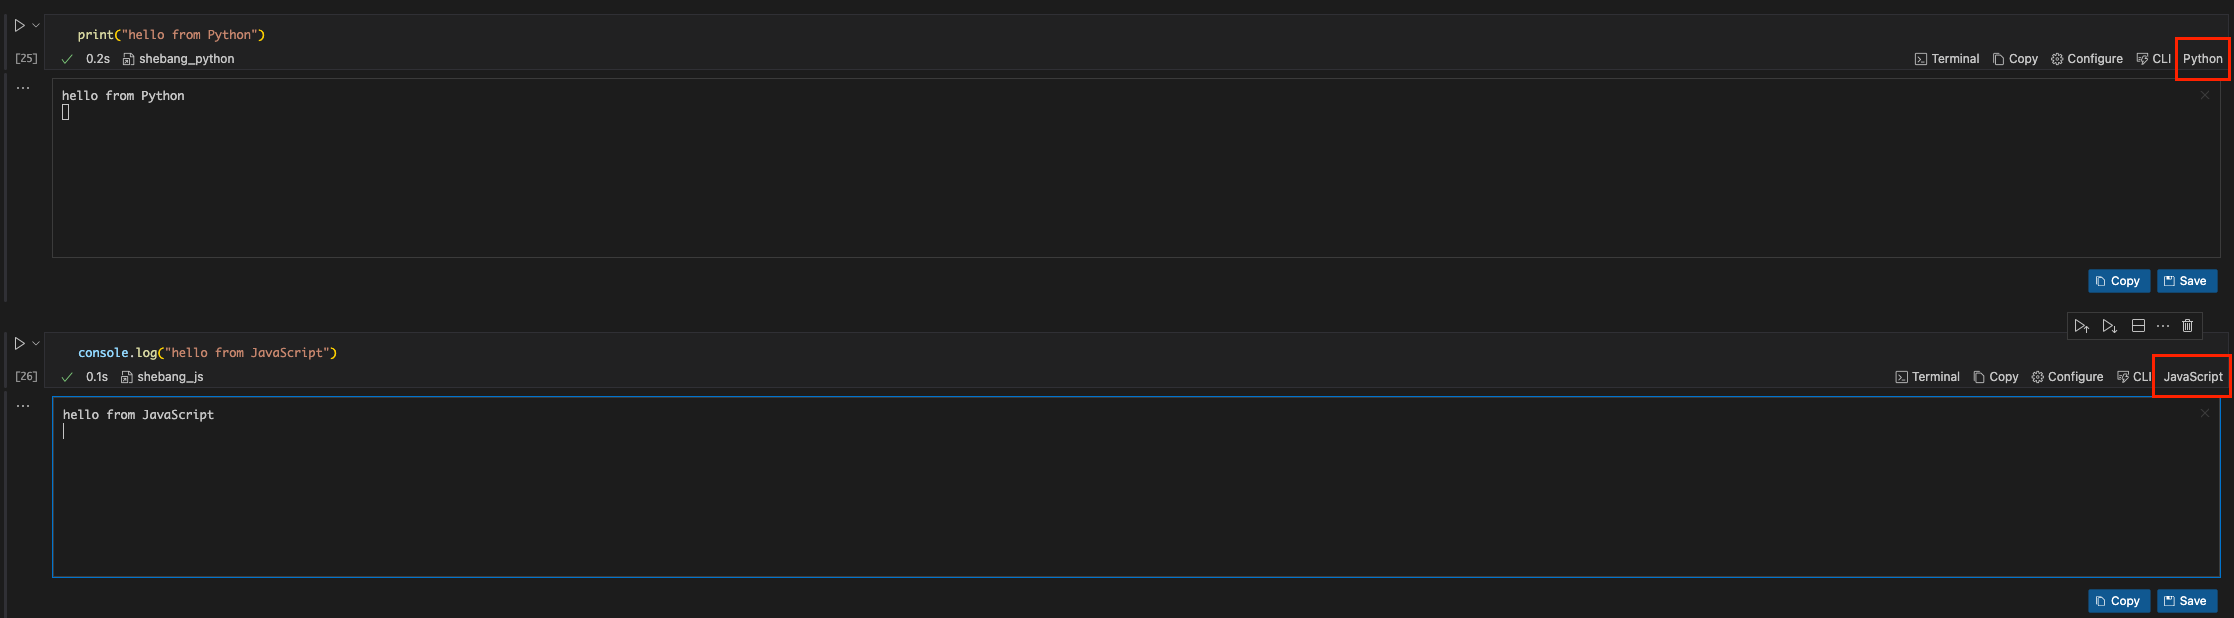
A useful setting is Shebang support. The current support, where the interpreter is automatically detected, is documented on the official documentation page. This makes it possible to use different programming languages within the code blocks. The desired language can be selected in the upper right corner of the code block.
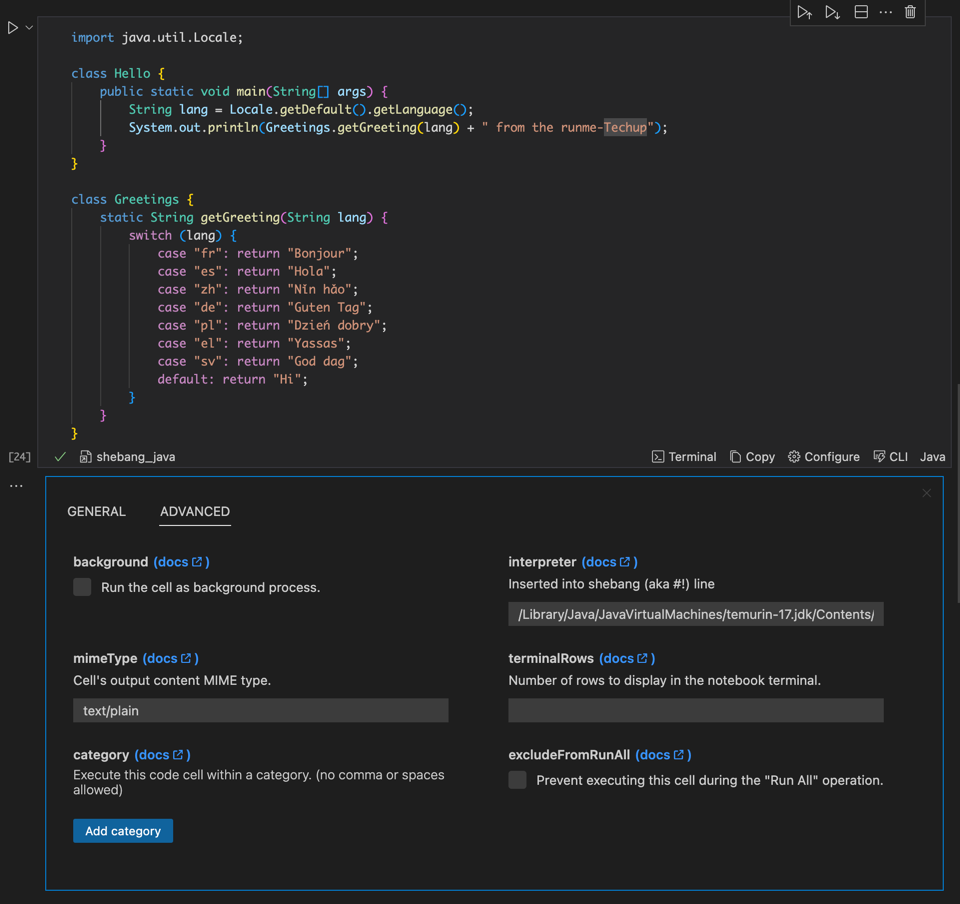
If it is a language that is not automatically recognized, the corresponding interpreter must be defined in the Advanced settings tab. For example, if you want to use Java, you must first add the desired code in the code block and set the Shebang setting to Java.
In my case, the path for the Java interpreter was:
|
|
The code block can then be executed, after which the desired output is displayed in the terminal.
terminalRows
In Runme, the outputs are displayed in lines/rows. The number of these lines in which an output is to be displayed can be set by a setting called terminalRows. This setting allows you to determine the number of lines in which your output will be visible below a cell. If no specific terminal line is specified, Runme uses 10 lines by default to display the outputs.
excludeFromRunAll
Each VS Code notebook allows users to execute all available cells at once. This can be especially useful when a complete runbook is defined in the Markdown file, allowing developers to click the “Run All” button to set everything up and get started.
The excludeFromRunAll can be used to prevent this block from being executed on Run All.
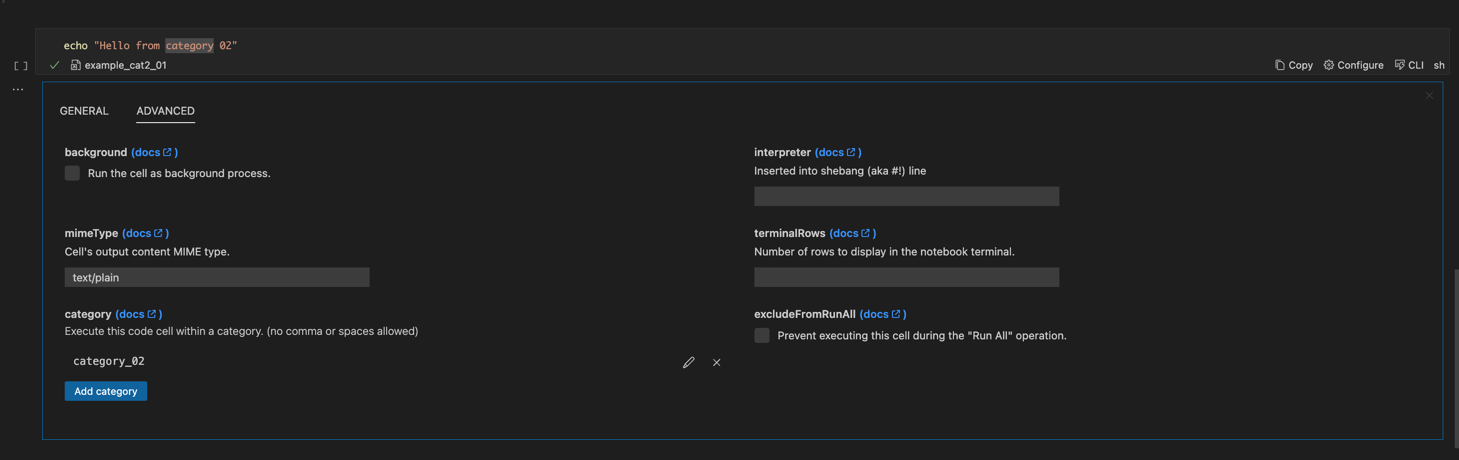
category
In the “Advanced” tab of the settings, it is possible to assign individual code blocks to a specific category. A practical use case for this would be, for example, if several code blocks are needed for setting up a project. In this case, you could create a suitable category and assign it to all relevant code blocks. You can then use the “Execute by Category” function in VS Code, select the desired category, and all associated code blocks will be executed in sequence.
I have also created an example for this. There is category01 and category02:
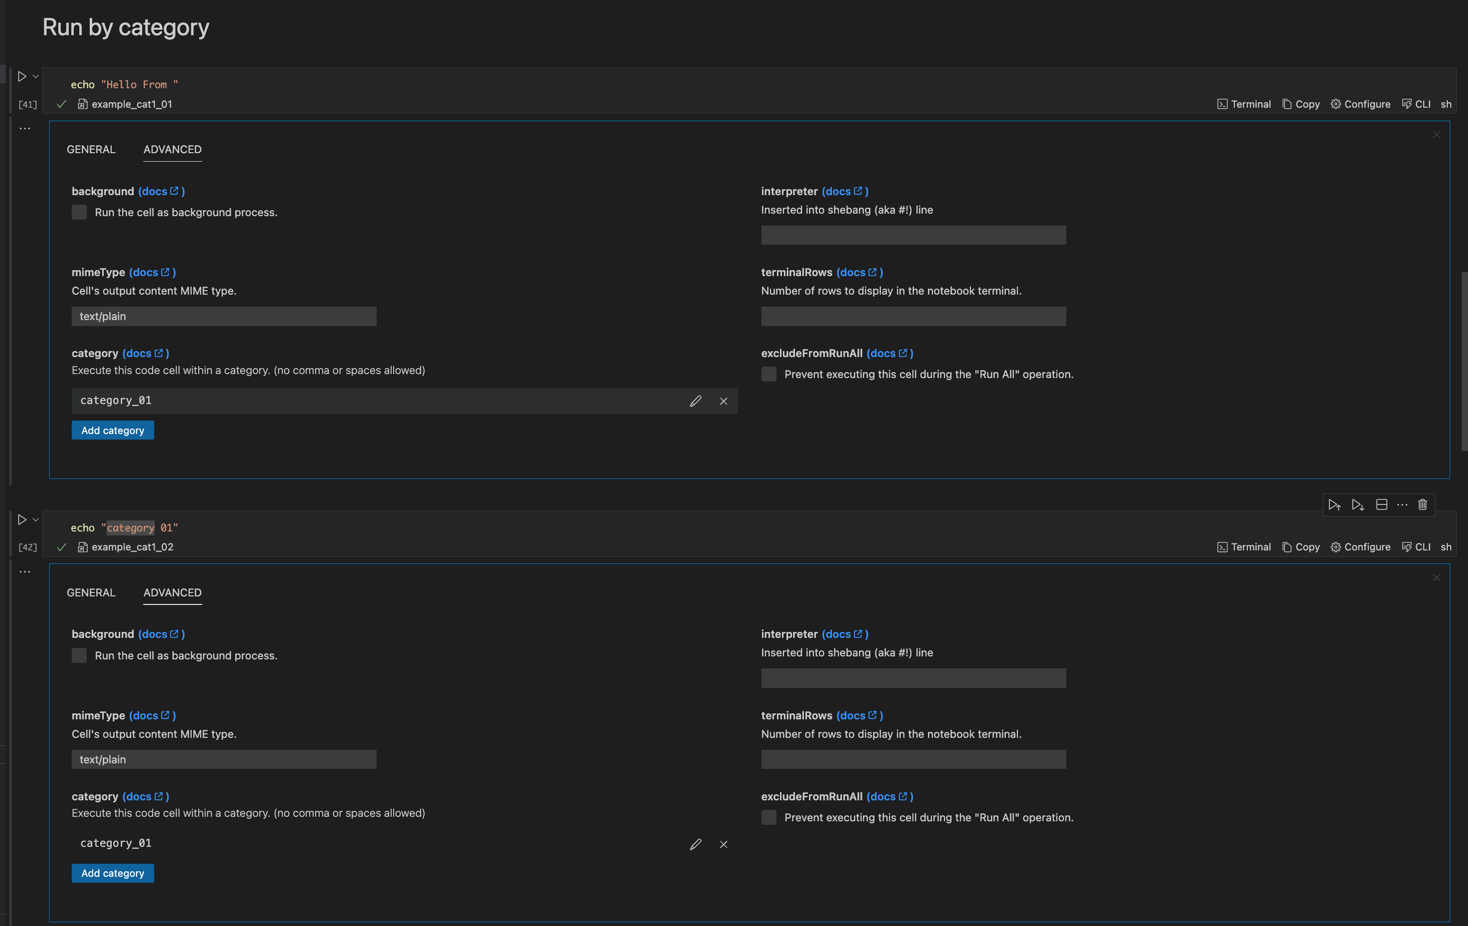
Now we only want to execute the category01. This would then have the following output:
Piping
Another useful feature is piping between code blocks. Here, it is possible that the output of one code block can be used as input within another code block. This allows for flexible and efficient data processing by allowing results from one process to be passed directly to the next step.
In the example, there is first a code block that queries a desired URL. The input can then be used directly in the next code block via the variable $__. In this case, a ping command is executed.
GitHub Action
Another notable capability that Runme offers is the ability to run GitHub Actions directly from the tool.
First, an action must be created in our repository. My example demonstrates an action that is triggered by the workflow_dispatch event and allows the user to provide specific input through the user interface. The available inputs include techHubType, which determines the type of TechHub contribution, with options such as techup and decodify, as well as title for the title of the contribution. The user can also select metaType, which defines the format of the contribution, with options such as markdown and mp3. An additional option publish asks whether the contribution should be published, with the choices being “yes” or “no”.
|
|
Once the GitHub Action is deployed to the repository, the link to it can be copied and pasted into a code block within Runme.
|
|
This integration allows the action to be executed directly. Runme provides a clear view that accepts the data for the GitHub Action. In addition, it shows that the action is being executed and provides a link to the running execution. This greatly simplifies the management and tracking of GitHub Actions.
Conclusion
Runme offers an innovative solution that transforms traditional readme files into executable runbooks and playbooks. This allows developers to interact directly with the readme and perform described setups interactively. This is made possible by allowing code to be executed directly from the documents, providing instant verification and practical application.
By integrating into the VS Code development environment, compatibility with the CLI, and the ability to use it as a web server, Runme demonstrates considerable flexibility across platforms. However, more extensive integration with other IDEs would be desirable to further improve usability.
Because Runme supports a variety of programming languages, it can be used in almost any project without experiencing limitations.
The ability to automatically execute entire code blocks, use interactive environment variables, and control GitHub Actions directly from Runme greatly simplifies development workflows. These features make Runme an effective tool that both increases productivity and promotes collaboration in technical teams.
For these reasons, I can definitely recommend Runme and believe that it should be used much more often.
[!TIP]
All examples are also available in our Techhub Repository
This techup has been translated automatically by Gemini