In today’s post we deal with the testing of Go applications. This is the second part in our ‘Go exclusive ‘ series. Last week Raffael presented the well-known and often used Cobra library and how to use it to write a CLI tool in 15 minutes.
But today it’s about testing. First it should be said that Go with its standard library already provides an official testing Package with the necessary tools. This means that unit tests can be written out-of-the-box without much effort. First, we will show you the basics and then the different types of test, as well as other helpful information and options.
Basics first
The file
If you want to write unit tests, these should be located within the package that you want to test.
For example, if you have the package hello with the file hello.go, you have to create another .go file with the suffix _test.go.
|
|
In this way, Go recognizes that it is a test file and is therefore excluded from the normal package builds.
The function
You also have to stick to a predefined naming convention when it comes to names.
The function must begin with the prefix Test and continue with an uppercase letter.
|
|
This prefix also distinguishes between the two test types that are provided as standard. Test cases that begin with test are the usual unit tests, but if the name begins with benchmark, it is, as already suspected, benchmark tests. We will go into the differences and examples later.
Run
Of course, once you’ve written your unit tests, you’ll want to run them too.
Here there is the command go test. You can choose whether you want to run all tests, just a desired package, or just a specific test.
If you want to run all tests, this is carried out from the workspace as follows:
|
|
If you are in the package that you want to test and want to have all tests carried out in it, this is sufficient:
|
|
Of course, there is also the case that you only want to run a very specific test. To do this, you have to be in the appropriate package and enter the name of the function:
|
|
To get more detailed information about all these commands, you can use the option -v.
It is also important to know that Go caches the test results.
This prevents all tests from having to be repeated even though they have already been successful.
If you clear the test cache beforehand, you can be sure that all tests will pass:
|
|
Another possibility to deactivate the cache is to set it via the GOCACHE environment variable with the value off.
Test coverage
The Go Standard Library also gives you the option of receiving a report on the test coverage. For this you can create a coverage report in the first step and in the second step you can format it in a reader-friendly HTML report.
|
|
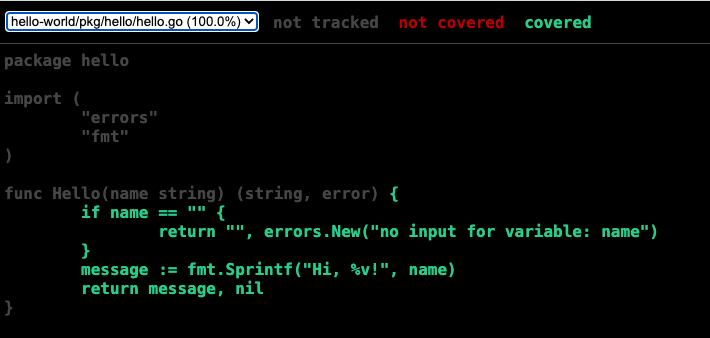
The report then looks like this, for example:
Test types
Unit
As already mentioned, a unit test must begin with the prefix Test so that it can be recognized correctly.
A test function in Go always has only one single parameter t *testing.T.
Furthermore, there are no assertions within Go, as is known in other programming languages. The reason for this is relatively simple, because this means that another ’language’ is dispensed with and relies on the internal resources that are already made available.
If you now want to write tests, IF conditions are used within Go. If these are not the same, there are two or four ways to throw this error.
-
t.Error*|t.Errorf*→ indicates faulty test, but continues to execute the following tests -
t.Fatal*|t.Fatalf*→ indicates faulty test, but stops the current test immediately
The function with the f also has the option of formatting the text according to your own requirements. Which function is to be used always depends entirely on your own test case.
Let’s take a look at this with an example.
We want to test the function Hello(), which returns a welcome message with the name that is passed as a parameter.
First we determine the desired result, this should be Hi, b-nova! in the example.
The method to be tested is then called and passed to b-nova as a parameter.
Then an If condition is used to check whether the return value of the method corresponds to the target state. If not, an error is issued.
|
|
You can now run this test with the command go test -v -run TestHelloName. This is successfully completed:
|
|
However, if the test fails, for example by passing another parameter to the function, the following message is displayed:
|
|
Benchmark tests
When writing a benchmark test, the name must always start with the prefix Benchmark instead of Test.
There are further differences to the normal unit tests, because these are executed with the flag -bench.
This will run the tests sequentially and run multiple times until a stable result is obtained.
This is achieved through the for loop and the variable b.N. The parameter also changes to b *testing.B.
|
|
The benchmark test can be started with the -bench flag and the corresponding package:
|
|
Some additional information is provided within the result.
goos specifies the operating system and goarch specifies the architecture of the test system.
You can also see which package is being tested and what kind of CPU it is.
Then the function is specified with additional information on how many cores this test was carried out on, in this case on 16 cores.
The following number determines the number of iterations, which are defined by b.N. And finally, the average time per operation is displayed.
|
|
Table-Driven Tests
If you have written unit tests on several occasions, you probably know that often only the parameters change. So that you don’t have to rewrite the entire test over and over again, Go offers the option of writing table-driven tests. This saves you the hassle of repeating the same test functions.
To do this, you should first create a structured data type Case for your test case.
|
|
As soon as this is done, you can create a slice of the previously created data type within the test function and define which values you expect.
|
|
Then you can use a for loop to go through all the entries in the slice and thus carry out all tests.
|
|
Since all tests are correct again in this example, you get this output in the terminal:
|
|
For a better overview of which test has just run, there is t.Run().
This method requires two parameters for this. On the one hand the name of the method and the function to be tested.
|
|
The output differs from the previous test in that the names that you pass to the t.Run() function are displayed.
This means you can know exactly which tests have passed.
|
|
Nice-To-Know
Assertions
Since, as mentioned at the beginning, there are no assertions, there are now some alternatives. This includes above all testify.
You can install this with go get github.com/stretchr/testify. As usual in other languages, the following assertions are now available:
-
assert.Equal() -
assert.NotEqual() -
assert.Nil() -
assert.NotNil()
The function TestHelloName(), which you saw as an example in the section Unit Tests, can now also be written in this way:
|
|
Another advantage is the output of the errors in the terminal, which are provided by this package. This looks like this through the testify functions:
|
|
Test data
When you write tests, there is also the case that you need test data which is located in an external file.
To do this, create a folder with the name testdata within the package in which the tests are also located.
This is namely not included in the normal builds.
You can then open and use the file with os.Open(). A test with this data could look like this:
|
|
Conclusion
So, we’ve seen how you can quickly write unit tests with the standard testing library. Use with a specialized library that reminds testing of the usual output and handling of Java tests is also guaranteed quickly and easily.
This text was automatically translated with our golang markdown translator.