Today I will show you how to use Keycloak as an OIDC client for Quarkus with an Angular frontend. It is a very practical topic, which I have encountered several times in my recent projects. It doesn’t matter whether you use Quarkus or Spring Boot. Only the configurations will be slightly different in both setups.
A few words about Keycloak
Keycloak is an open source software project written in Java, which experienced its first release in September 2014 after a year of development. It is therefore not a particularly new project. With Keycloak SSO can be implemented with identity and access management for modern applications. It implements the OpenId Connect protocol. Until March 2018, the project was driven by the WildFly community. Since then, it has been using RedHat as a driver for its RH-SSO products. Keycloak offers the following features, among others:
- User registration
- social logins
- SSO of all applications registered to the same realm
- 2-factor authentication
- LDAP integration via a federation
In principle, the way Keycloak works is quite simple. After successfully authenticating a user, Keycloak issues an Identity Token in the form of a JSON Web Token for that user. At the same time, an access token is issued, which enables the application to call services on behalf of the user. The identity token is the difference between OIDC and the OAuth2.0 protocol, since information about the user’s identity is primarily stored here. With OAuth2.0, only the rights of a user were taken into account in the form of an access token.
All clients that are connected to a realm are available to a user after they have logged on once without having to log on again.
Setup
Quarkus
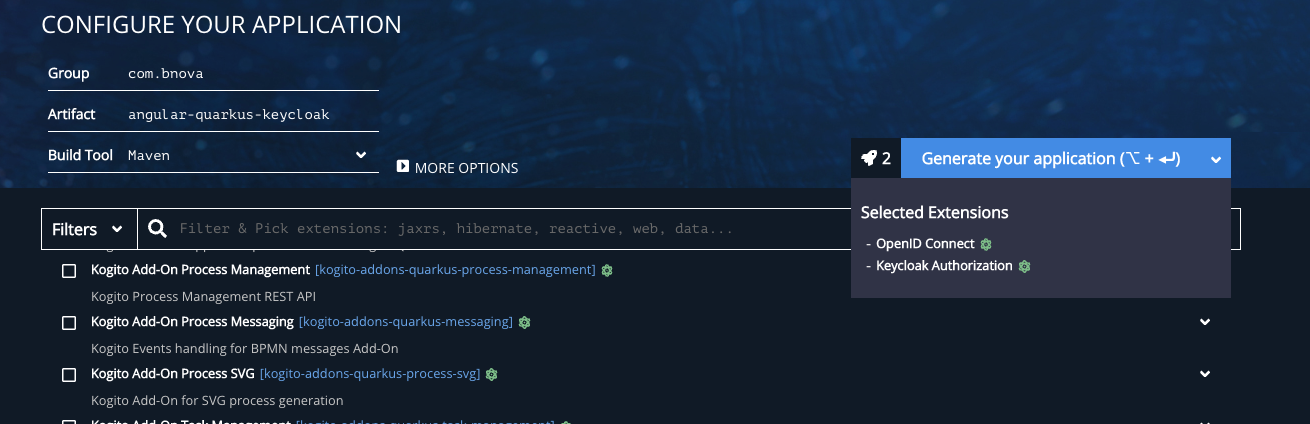
We create a Quarkus application (Version 2.5.1) with the extensions OpenID Connect and Keycloak Authorization. I leave the rest here as default.
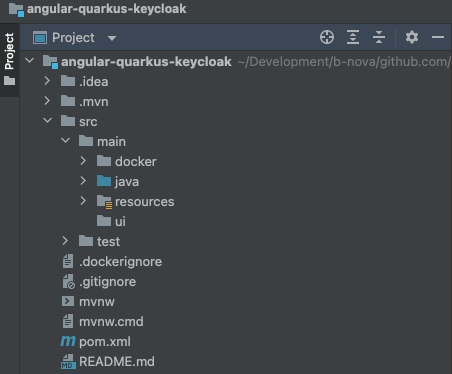
In our Quarkus application itself we create a folder /src/main/ui in which our Angular application will later be placed.
So our folder structure looks like this.
Angular
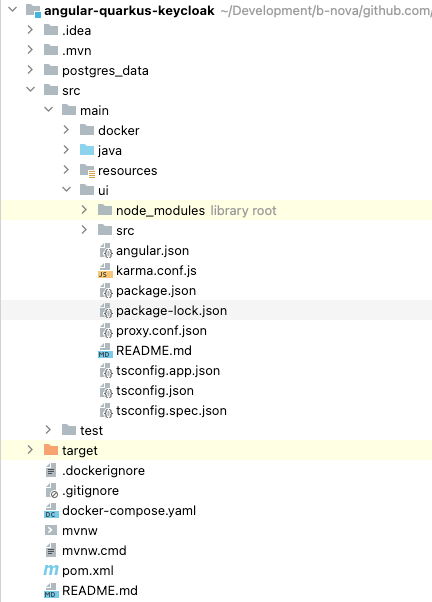
Next we create the Angular application (Version 12), I’m here using the Getting Started Guide from (https://angular.io/start), then downloaded the application and unzipping in into the /src/main/ui folder.
Our project should now look like this.
In order to avoid CORS errors, we have to use a proxy in the Angular application to access the Quarkus backend.
For this we create a file proxy.conf.json with the following content.
|
|
So now all calls to /api are sent to our Quarkus backend.
In the package.json file we also have to change the start script slightly so that this proxy configuration is also used.
|
|
Keycloak
Next, let’s set up Keycloak. Keycloak is an open source identity and access management tool that is very versatile. It offers OpenId Connect, OAuth2 and SAML2 as protocols and also offers a user federation with which users can be imported from a company’s own LDAP. In the course of the TechUp we will go into a few more features of Keycloak, but first we will ensure that we make Keycloak available to us locally.
To do this, we create a docker-compose.yaml file with the following content
|
|
We have defined 2 services here. First the Keycloak service itself and second a Postgres database to store our configurations.
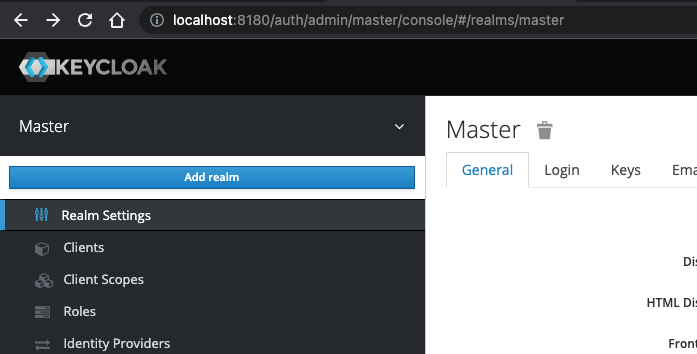
After running docker compose up, we can log in to Keycloak’s admin console at http://localhost:8180 with username admin and password admin.
The jboss/keycloak image didn’t work on my new MacBook Pro with M1 processor. There are two options here:
- use image
wizzn/keycloak - clone the official repository git@github.com:keycloak/keycloak-containers.git and build the image locally yourself (that’s how I did it).
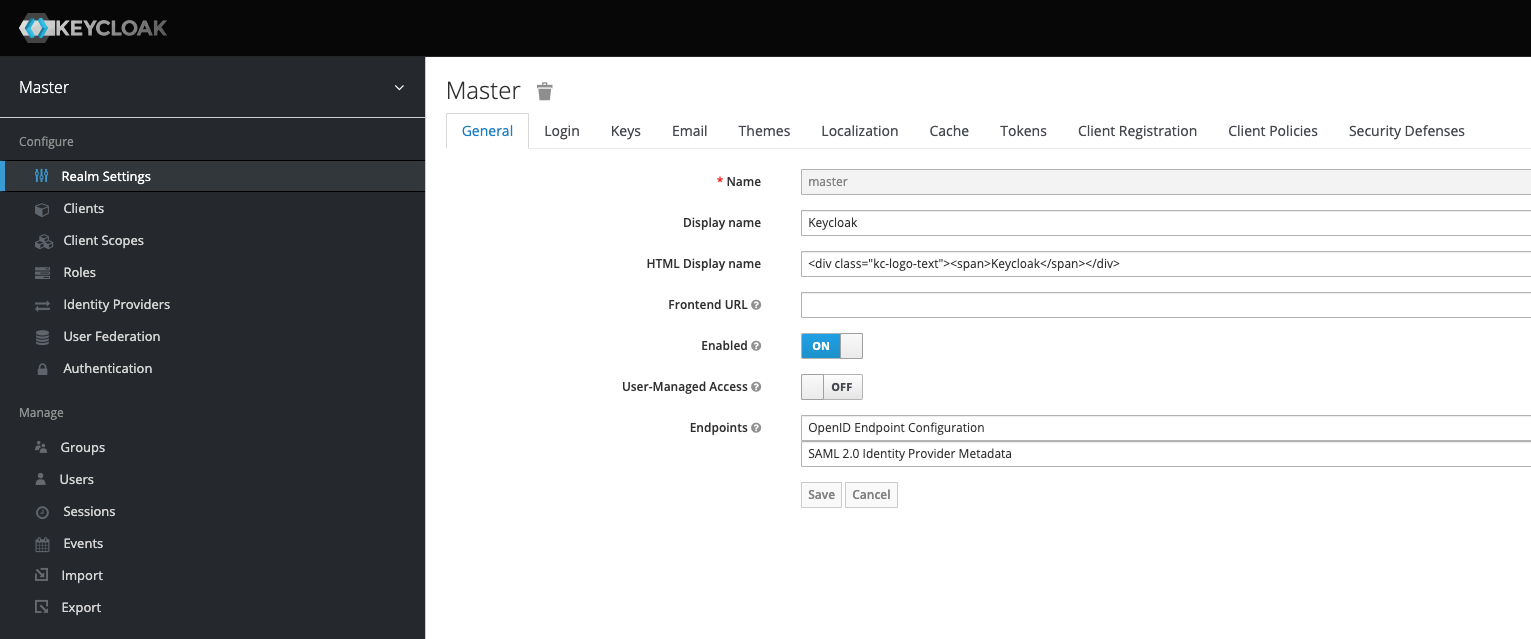
Once Keycloak has started and we’ve logged into the admin console, we should now see the following page when accessing it.
We have now set up all applications and can start them separately. At this point we want to verify our setup.
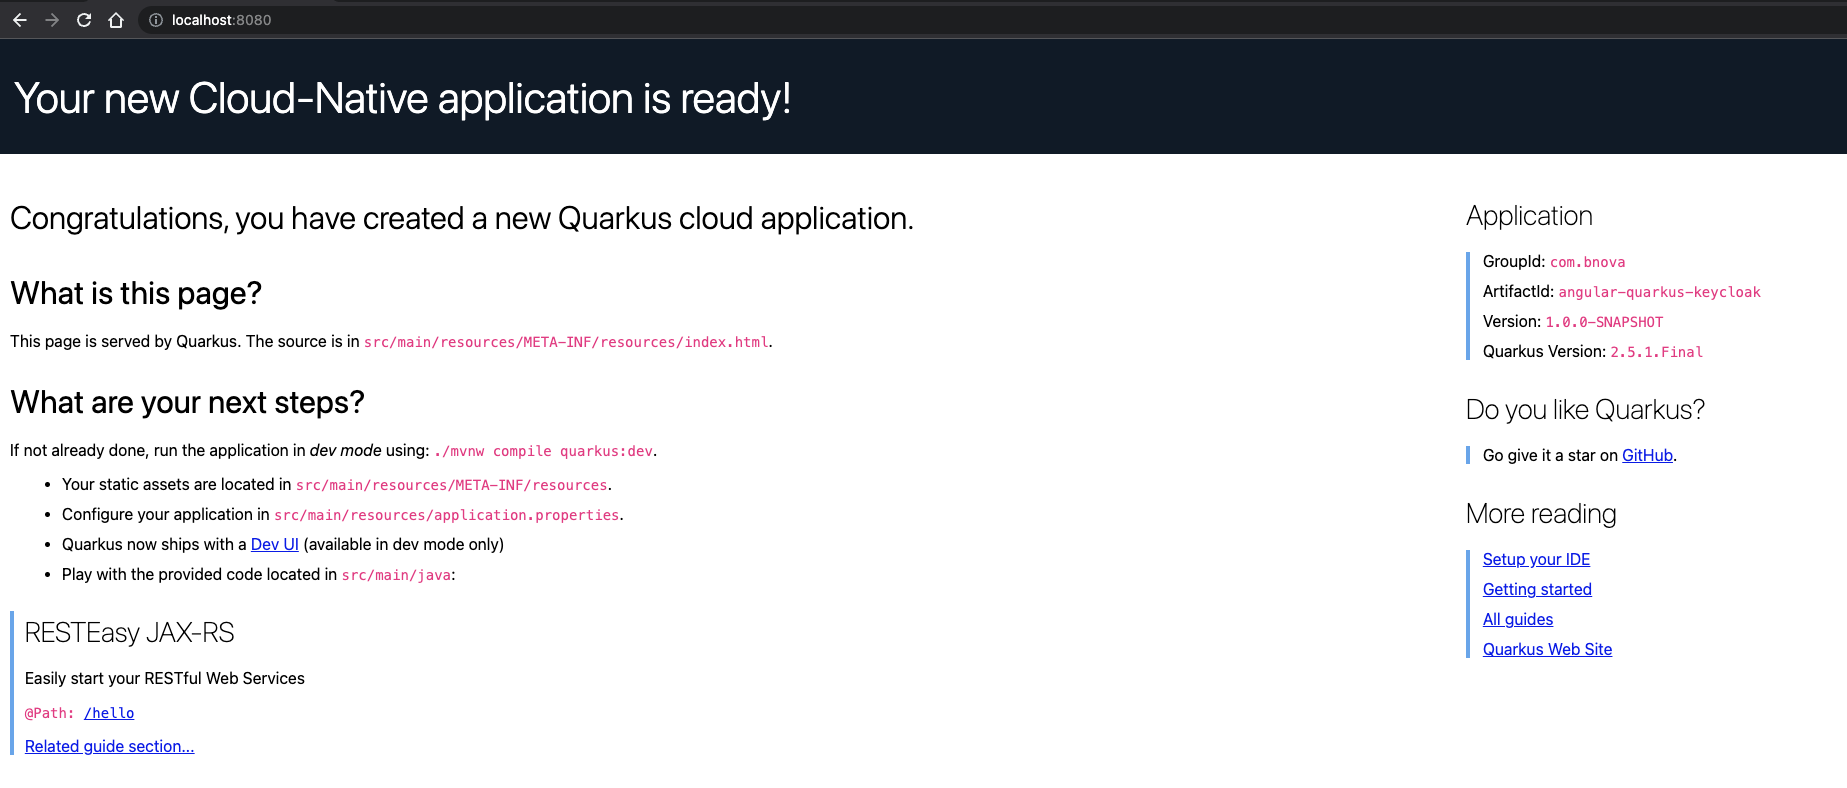
We open a new terminal and switch to the root folder of the Quarkus application.
Here we enter mvn quarkus:dev.
The server should start and we can access it via http://localhost:8080 and see the following screen.
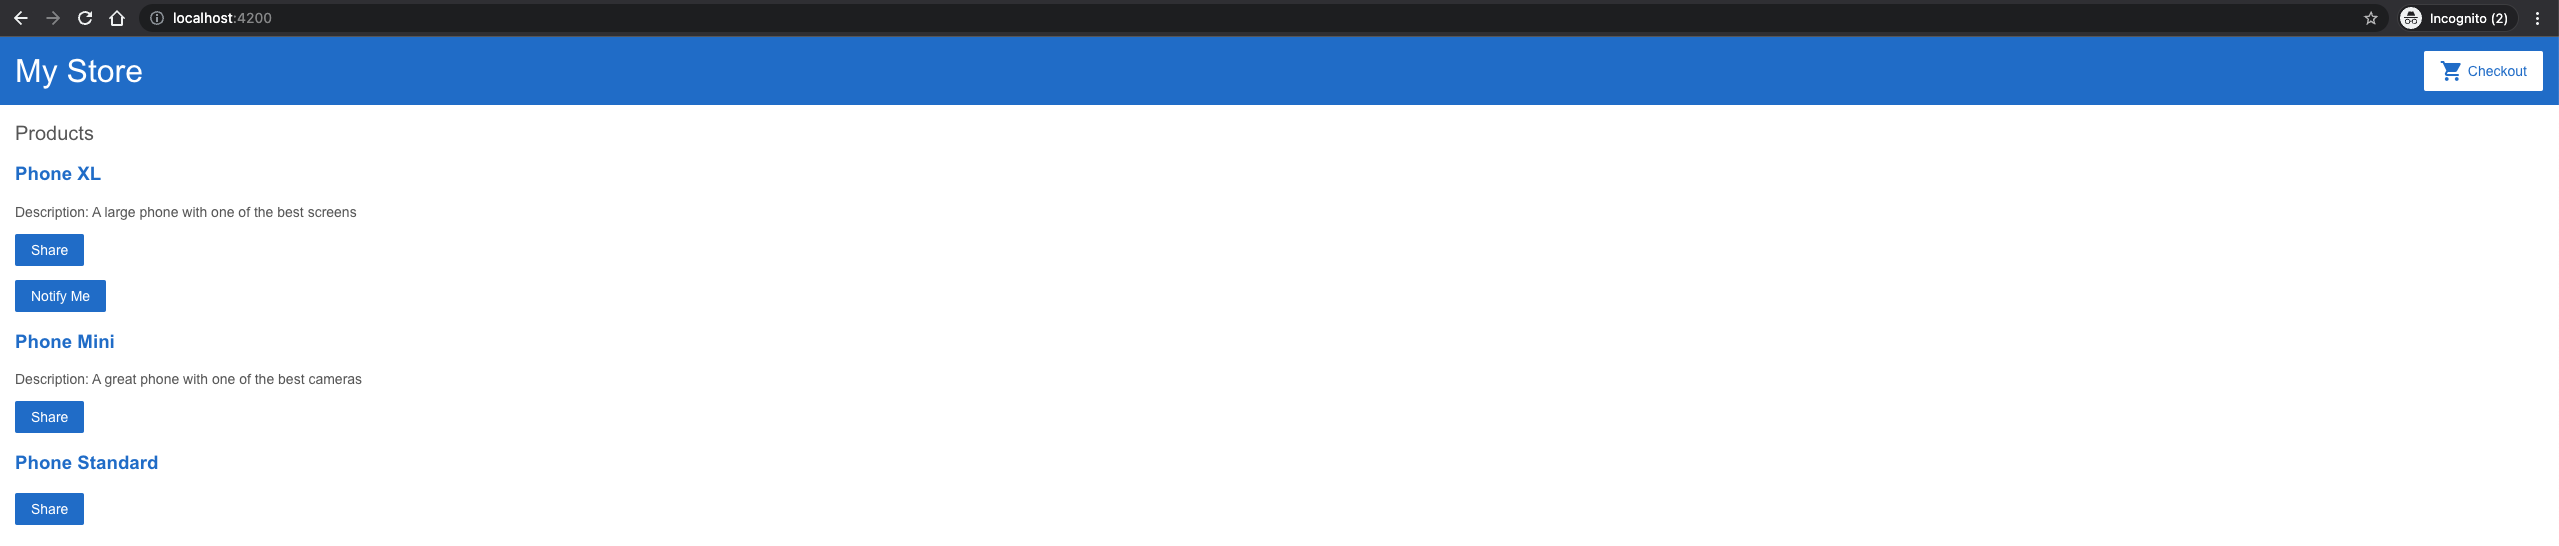
Now we go to the Angular directory and enter npm install && npm run start there.
The Angular application should start and a browser window should open automatically with the following content.
Setup done!

Configuration
Keycloak
Realm
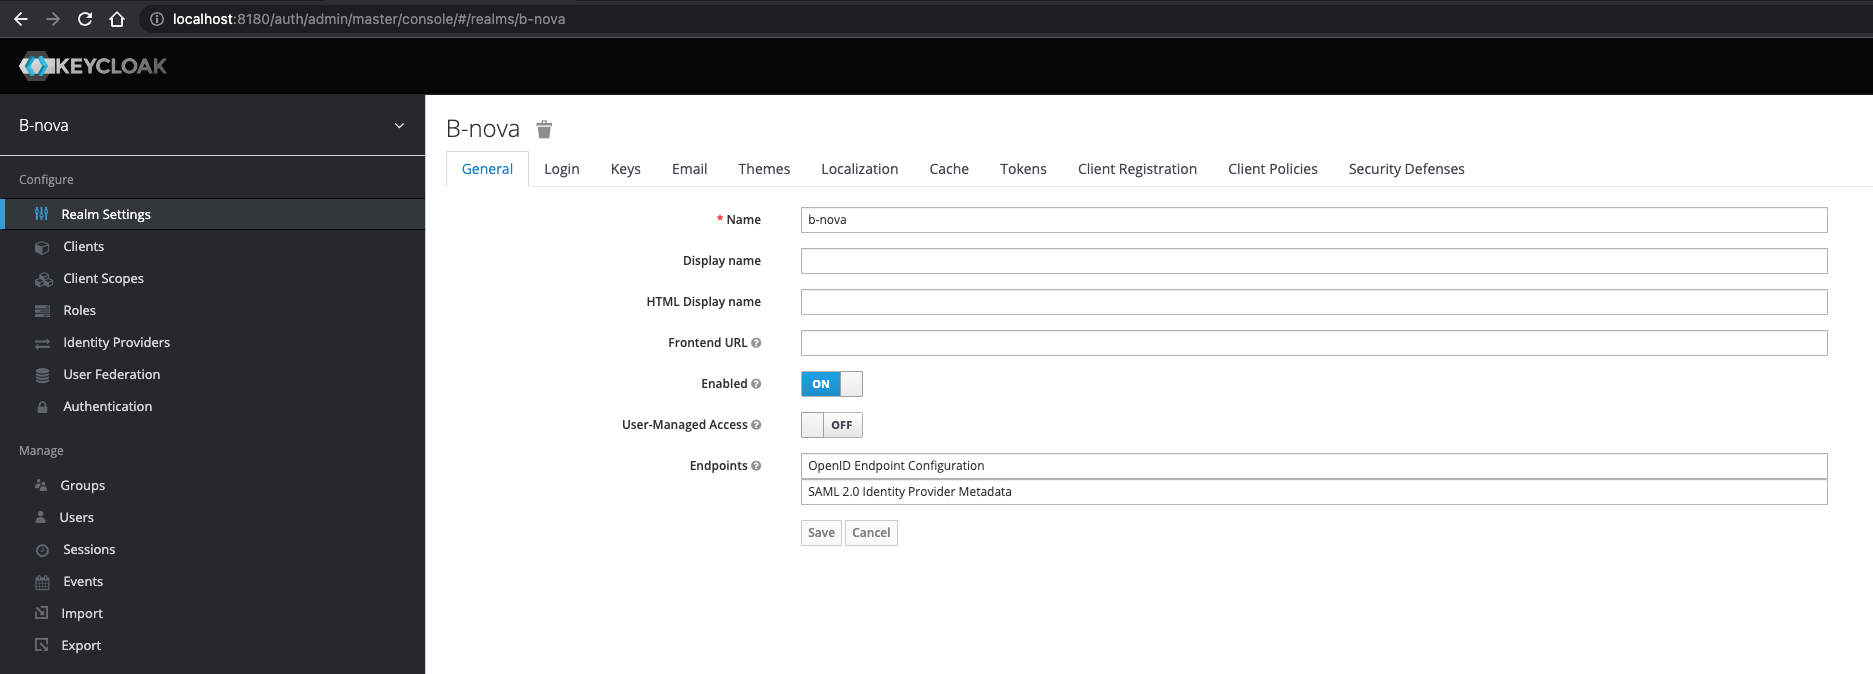
Next we take care of the configuration. We start here with Keycloak. First we create a new realm. By default, there is only the master realm. Realms are created in a hierarchical structure. The master realm forms the root. For example, admin accounts that are created in the master realm can access all other realms. So it makes sense to create a separate realm for users and applications in an organization.
To create a new realm, we click on the arrow next to the master realm and there in the popup on “Add Realm”. Then we assign a meaningful name and click on “Create”
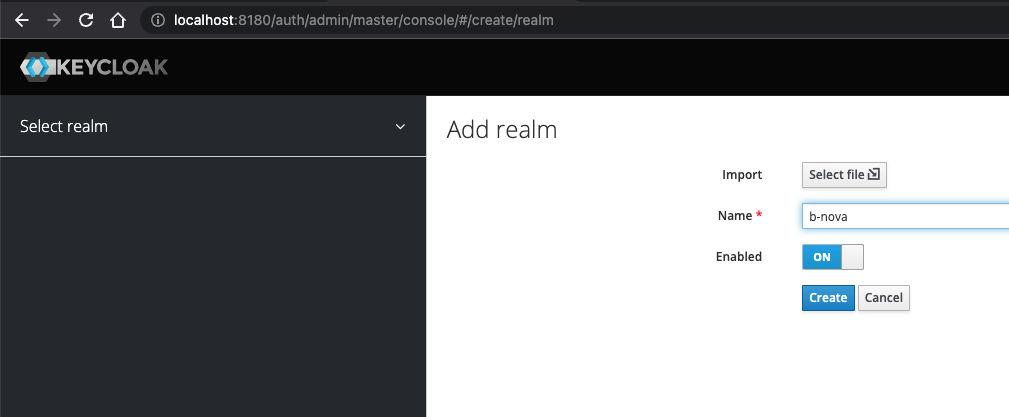
Our new realm should then open automatically.
Customers
Front end
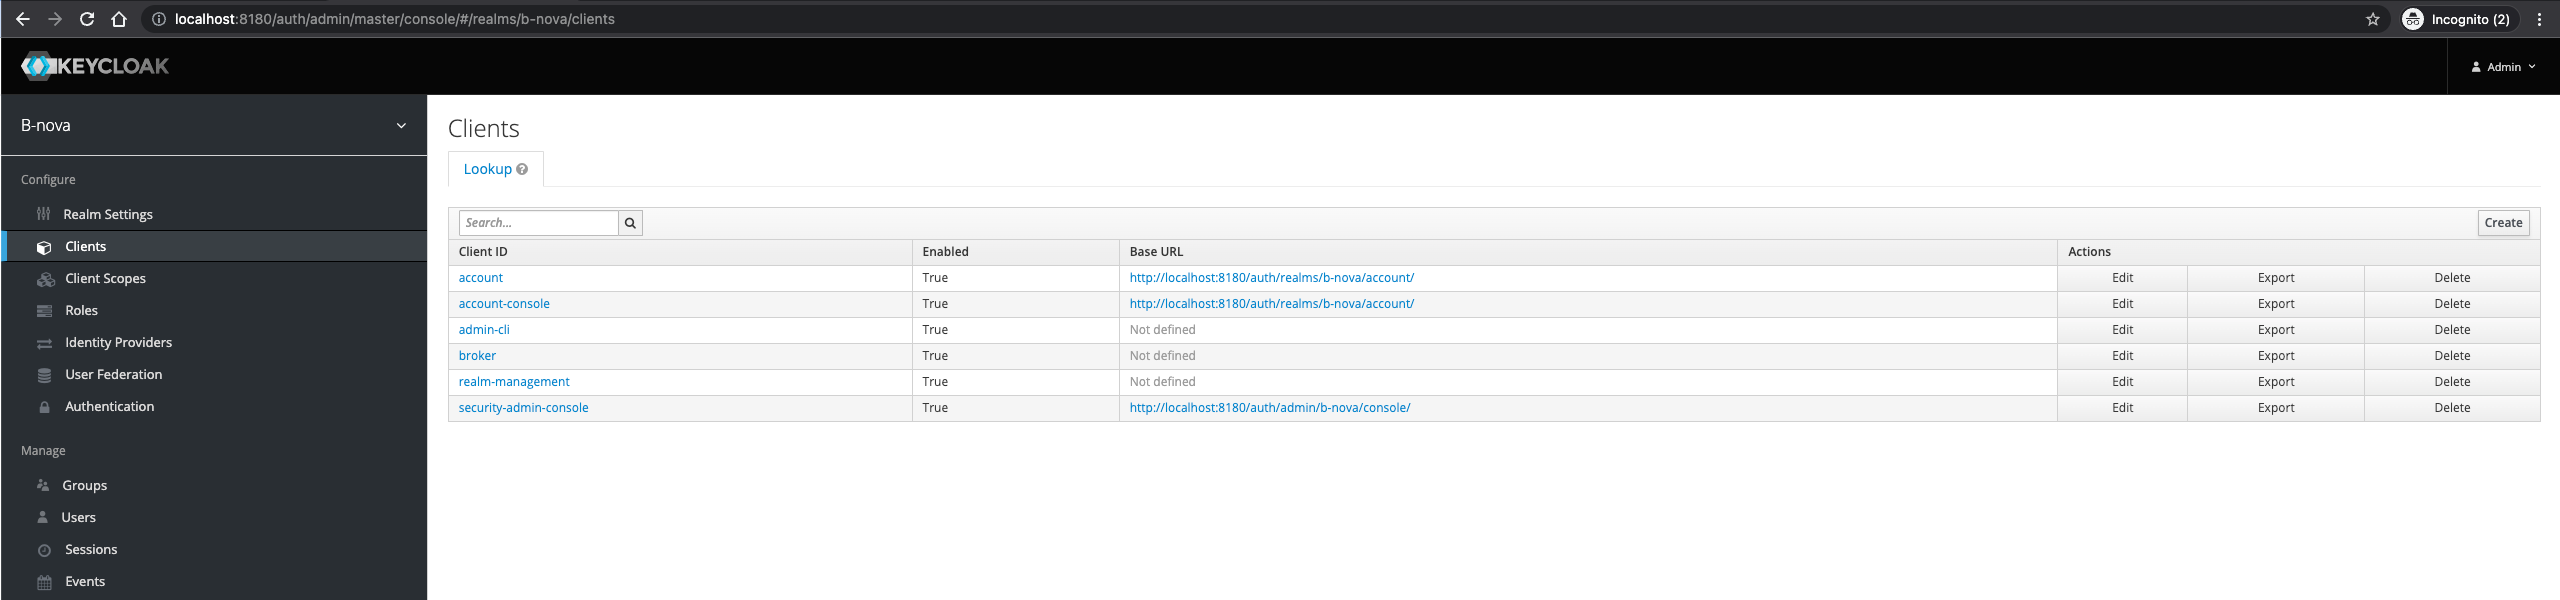
Now let’s create the required clients. Clients can request authentication of a user. Clients generally come in 2 forms. The first client type is an application that wants to participate in single sign-on. These clients just want Keycloak to provide them with the appropriate security. The other type of client is one that requests an access token so that it can invoke other services on behalf of the authenticated user.
We will now create an OpenID Connect Client (OIDC Client). To do this, we go to Clients and then click on the “Create” button.
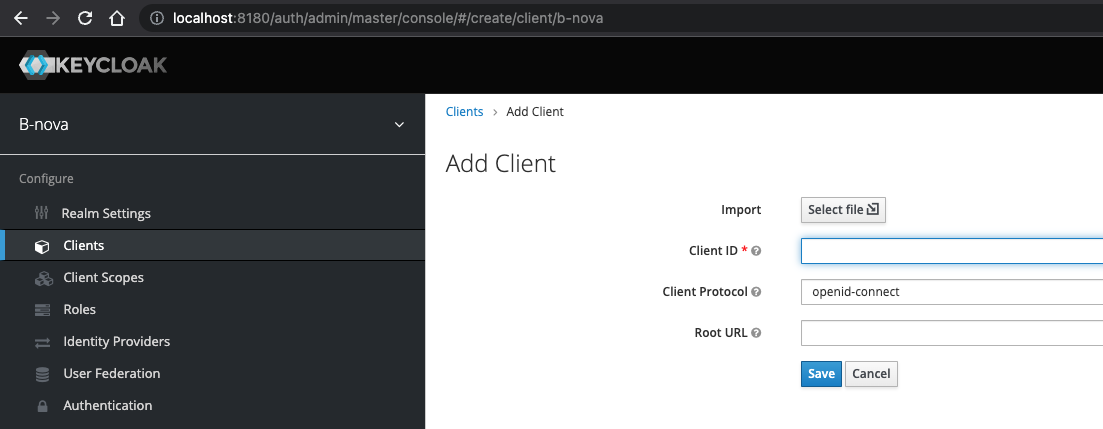
We enter the name of the application as Client ID.
Since we have a product list, I’ll call the client productlist-frontend in our case.
We will see later why I use the frontend suffix.
We enter the URL of our Angular application as the root URL, i.e. http://localhost:4200 by default.
We should now see a new client with the following configurations.
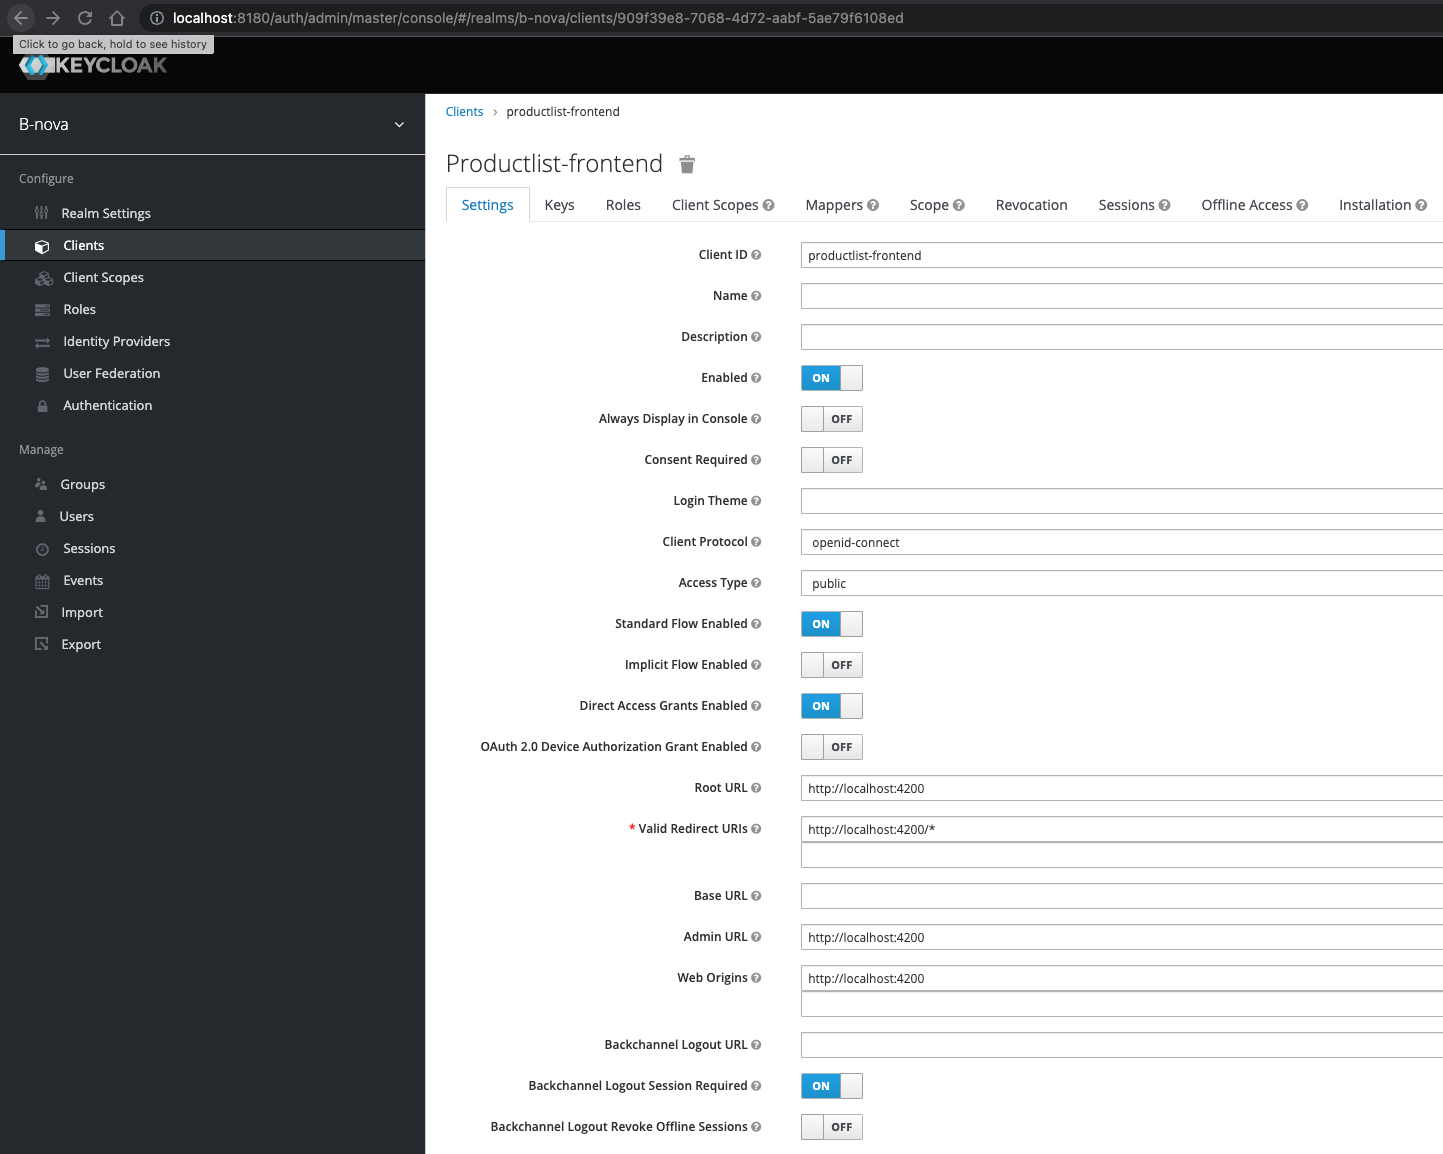
Let’s give our application a name. This is the friendly name for the client when viewed on a Keycloak UI.
The “Access Type” is also important here. With this we determine the type of OIDC client. There are 3 different types:
Confidential The confidential access type is for server-side applications that require a client secret when converting an access code into an access token. This type should be used for server-side applications.
Public The public access type is for client-side applications that need to perform a browser login. With a client-side application, there is no way to keep a secret safe. Instead, it’s very important to restrict access by configuring the correct redirect URIs for the client.
Bearer only The bearer-only access type means that the application only allows bearer token requests. If enabled, this application cannot participate in browser logins.
Everyone should be able to log in to our frontend.
We therefore choose the “Access Type” public.
Here we now also see why the suffix frontend makes sense at this point.
We don’t have to set anything else in the frontend client.
Backend
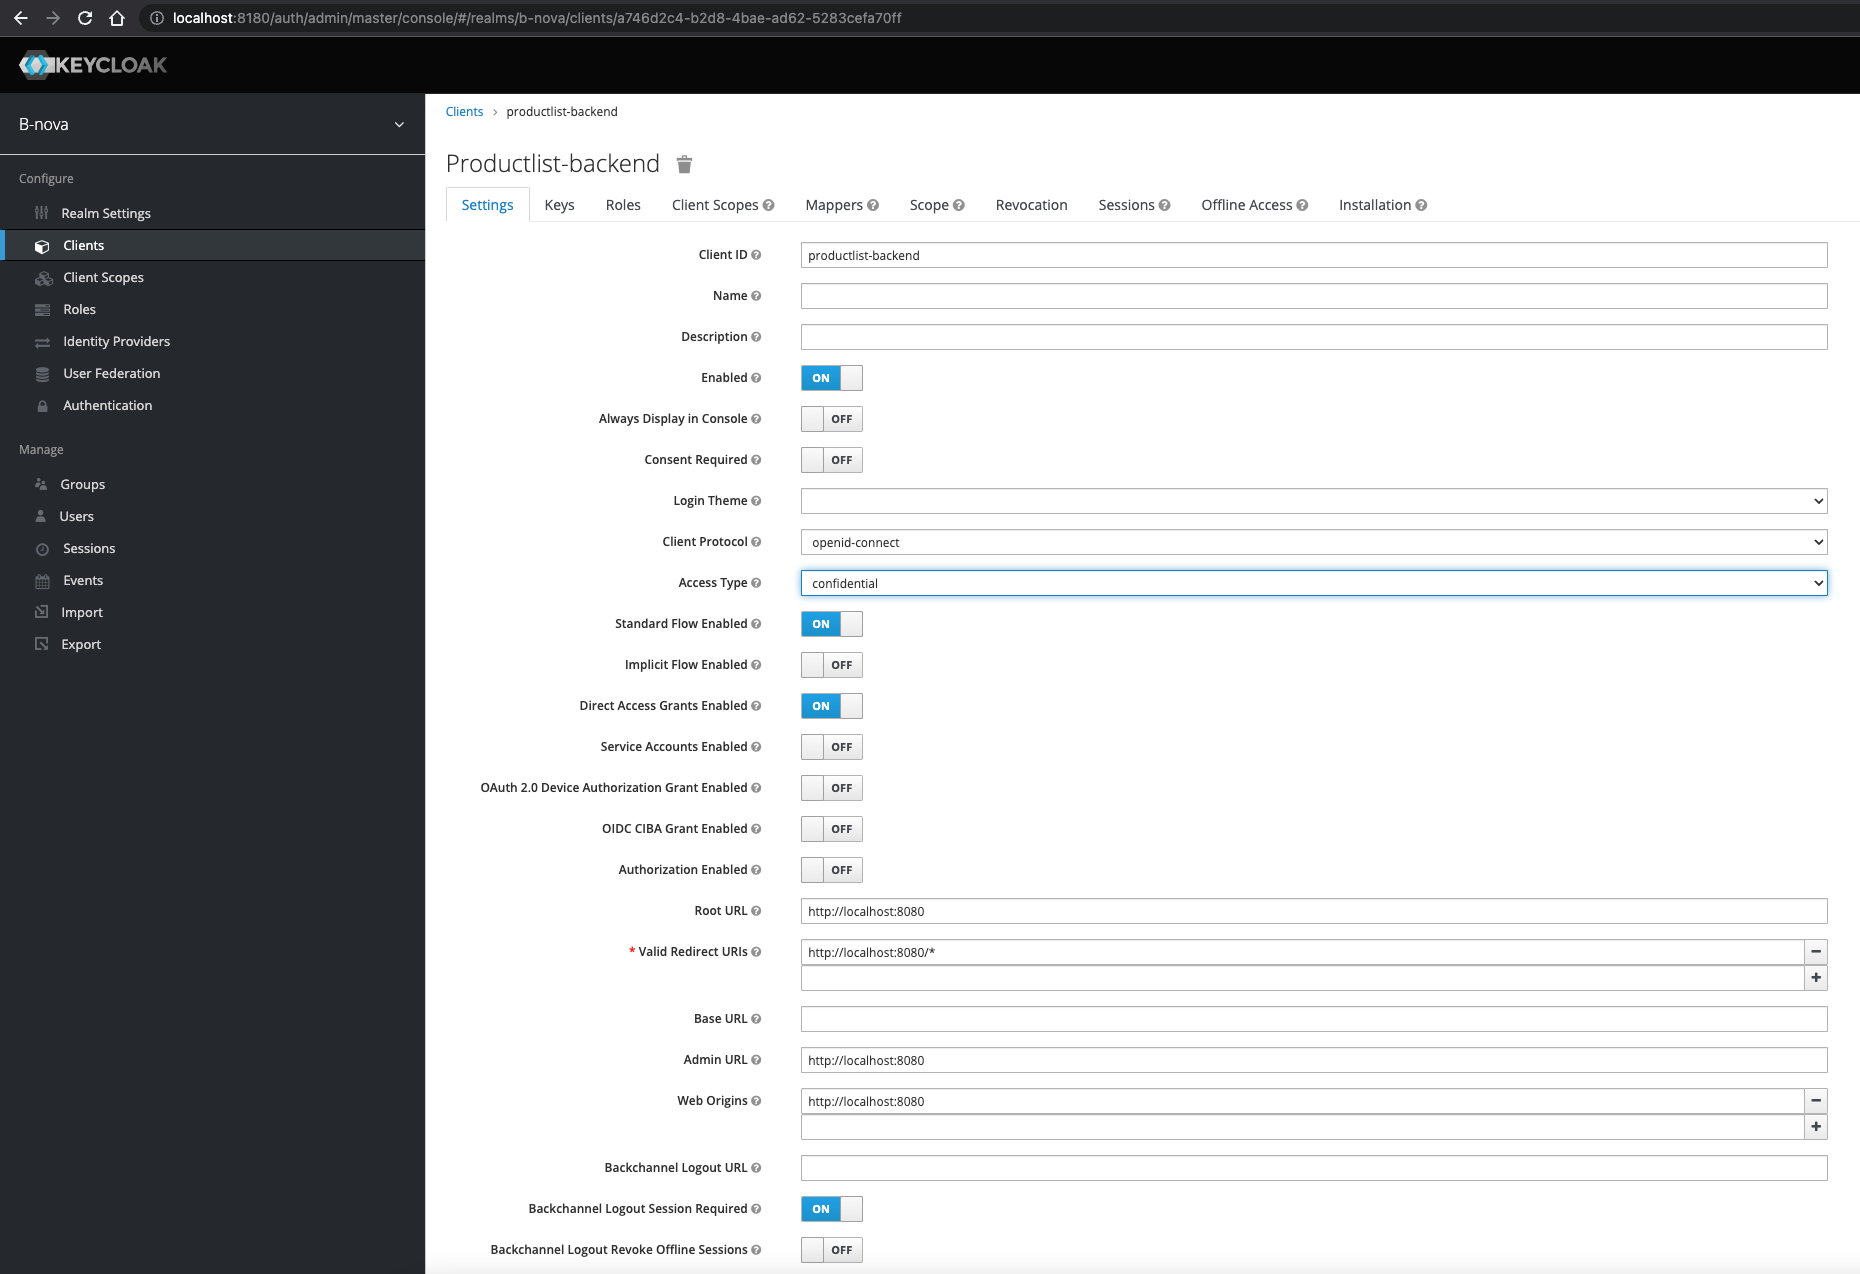
Next, let’s take care of the backend. We go back to the Clients overview page and click on “Create”.
We now select productlist-backend as Client ID and this time the URL of our Quarkus server as root URL, i.e. http://localhost:8080.
Unlike our frontend client, we change the access type to confidential.
As we can see, the configuration options change after we change the type.
TO DO:
Here we now have to make a few necessary changes so that our authentication works later.
Users and Roles
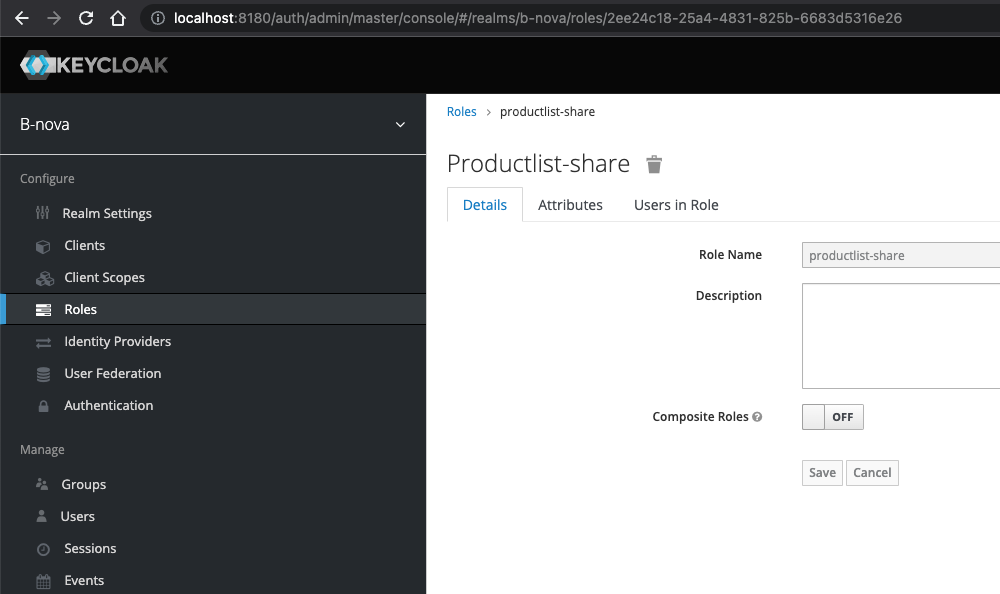
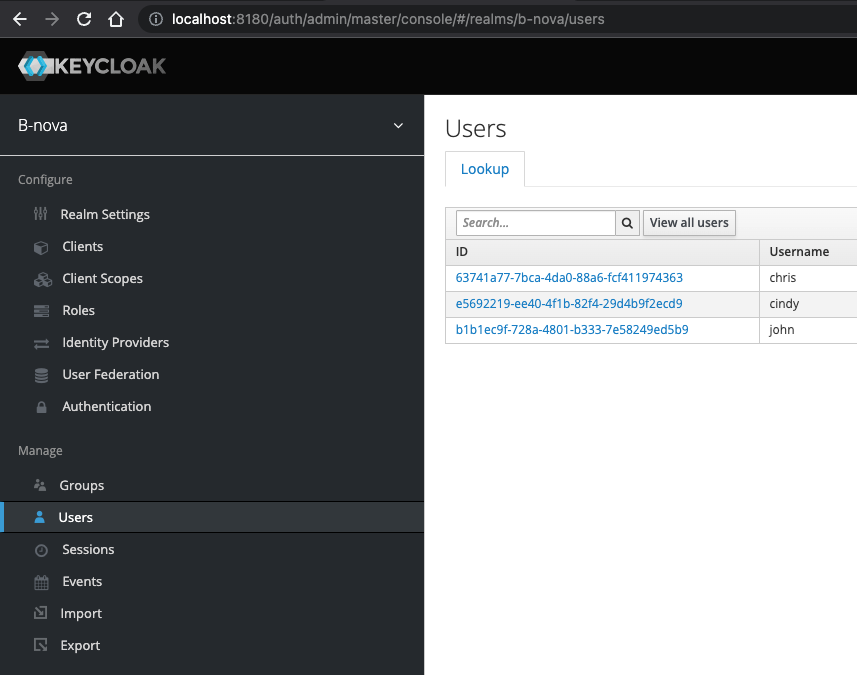
Finally, we have to create users and roles that we can later use to access the application.
We create 2 roles and 3 users. We create the following table:
- John - productlist-share, productlist-notify
- Cindy - productlist-share
- Chris - productlist-notify
To create the roles, we click on “Roles” → Add Role. After we have created the role, we see the following page. We do this for both roles.
Then we create the new users via Users → Add User.
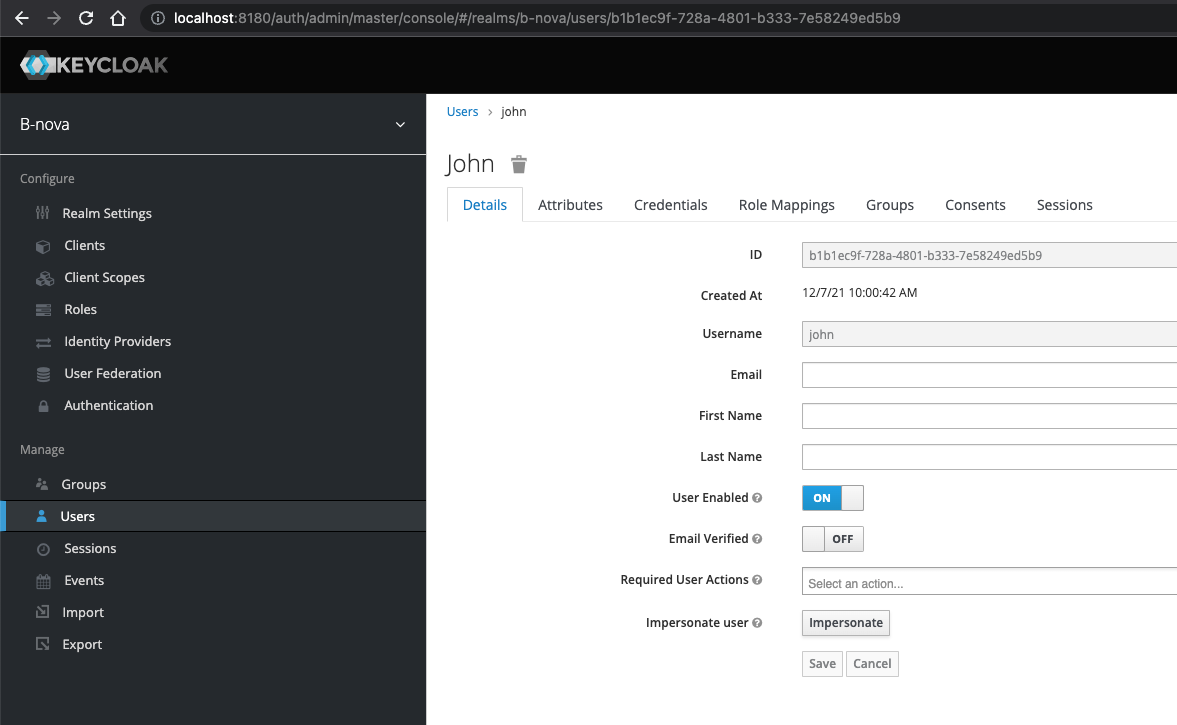
We now have to assign the role to the users and assign a password. To do this, we first go to the “Role Mappings” tab, select the relevant roles and click on “Add selected”. Then we go to the “Credentials” tab and assign a password for the user here. I just used the username as the password here. The “Temporary” flag can be removed. By activating this flag, you can force the user to change their password after the first login.
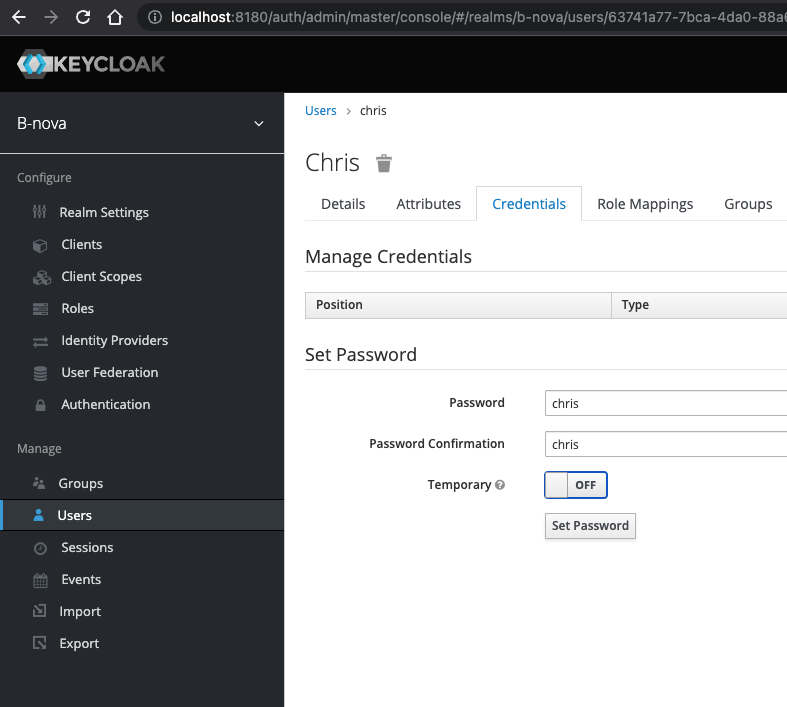
When we have created all users, we should see the following entries under the “Users” menu item: (click “View all users”, if the table stays empty).
We are now finished configuring Keycloak and now take care of our frontend and backend.
Angular
Let’s look at the Angular configurations first? First we have to install the Keycloak libraries there.
So we go to the /src/main/ui folder and enter the following command.
|
|
After the installation we still have to import and configure the Keycloak module. To do this, we add the following information to the app.module.ts.
|
|
In the initOptions we also specify the option onLoad: 'login-required'.
This ensures that the page can only be accessed with authentication.
If we now call up the page, we should no longer see the application, but the Keycloak login window.
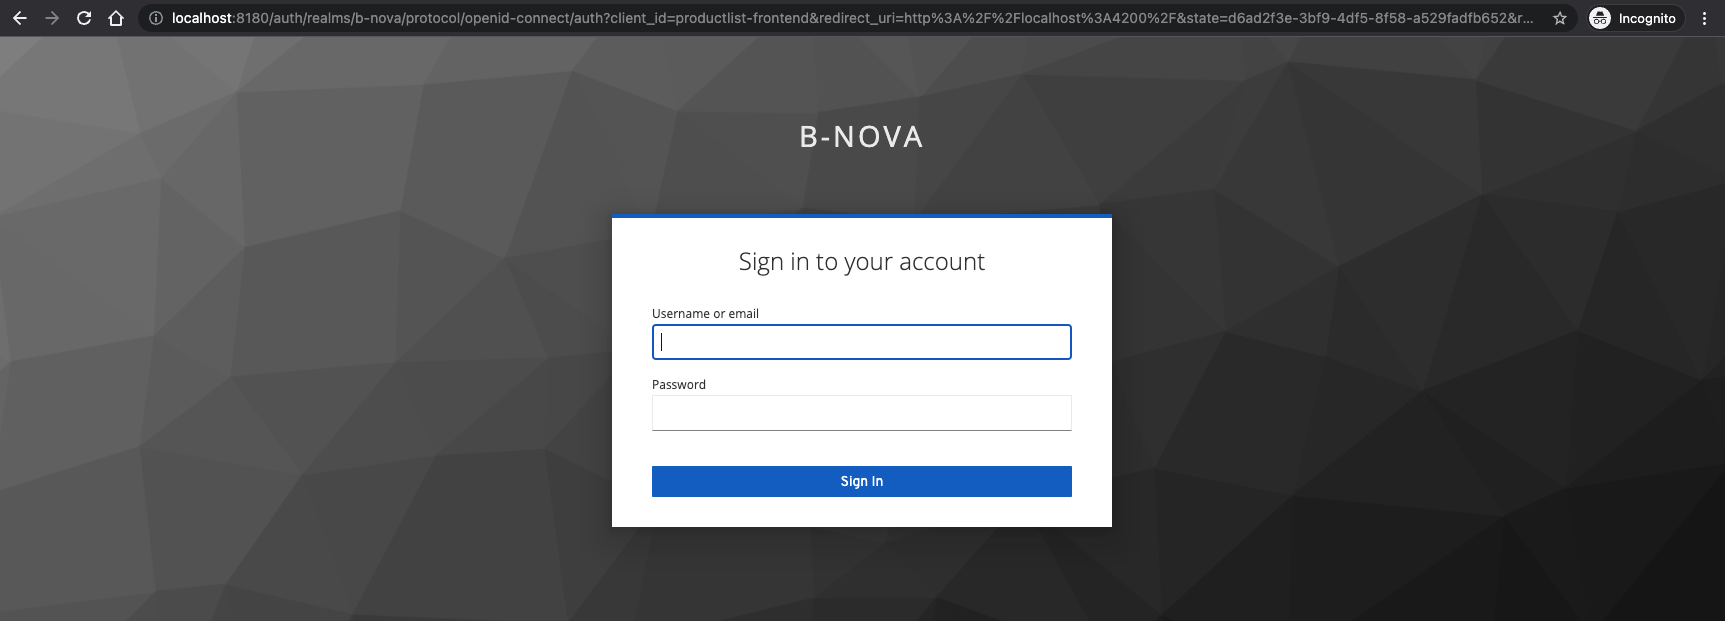
We can now log in here with the corresponding login data and should then see our application again. But what exactly happened now? Let’s take a closer look at the request we make after logging-in in the browser console.

We see that the first call always goes against Keycloak. Our cookies are checked and replaced there and then a redirect to our application takes place. All authentication is done using the Authorization Code Flow. This ensures that we receive a JWT token with which we can authenticate ourselves for further requests. Let’s take a look at what exactly is in our JWT token. To do this, we first need to modify our application a bit so that we can make a call to the Keycloak API.
We add the app.component.ts as follows.
So in OnInit we simply make a call to Keycloak to load the user profile.
|
|
If we then look at the browser console again, we see that there is a new request against the account interface from Keycloak.
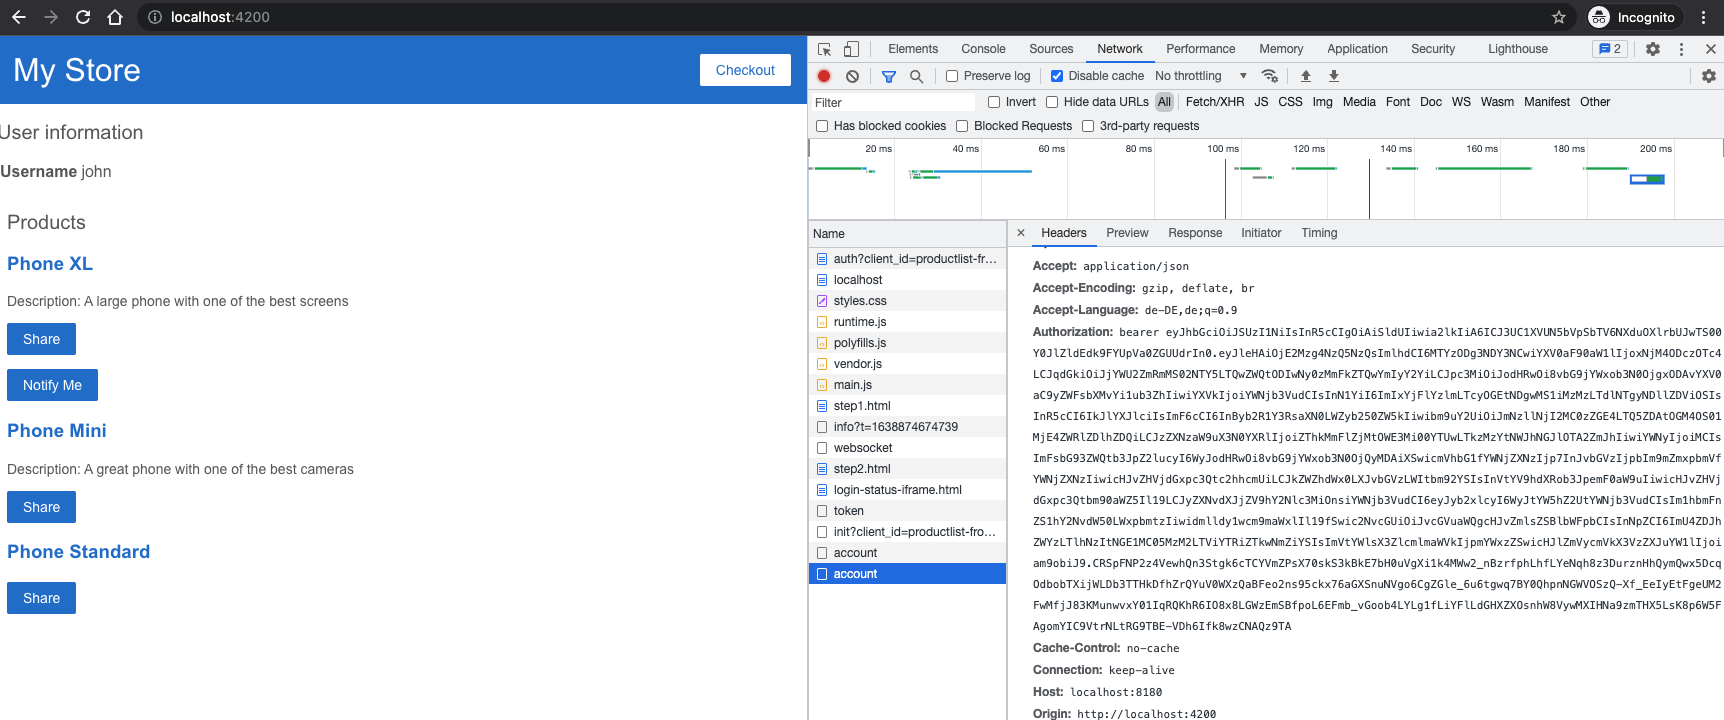
This request is made with an authentication header containing the JWT token. If we copy this JWT token once and enter http://jwt.io, then we can see all the information that is stored in it.
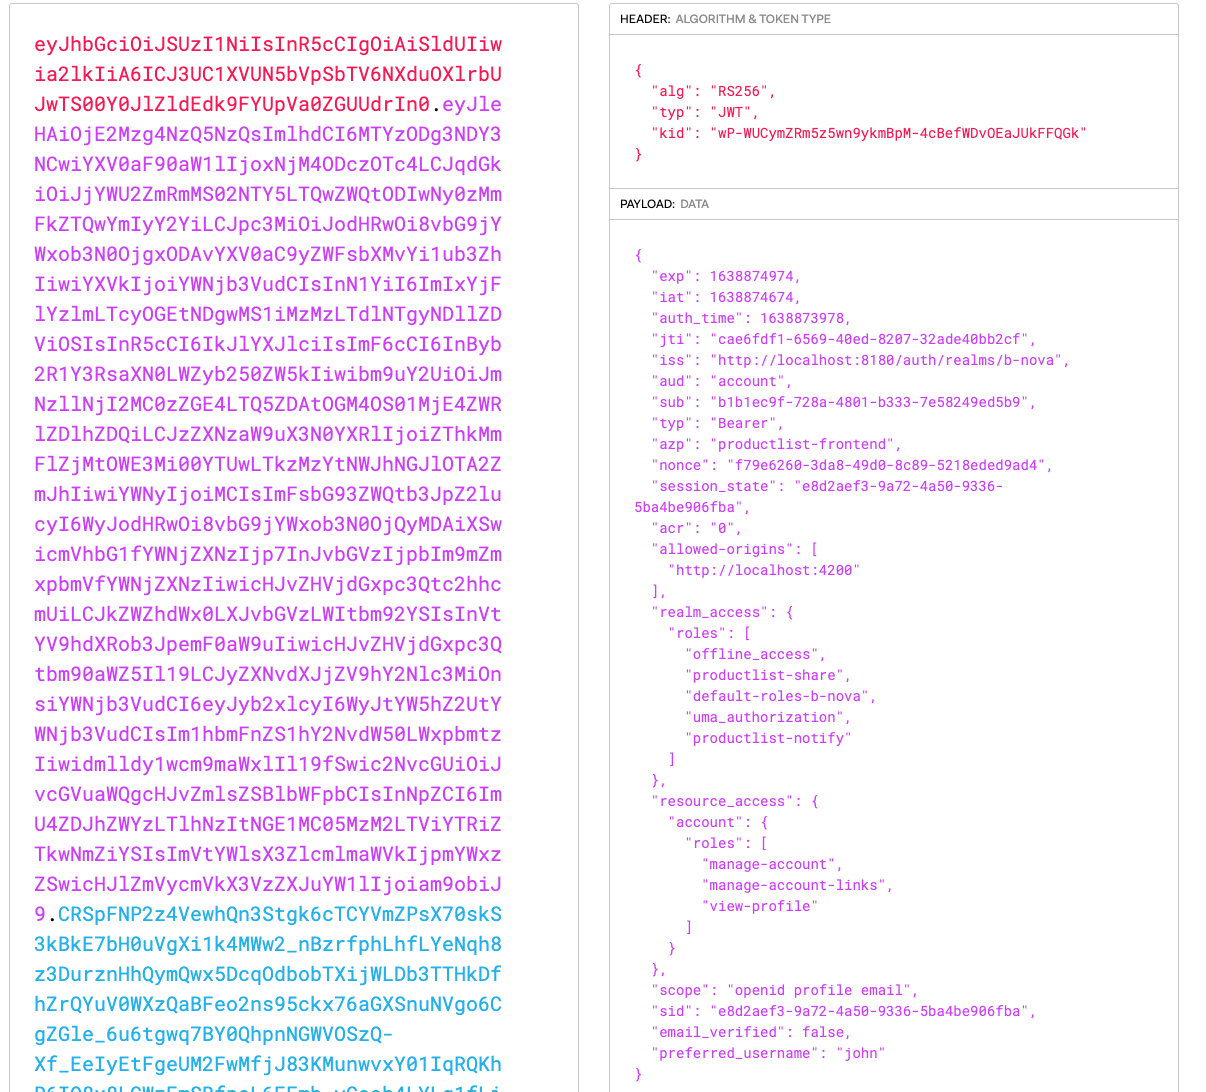
We can see that in addition to the username, the roles are also included here.
Quarkus
Now let’s take care of the backend part.
In the GreetingResource there is currently a method hello.
This can be accessed by anyone.
Let’s create a few additional methods that can only be called by authenticated users and also need a specific role.
|
|
Now we also have to make the OIDC configurations in our Quarkus application.
We now store the following configurations in the application.properties.
|
|
As client-id we enter the backend client (productlist-backend), which we created above.
The only thing missing is the secret.
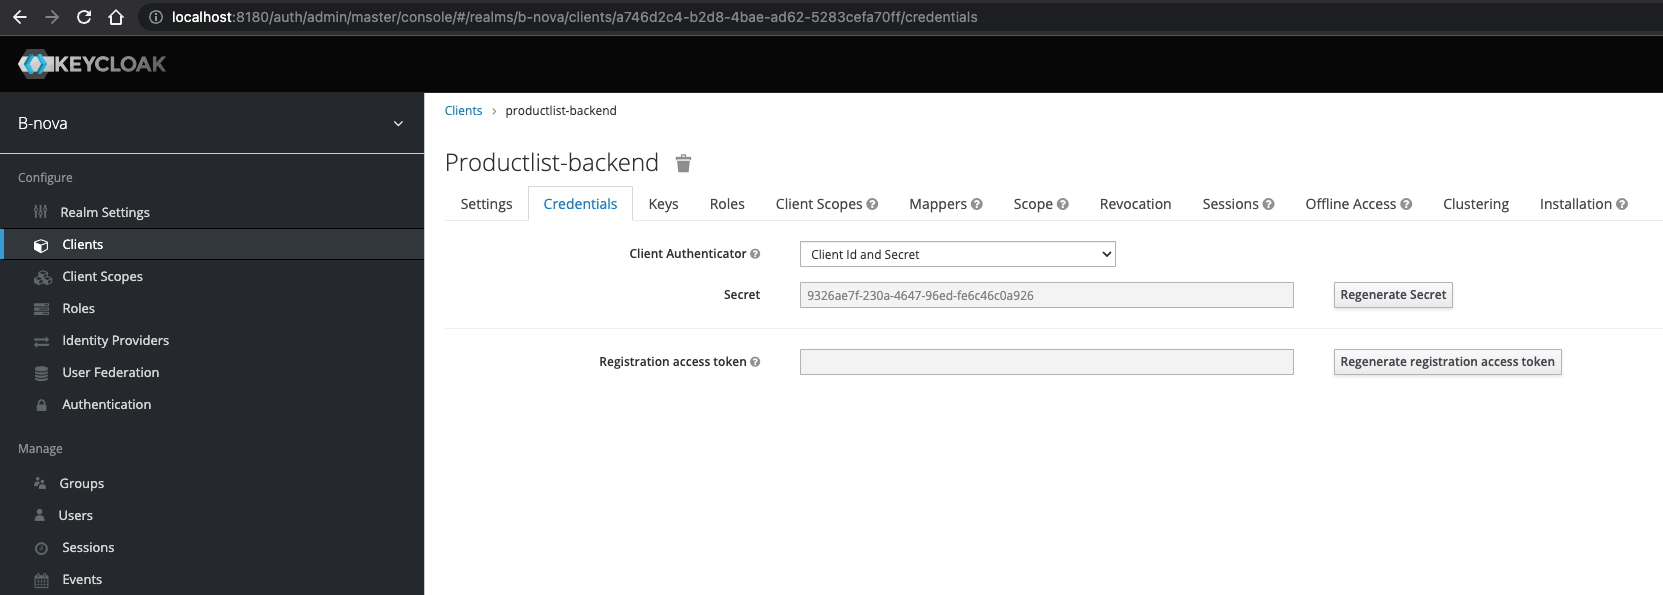
We get this when we go back to the Keycloak admin console and go to the “Credentials” tab in our backend client.
Here we see a secret, which we copy and paste as a secret in the application.properties.
Now we can start our Quarkus and should receive a message that we are connected to the OIDC client.

In our Angular application we still have to create the appropriate functions to be able to call the API in the backend.
So we adjust the product-list.component.ts as follows.
|
|
Of course, the HttpClientModule must also be inserted in the app.module.ts for the imports.
In the product-list.component.html we add the corresponding buttons for hello and secure.
|
|
Now we want to click on the different buttons in our Angular application and see what happens.
First, let’s log in with the user cindy.
As we saw above, Cindy is only allowed share but not notify.

As we can see, this has worked before.
Now let’s look at Chris.
He can do anything except share.

Looks good too. Lastly, John. With him, every call should be successful.

Made. All users have access as we wish.
Conclusion
Today we saw how Quarkus, Angular and Keycloak can be used to quickly and easily implement full authorization using OIDC. Of course you can configure a lot more here, so that you have the greatest possible flexibility. Keycloak, despite being a grandfather in IT, still meets the needs of a modern cloud environment.