
Finally, a New Programming Language Again
Today, I’m dedicating my time to Ballerina, an open-source, cloud-native programming language optimized for integration. The website even states:
“Ballerina is the ONLY programming language designed for integration.”
It is developed and supported by WSO2. According to the developers, Ballerina should make it possible to easily develop microservices, API endpoints and integrations, as well as any other application for the cloud. I want to take a closer look at this today and find out what the new programming language is really capable of.
But first, a few details about Ballerina. The first release of Ballerina was on May 1st, 2019. The semantics of Ballerina are not defined by the implementation, but by specifications. Currently, there is only one implementation of this specification (jBallerina) which, as the name suggests, compiles the source code into Java bytecode. However, there are supposed to be other implementations in the future. A look at the Github Page of Ballerina is also worthwhile. Here you have a pretty good overview of which modules and extensions exist around the language and also how actively it is currently being developed.
So, let’s get started. First, you need to install the Ballerina distribution for your respective system. For me as a Mac user with Homebrew, it’s quite simple:
|
|
After that, I can already start with my first experiment. Visual Studio Code is a good choice for development. There is a nice Extension here, which, in addition to the usual syntax highlighting and code completion, also provides a corresponding Dev Container if we want it. There is also a UI with which we can display the code as a kind of sequence diagram (service diagram) and also edit the code via the diagram. There is also an HTTP and a GraphQL API designer.
But now let’s turn to the first example and start with a simple “Hello World” example. We can create this with the following command:
|
|
Let’s look at the structure of the project. To do this, we open the project in Visual Studio Code.
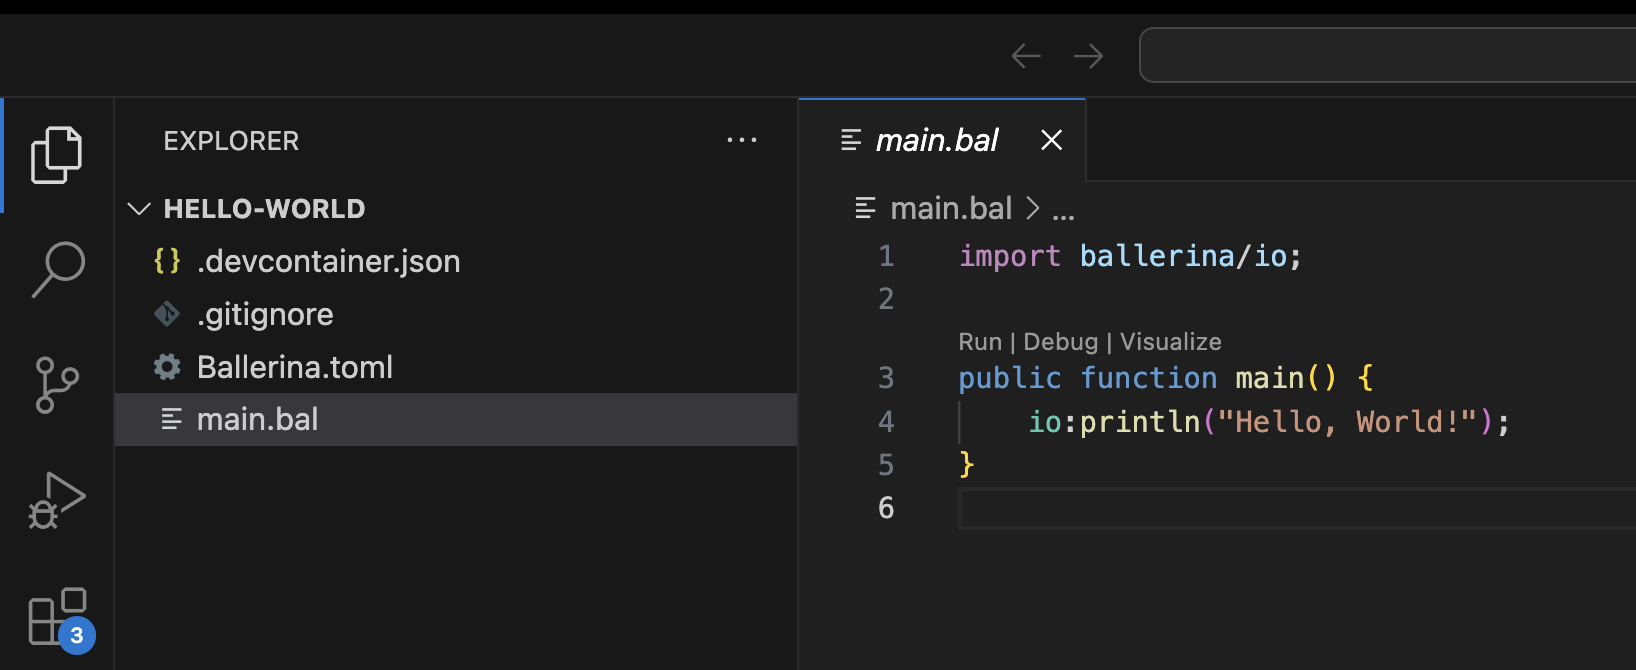
There is the file Ballerina.toml which contains various metadata. In addition, a .gitignore and a .devcontainer.json file were created, with which we can start the DevContainer, as mentioned above. For us, however, only the file main.bal is important for now, in which we can write our code.
From the syntax, we see that the language looks like a mixture of Java and Go. As we can see, there are now 3 “buttons” above the main() method that we can click. So let’s first run the application by clicking on “Run”.
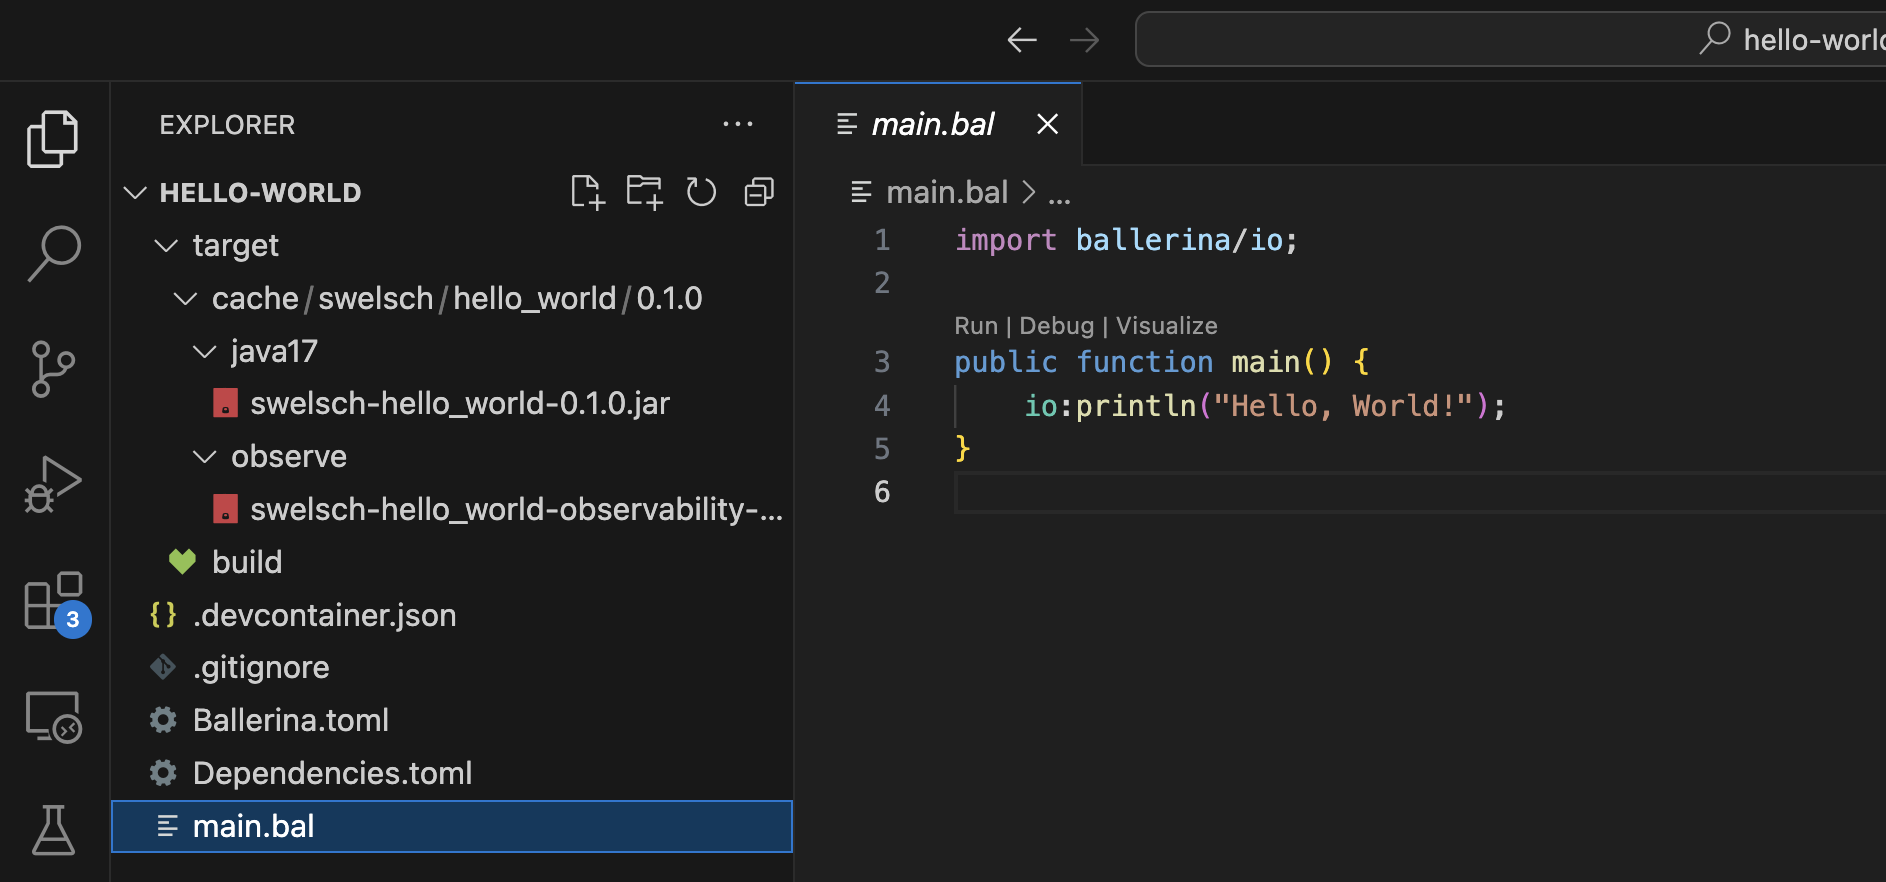
Now we are less interested in what happens in the output, but rather what exactly happens when we click on Run. In the target folder, we see, as mentioned above, that the source has been compiled into a Java application. In the output, we naturally see a “Hello, World!”.
Ok, let’s go one step further and try to call an HTTP API. For this, Ballerina offers us the http module.
So we change our code in the main.bal as follows.
|
|
With the code, we want to search for dog breeds at the Dog API. You can create a free API key there if you want to play with it.
In line 3, we create an HTTP listener that is bound to port 9090. So when our application is started, we can call it on port 9090. This is essentially our server.
On line 5, we then register a GET endpoint that listens on the path breeds. As a return value, we expect either a json or an error if there is a problem calling the Dog API.
In line 6, we create an HTTP client that can communicate with the Dog API endpoint.
[!NOTE]
The check keyword saves us the error handling in Ballerina. Instead, we simply throw the error to the calling method or block. Alternatively, we could also do the following to handle the error immediately.
1 2 3 4http:Client|http:ClientError jcClient = new ("https://api.thedogapi.com/"); if jcClient is error { // handle error here }
Lines 7-9 simply create the header that we need to send to the Dog API endpoint for authentication.
On line 11, we now execute the request against the Dog API. With 'limit we specify a query parameter that tells the service how many results we expect back, and additionally we also include the api-key header. As a response, we expect a json, which we return to the calling client.
We can now start our program with the following command:
|
|
Now we open a second terminal and test our newly created endpoint.
|
|
As we can see, we get 3 results back from our service as expected.
Now we want to store the names and life expectancy of the animals in a database. We use a serverless AWS DynamoDB database internally, and fortunately, Ballerina already provides us with a corresponding extension. But before we store the values in the DB, we first want to store them in a specific type. Ballerina also offers us a type very similar to golang for this purpose. So we extend our main.bal file with the following content:
|
|
So we no longer store the response from the web service in a generic response, but in a so-called Record. This is a so-called open record. We’ll see what that is in a moment.
If we now start our program and again execute a curl on the endpoint breeds, we surprisingly get the same result as before:
|
|
Not quite, because if you look closely, you’ll notice that the order of the attributes has changed. First come the attributes that were defined in the record, and then all the others that the API returns to us. Now here comes the open record mentioned above into play. It simply includes additional attributes as type any. If we had defined a closed record, we would have gotten an error here because there are attributes that cannot be mapped. A closed record is defined like an open record, but there is a pipe after the curly brace
|
|
The response from the service would then have been the following:
|
|
Ok, let’s take care of writing to the database. For this, we create a new file dynamob.bal in which we want to encapsulate our logic for writing to the database.
|
|
[!NOTE]
Unfortunately, there is currently no way to use a “local” DynamoDB. In the code of the Dynamodb client, the AWS host is set fixed.
1 2 3 4 5 6 7 8 9 10 11public isolated function init(ConnectionConfig config) returns error? { self.accessKeyId = config.awsCredentials.accessKeyId; self.secretAccessKey = config.awsCredentials.secretAccessKey; self.securityToken = config.awsCredentials?.securityToken; self.region = config.region; self.awsHost = AWS_SERVICE + DOT + self.region + DOT + AWS_HOST; string endpoint = HTTPS + self.awsHost; http:ClientConfiguration httpClientConfig = check config:constructHTTPClientConfig(config); self.awsDynamoDb = check new (endpoint, httpClientConfig); }
Ok, let’s take a look at what’s happening here. In lines 4-12, the DynamoDB client is created with the required data. I simply pulled these as environment variables, since I use tlr.dev in the setup. A tool that I can really recommend if you want to manage secrets for local development. I also wrote a corresponding Techup about it almost 2 years ago.
Then, in lines 15-29, we implement our method for storing the dog breed. I think the code is self-explanatory, so I’ll spare you the explanation at this point :-).
In the main.bal, we now simply call the new method
|
|
That’s it. We now have a complete application that writes data from a web service to a DynamoDB. Code-wise, I find it very simple and intuitive to understand.
Ballerina Visual Studio Code UI
But let’s take a look at another highlight that I already mentioned above. The Visual Studio Code extension comes with a UI, which we want to take a quick look at now.
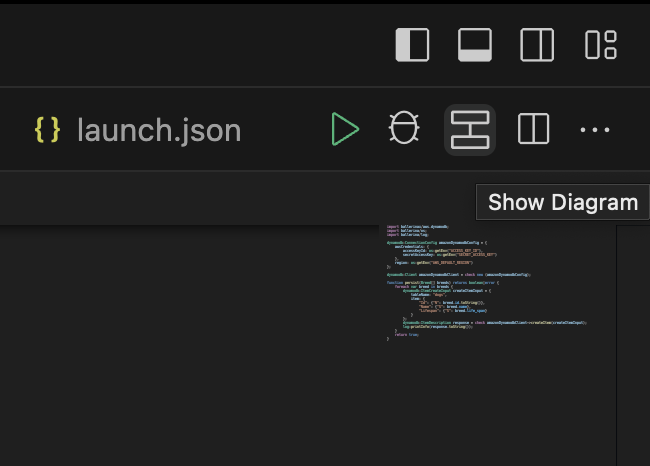
In the upper right corner, there is a symbol with which we can display the diagram. When you click on it, an overview of all components opens first.
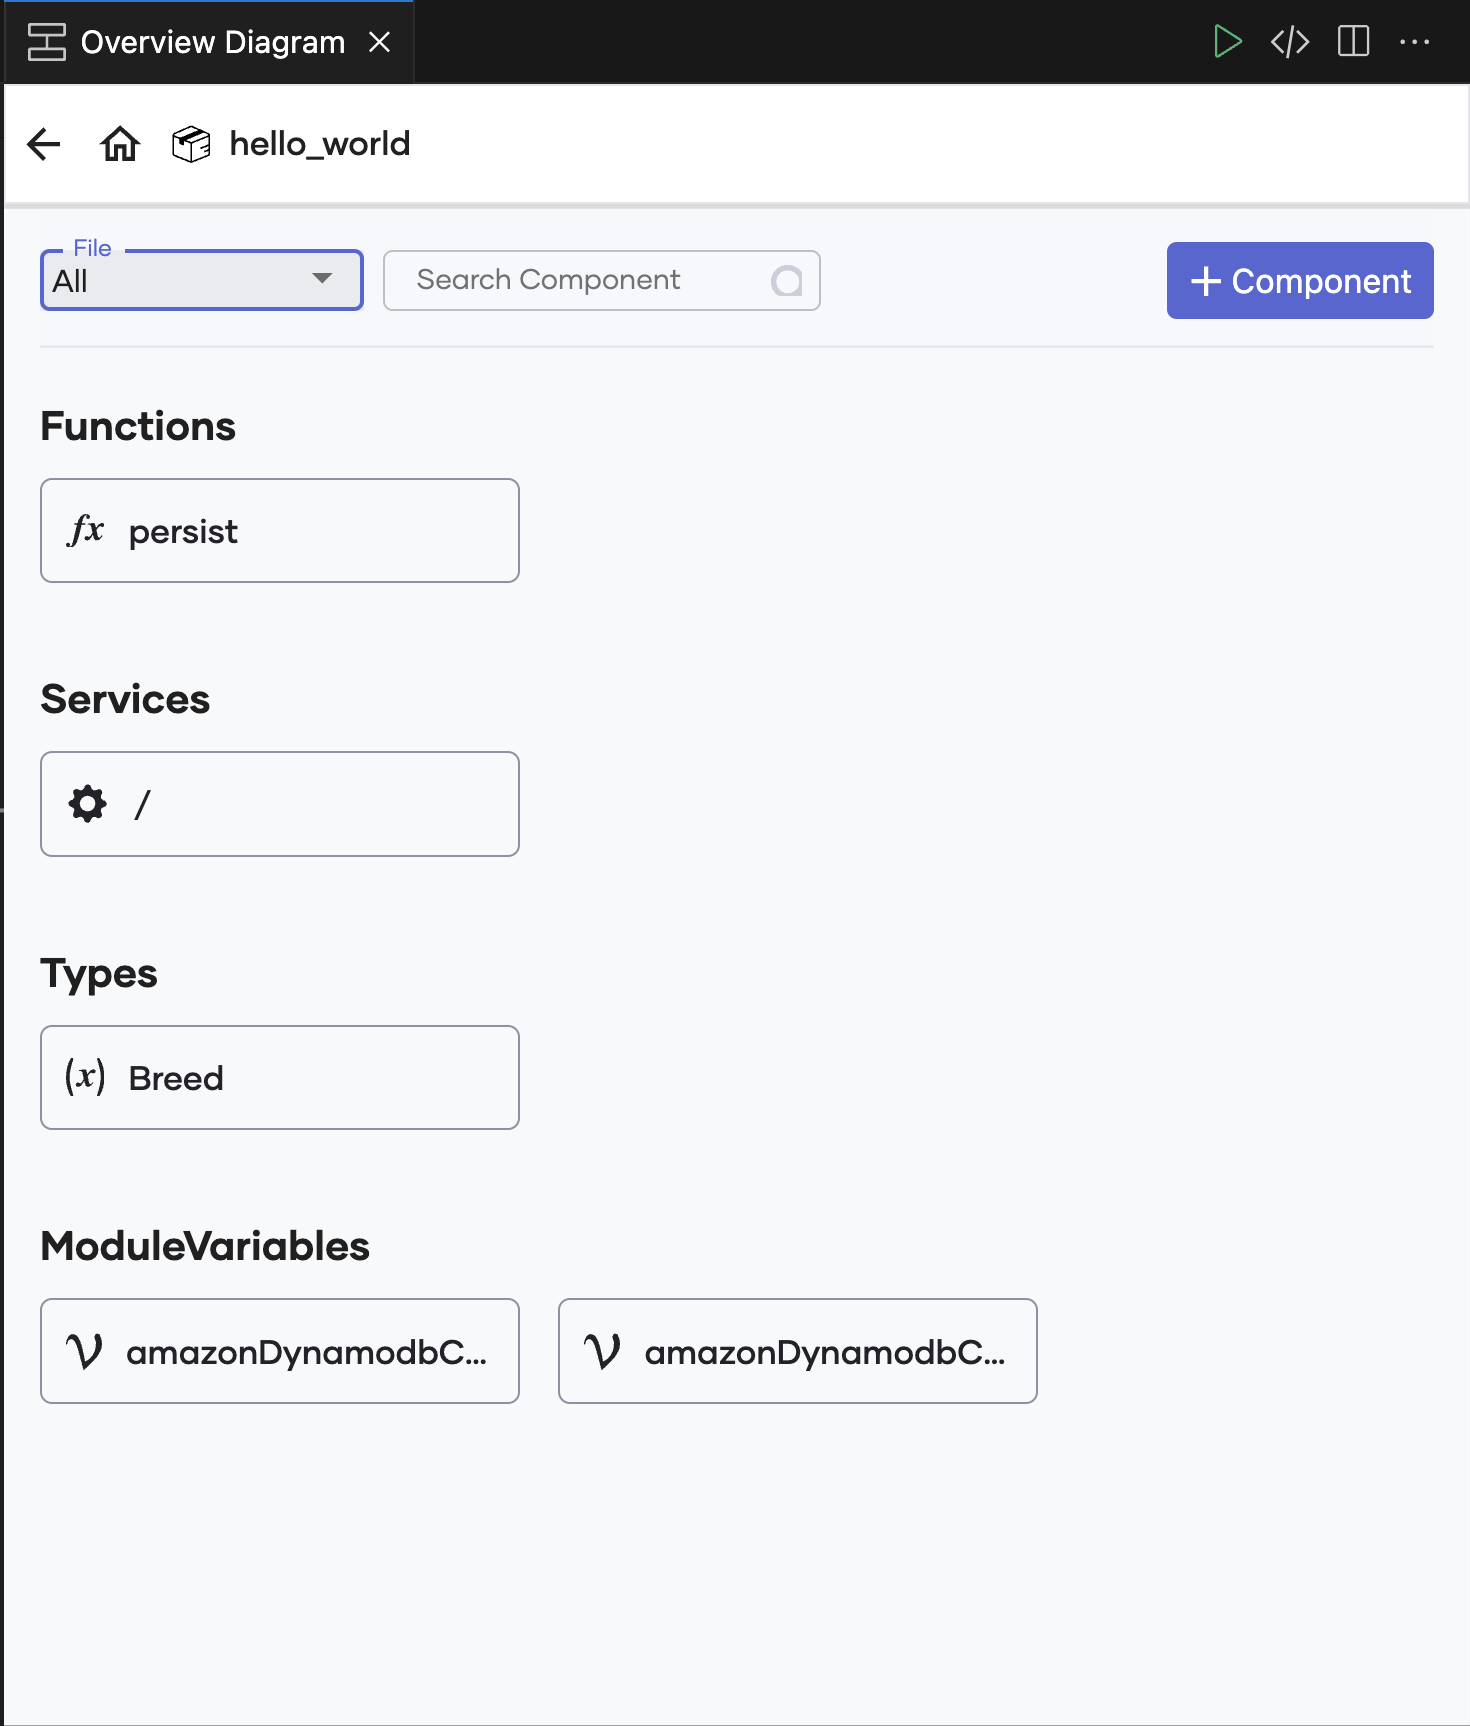
We can now take a closer look at the corresponding component by clicking on it and even edit it via the UI. Let’s take a closer look at the function.
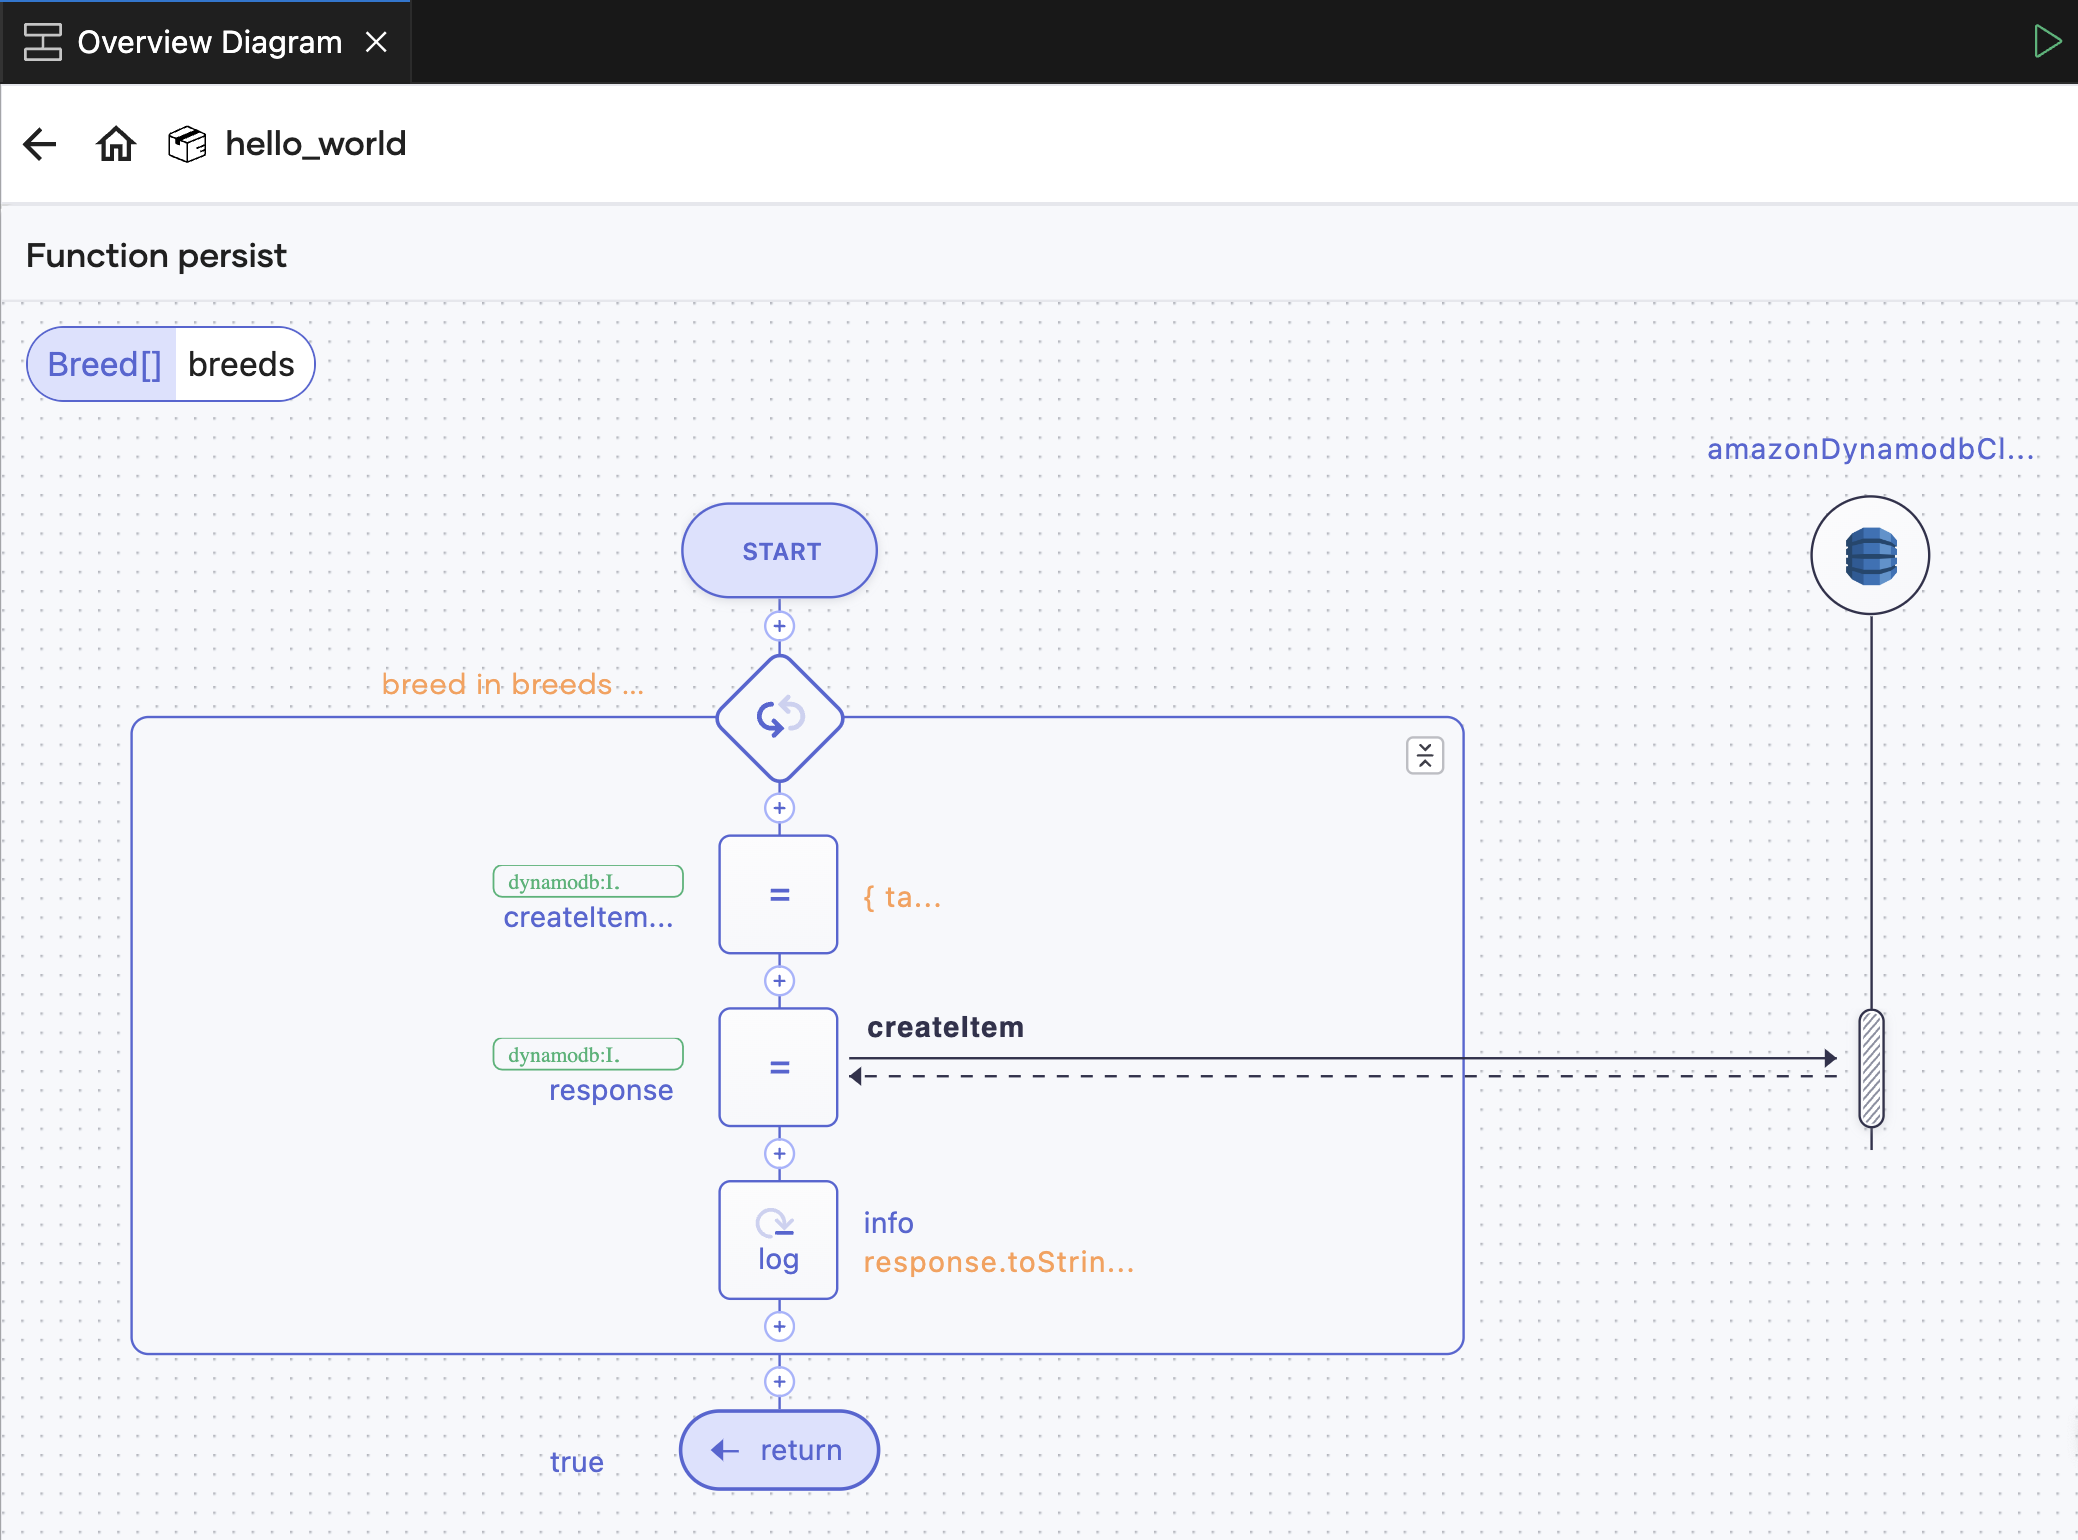
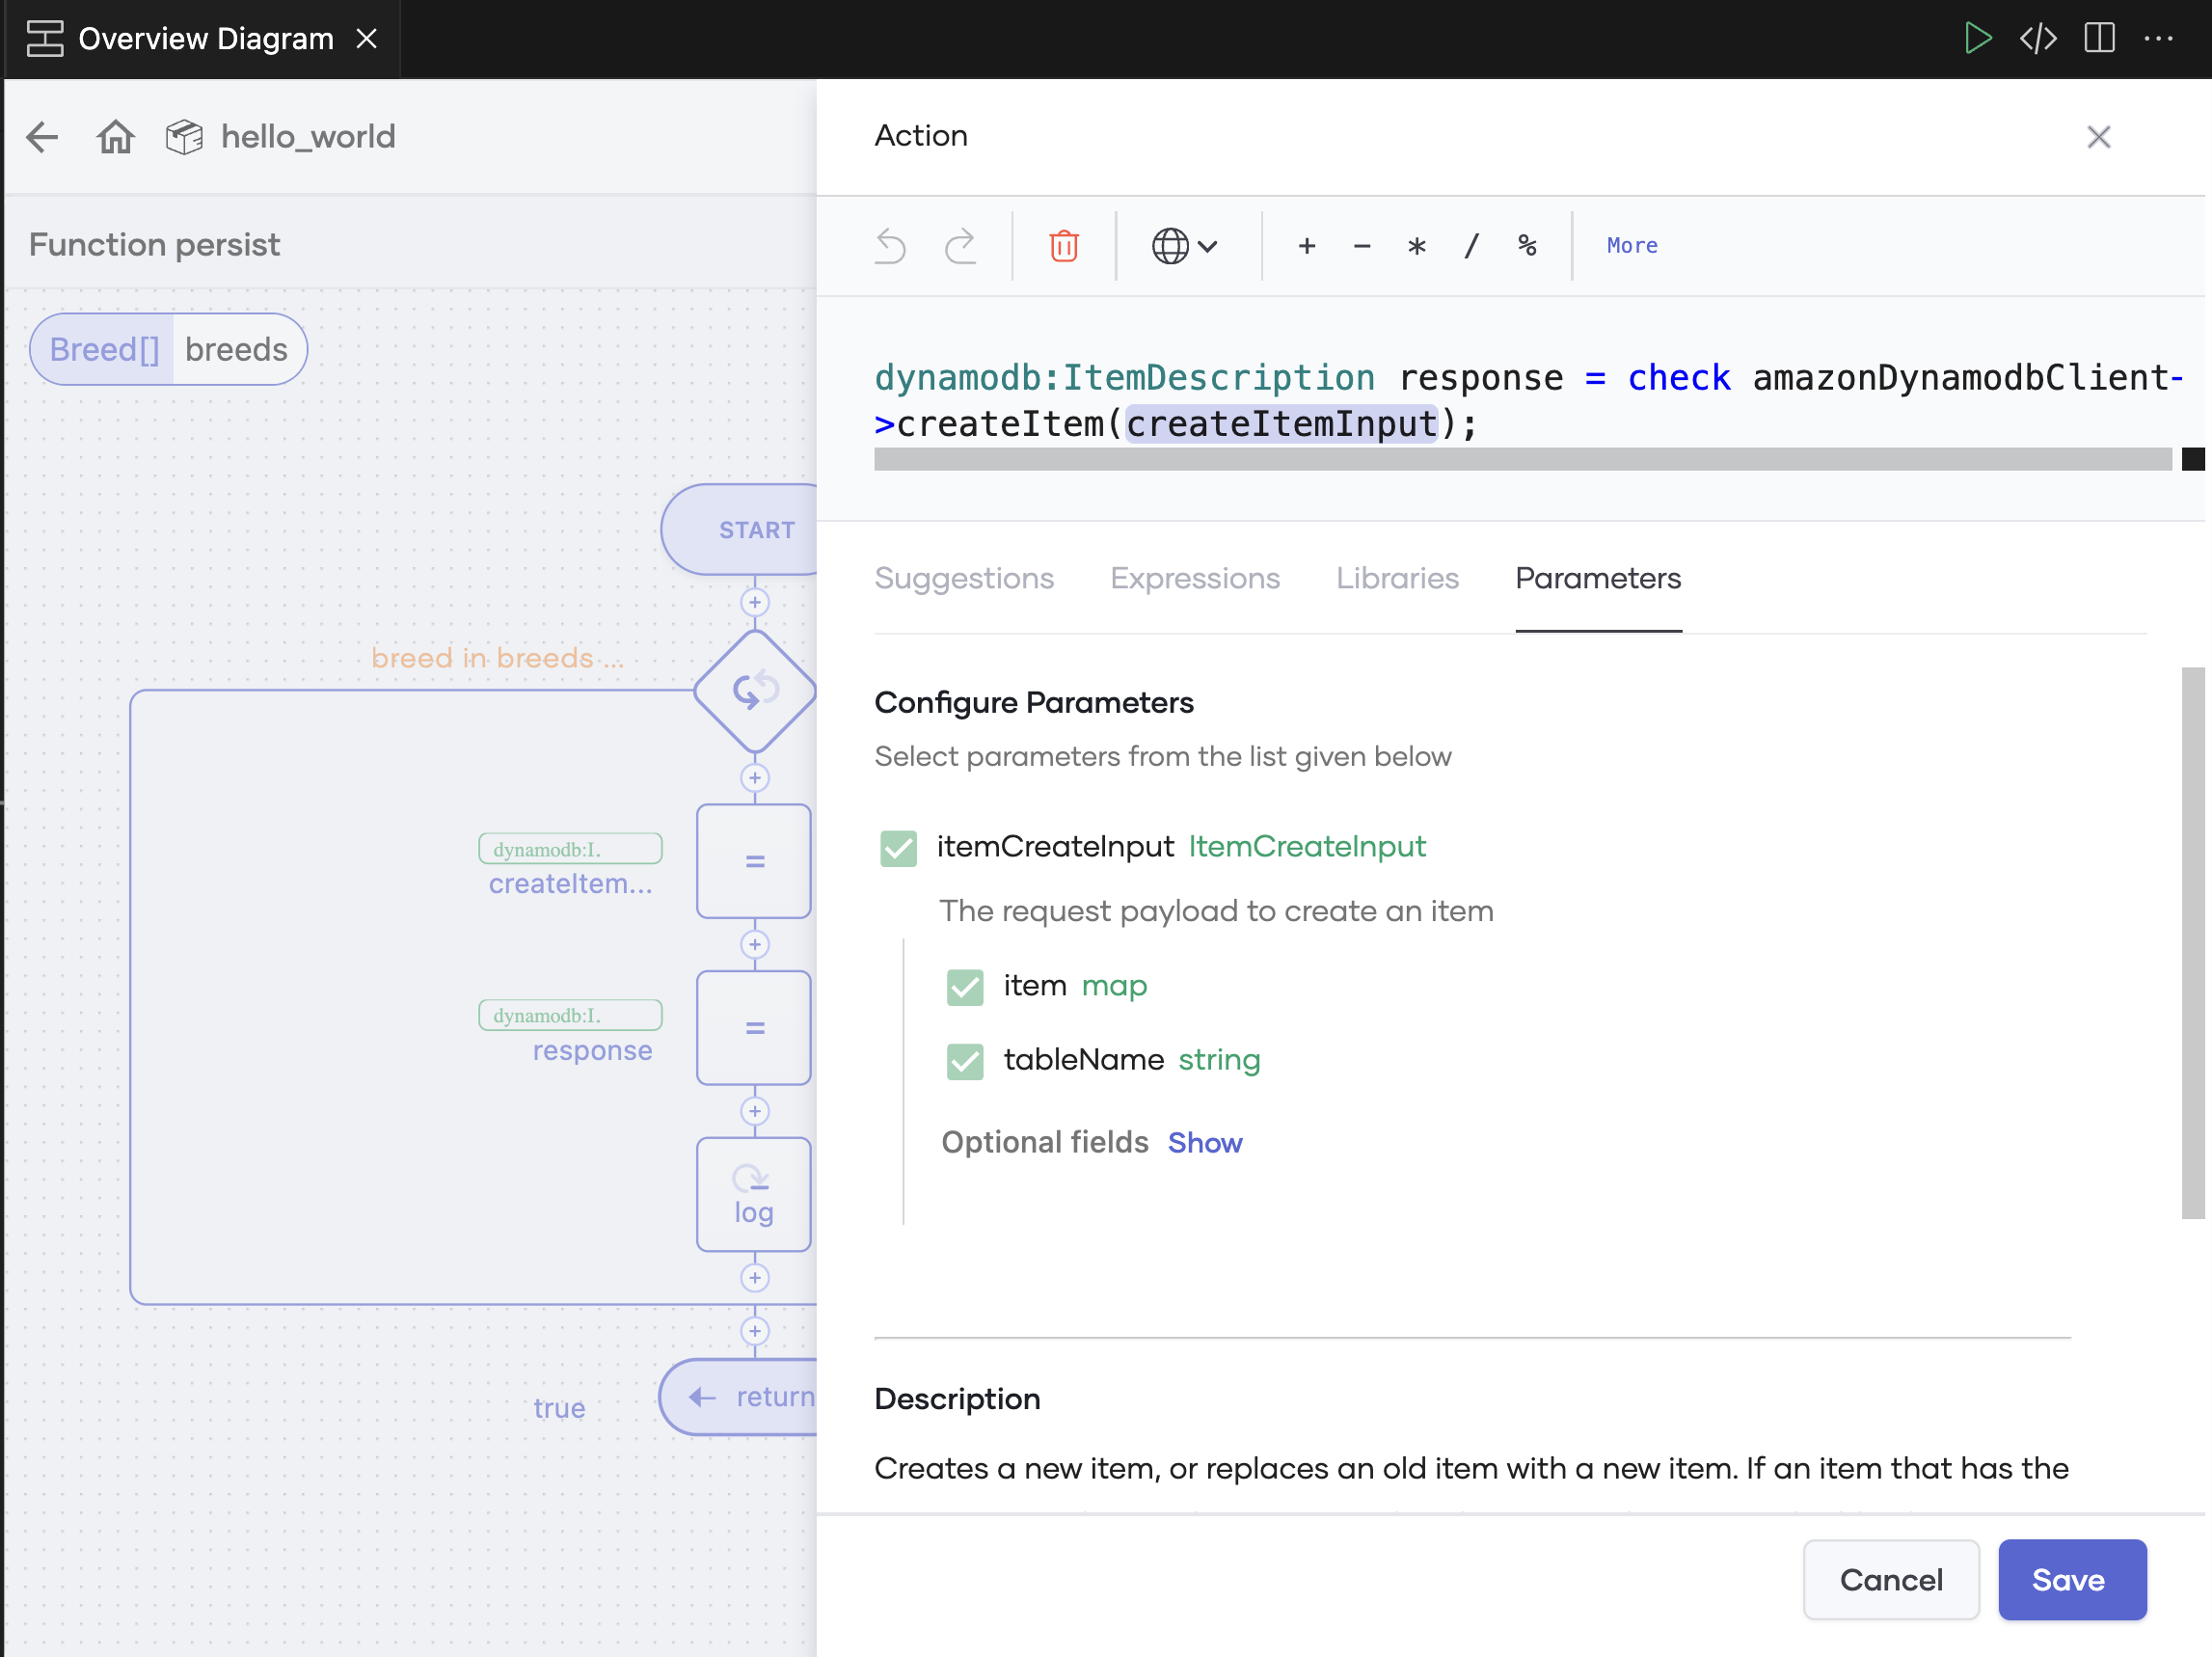
We see in the representation what exactly happens in the persist function in terms of the process flow. This way, you always have a nice visual representation of the written code and can also see when the communication with the DynamoDB happens. We can now click on one of the boxes to edit the code directly. When we click on the box in the middle, i.e. where “createItem” is called, we see the following window:
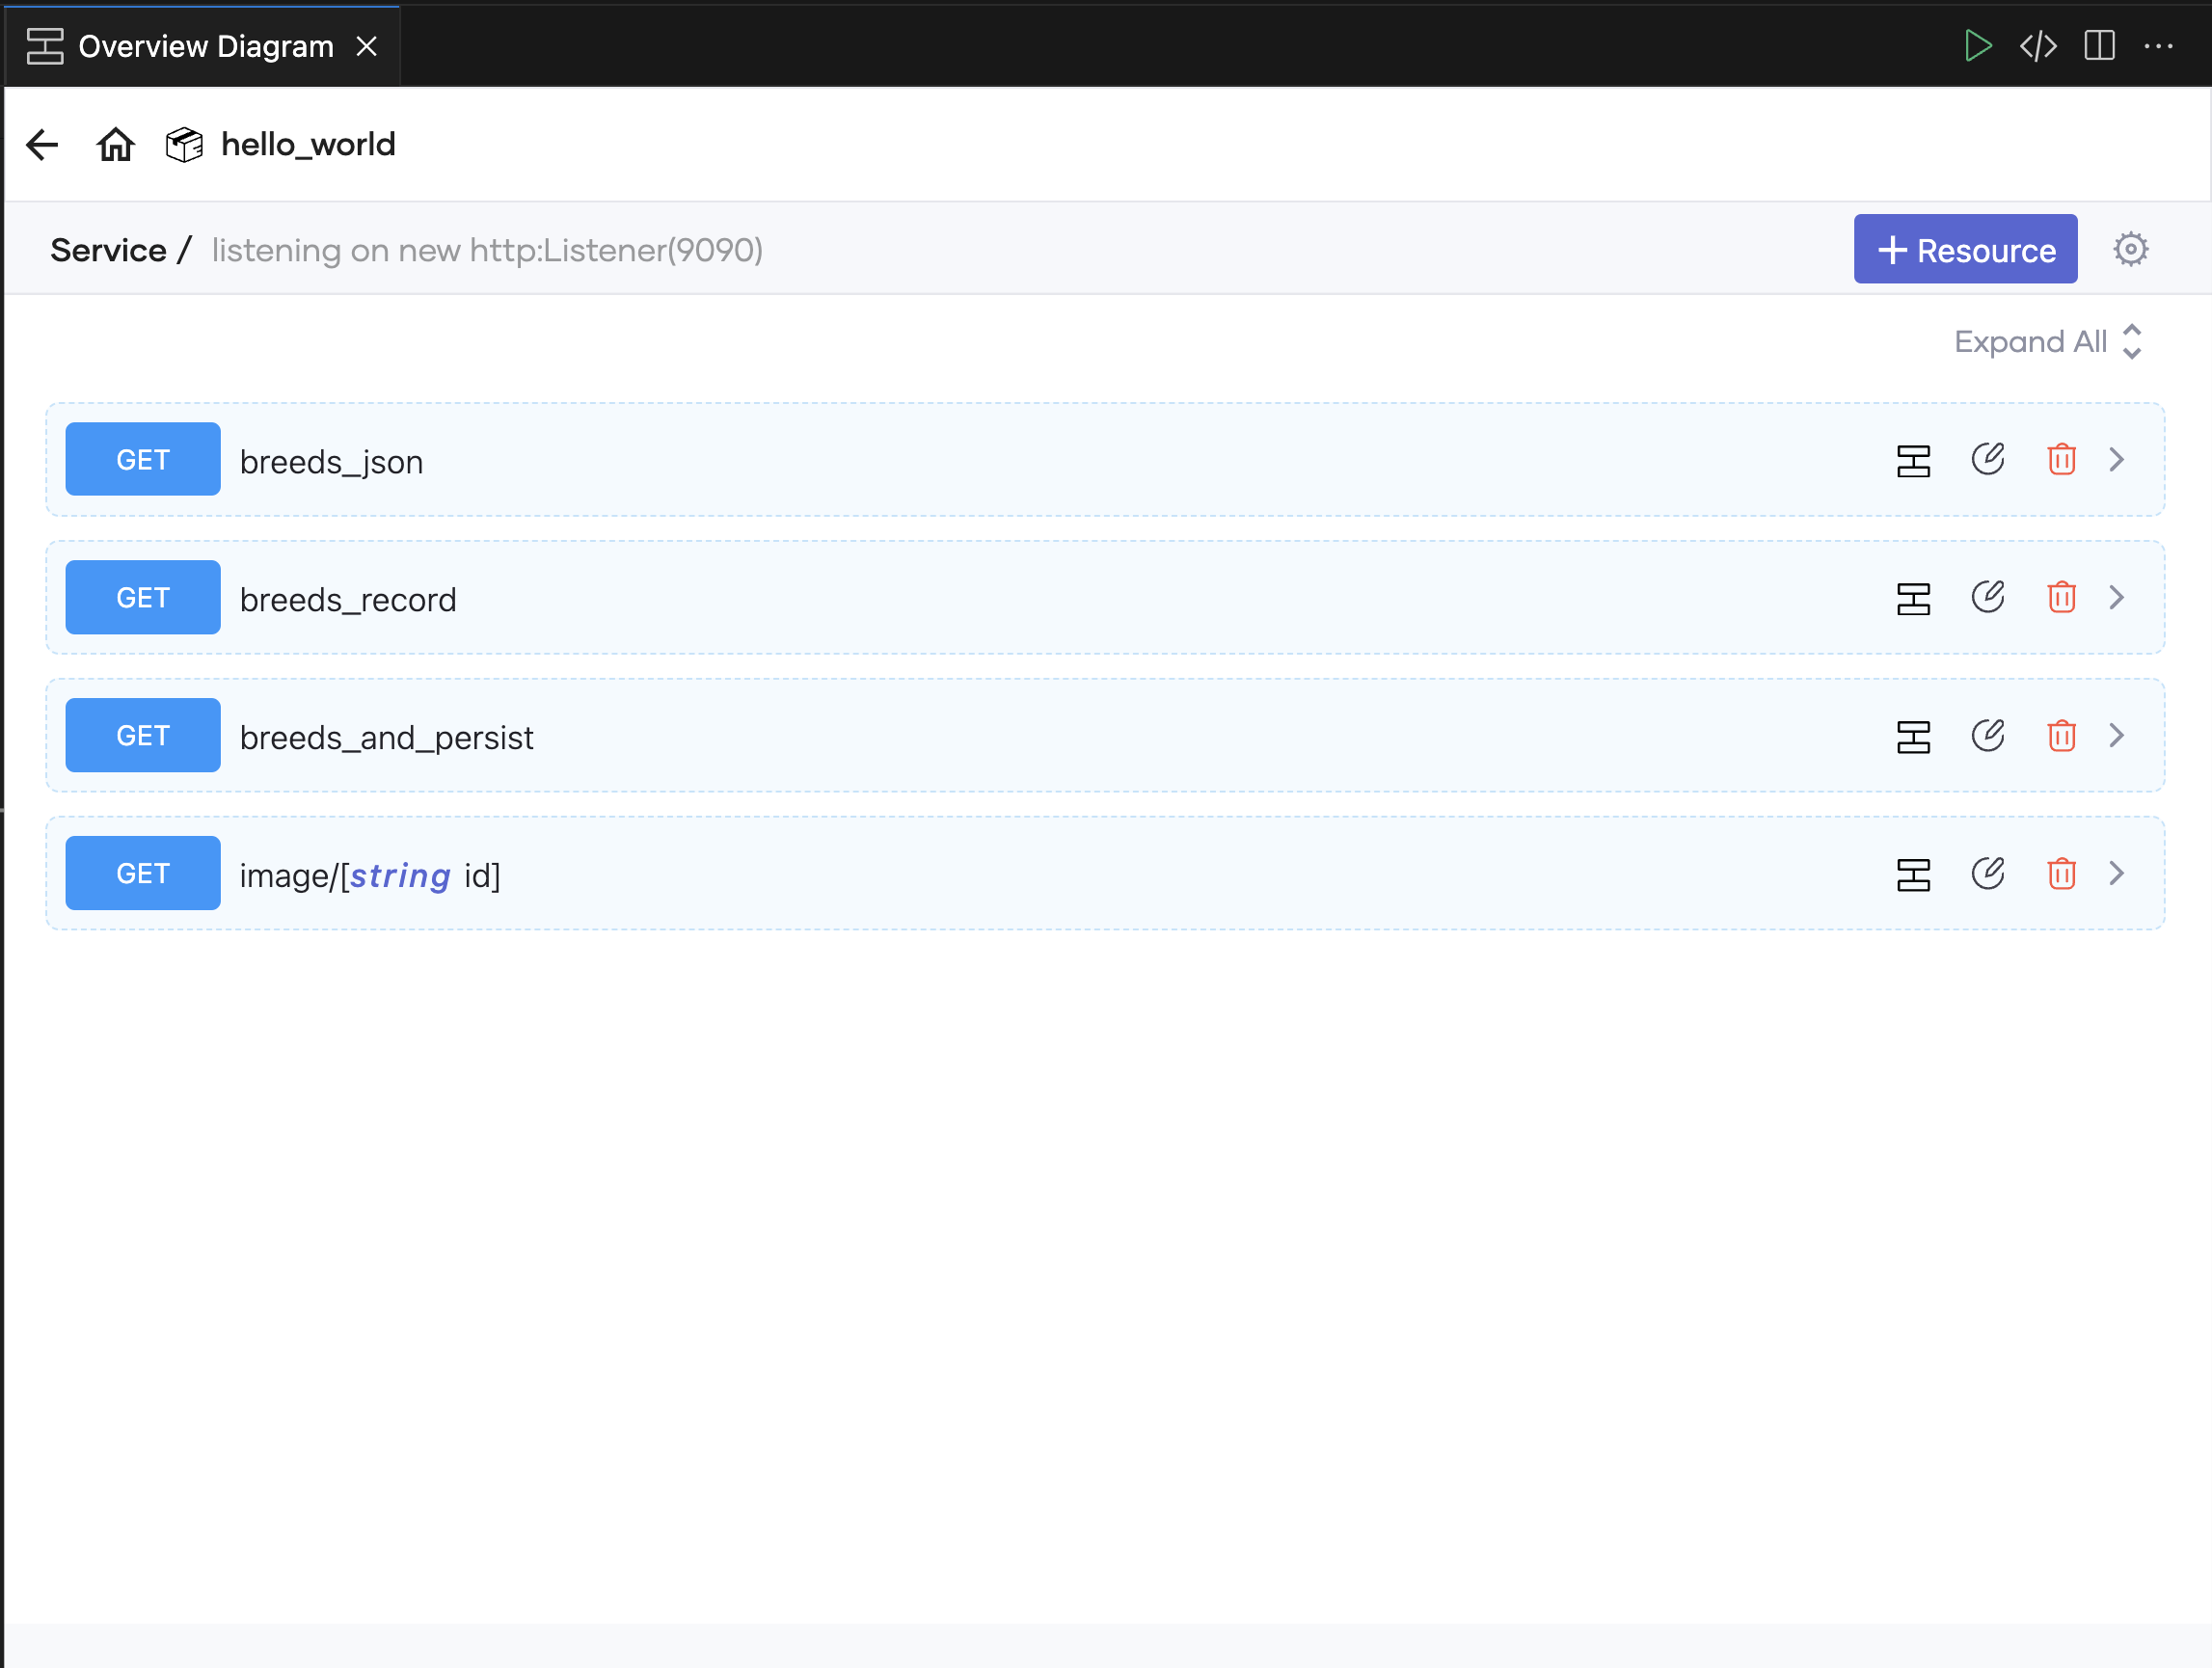
Let’s also take a look at the service. By clicking on the house in the upper left corner, we get back to the component overview. There we now click on the service / and see all endpoints that are registered in our application. I have created several endpoints for testing, so I have 4 endpoints in my view.
The UI feature is quite nice, but as a code enthusiast, I still prefer it in text form. I always find clicking around very tedious, and in my opinion, you’re also much faster when you write “good old code”. In this sense, greetings to all NoCode and LowCode enthusiasts ;-)
Conclusion
How will b-nova continue with Ballerina? Well, we will try out different scenarios with Ballerina in a half-day hackathon, as it is really exciting, especially for small projects. Also exciting for us is what a CI/CD pipeline with Ballerina looks like and how the application performs under load. So if you want to learn more about Ballerina, you will definitely be able to learn one or two things from us, so “Stay Tuned :rocket: “!
You can find the entire project in our Techup Github.
This techup has been translated automatically by Gemini