We at b-nova use the well-known Slack for our internal communication. Slack is not only good for direct exchange, but can also coordinate work and inform you about current statuses via a structured administration with the help of channels and features. For example, status messages from an ongoing CI / CD pipeline are automatically and centrally displayed in a single app or specific alerts are triggered to the relevant target groups. Nevertheless, certain inputs are necessary by hand and often require short-term, intensive copy / pasting sessions. This gave me the idea to automate these recurring, repetitive tasks with a Slackbot. After a short search I came across a Guide, which provides a Slackbot on Heroku with the help of Kotlin and Kotr. Kotlin is ideally suited for this and has therefore simply written a slackbot with it. Here I’ll show you how to do it.
The requirements for the bot
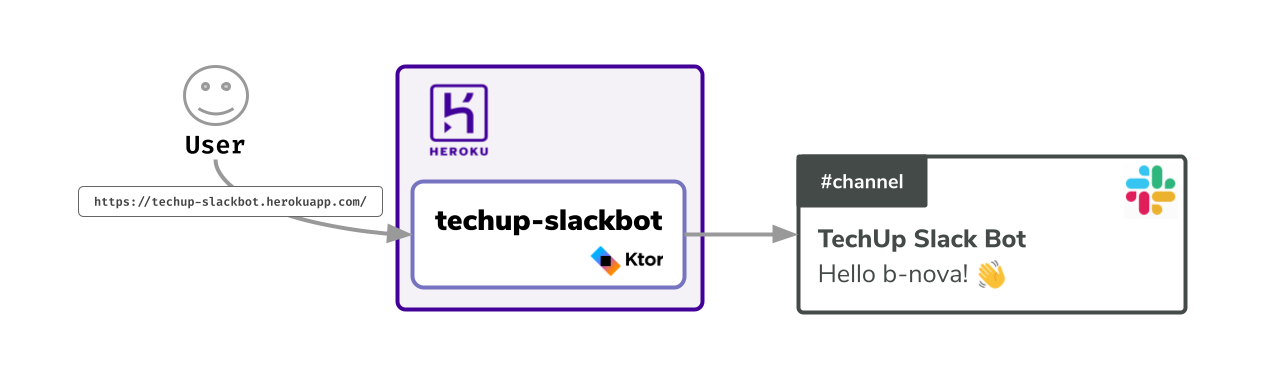
The bot is very simple. It provides a GET endpoint as a web service. As soon as this is called, a message is triggered in a defined channel on Slack. This scenario can then be adapted and configured as required in a second step. The main focus here is how to expose such a bot with a contemporary framework and how to make this bot available as an app in a cloud service as simply as possible.
In our case we chose Ktor, the Kotlin framework developed by JetBrains, and Heroku as the app provider. With Kotlin you can work with the JVM environment as usual and still write readable and maintainable code. Heroku is a popular provider that supports a variety of languages and tools and with which you can launch an application with minimal effort.
The Stack
- Slack
- Kotlin
- Kotr Framework
- Gradle w/ Kotlin DSL
- Gradle Shadow for FatJar
- Heroku
Setup
We only use JetBrains IntelliJ for development. Also make sure you have the latest version of the IDE installed. Kotlin and Kotr are both delivered by default as in-house JetBrains products with the IntelliJ IDE and do not require any additional installation with the newer versions of the IDE.
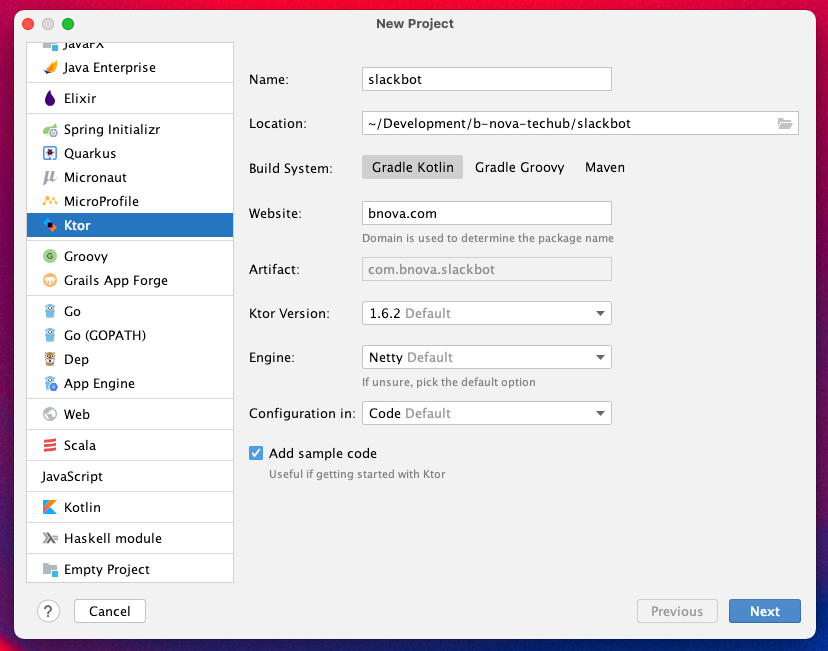
Create the Kotr project
In the New Project window, select Ktor as the framework. Here we use the version 1.6.2 of the framework.
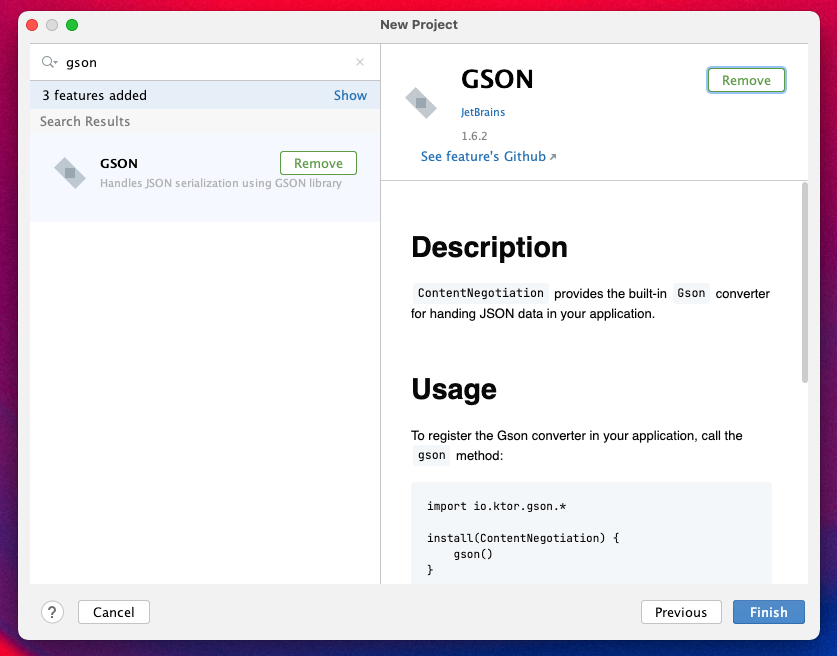
In the second window of the project creation, you should add the GSON feature to the project as a plug-in. Just search for it and add it.
Once the project is built, we’ll run a gradle run to try starting the vanilla project. By default, Kotr sets a server endpoint on port 8080.
|
|
Initially this can take a while as a DSL is still being downloaded and the Gradle daemon has to be started. When calling http://0.0.0.0:8080 a Hello World! should be output.
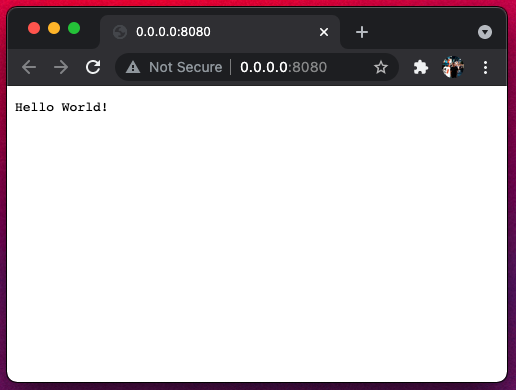
Perfect! Ktor runs and provides us with a nice Hello World! As a standard output value. So far so good. Now we can take care that Slack can recognize our application as an app.
Create the Slack app
To let Slack know that we want to connect an app to the Slack-API, we must first declare a app through Slack. To do this, you have to log into your Slack profile in your workspace of choice. It should be noted: this is only possible via the browser and not via the Slack app.
Create the app via Create an app as follows:
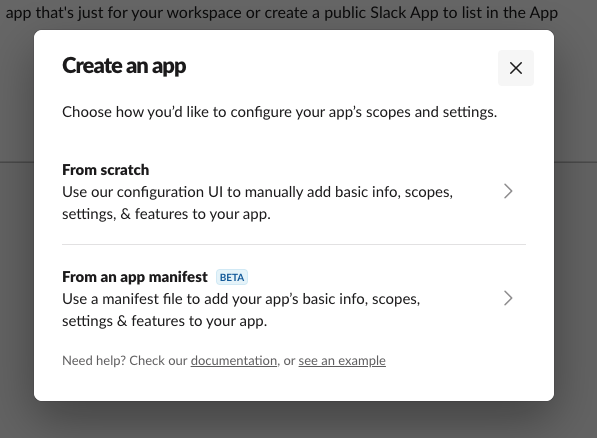
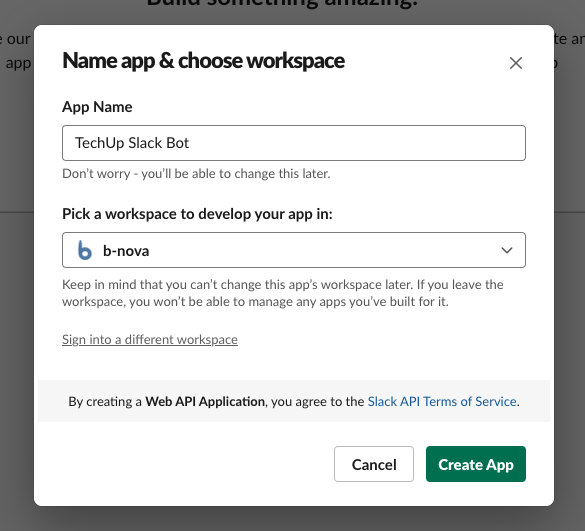
We select from scratch here and in the second creation step we come to the selection for the app name and the target workspace. In our case we chose TechUp Slack Bot as the name and our in-house _b-nova _ \ workspace. Confirm with the green button Create App.
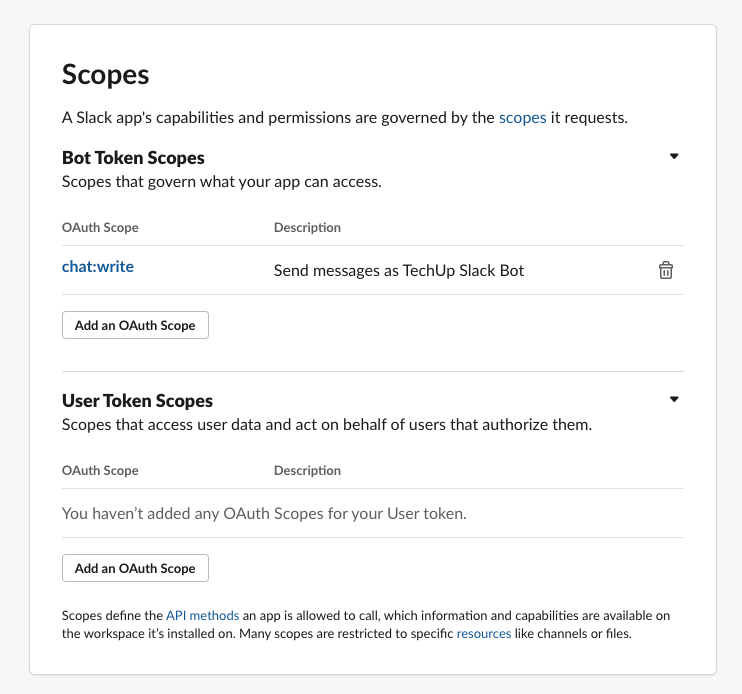
Now the Slack app is created. But we still have to make a few configurations to the app. First, we create the necessary OAuth scopes which define what our app is allowed to and cannot do. In our case, we want to make sure that the app is allowed to write messages in Slack. To do this, we add a scope via _ Add an OAuth Scope _ under the tab OAuth & Permissions> Scopes.
The desired scope is chat:write. Simply select and click.
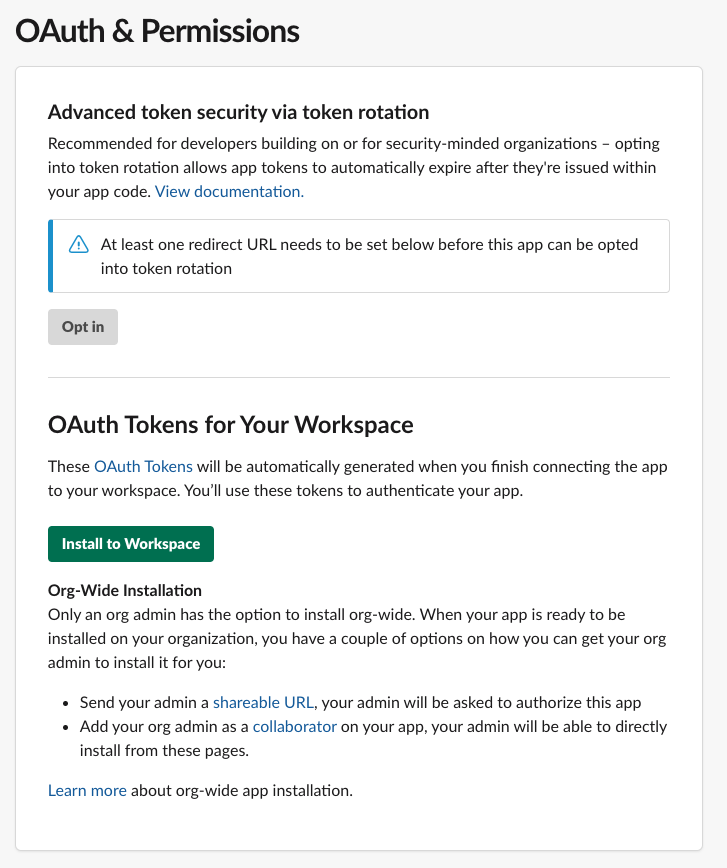
Now we have to install the desired target workspace or generate the token for the app. To do this, select the green Install to Workspace \ button under OAuth & Permissions > OAuth Tokens for Your Workspace.
You will then be asked to allow the permissions regarding Send messages. Select the green Allow \ button. Clear.
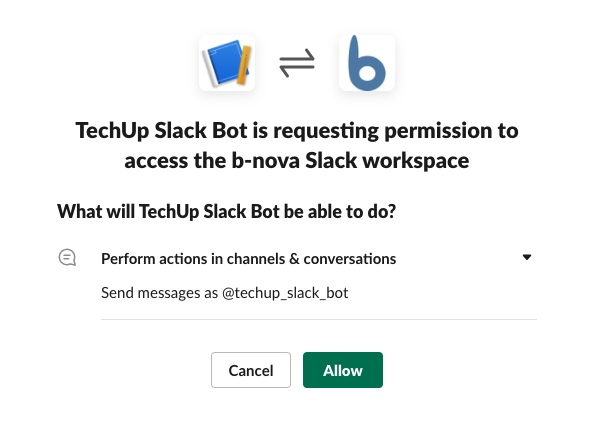
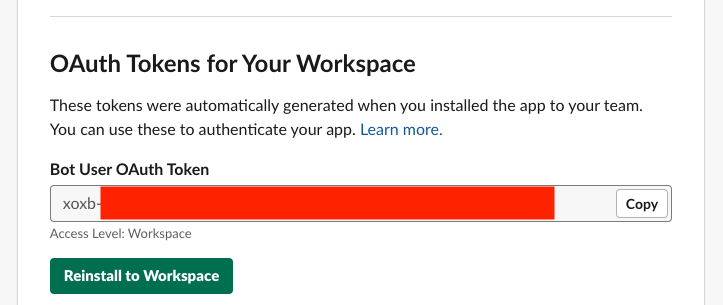
Very good. Now everything should fit. The token should now also have been generated. We need this token so that the app can identify itself when accessing Slack and its API. Please copy this token somewhere in your interlayer.
With the OAuth token for Slack in the luggage, we expand our Ktor app so that we can write a message in our desired Slack channel.
Slackbot is learning to write
We already have a main \ function in our Application.kt \ class. We are now adding a Slack write functionality to this.
The src/ \ directory should look like this.
|
|
The Application.kt is our entry point into the app.
This provides a server via 0.0.0.0. It is important here that the port is read from the environment variables, as the port on Heroku will not always be 8080. This is very easy as shown here on line 9:
|
|
The module() \ function is declared in our Routing.kt. This in turn calls the homeRoute() \ function for Routing.
|
|
The homeRoute() \ function takes over the actual functionality of writing the Hello b-nova! 👋 message.
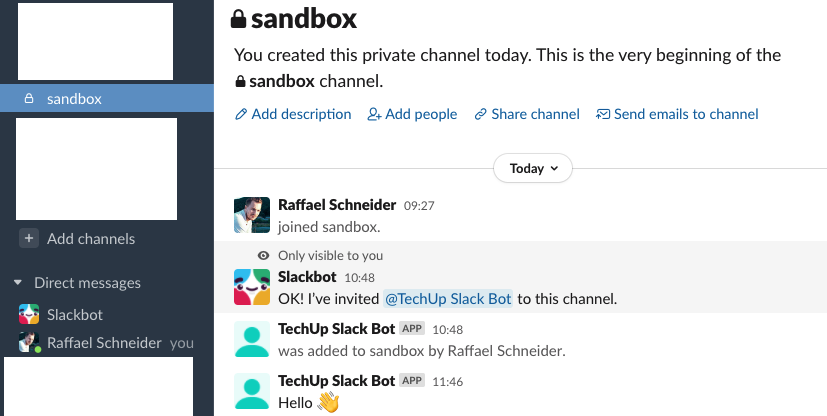
The desired target channel is #sandbox and is a private channel that I created for test purposes. It is also important to read out the token from the Environment \ variables.
|
|
Now we have to define the desired dependencies in our build.gradle.kts, as well as use the Shadow-Gradle \ - plugin to generate a FatJar during the build.
|
|
In the gradle.properties we also put certain properties which primarily specify the versioning of our dependencies.
|
|
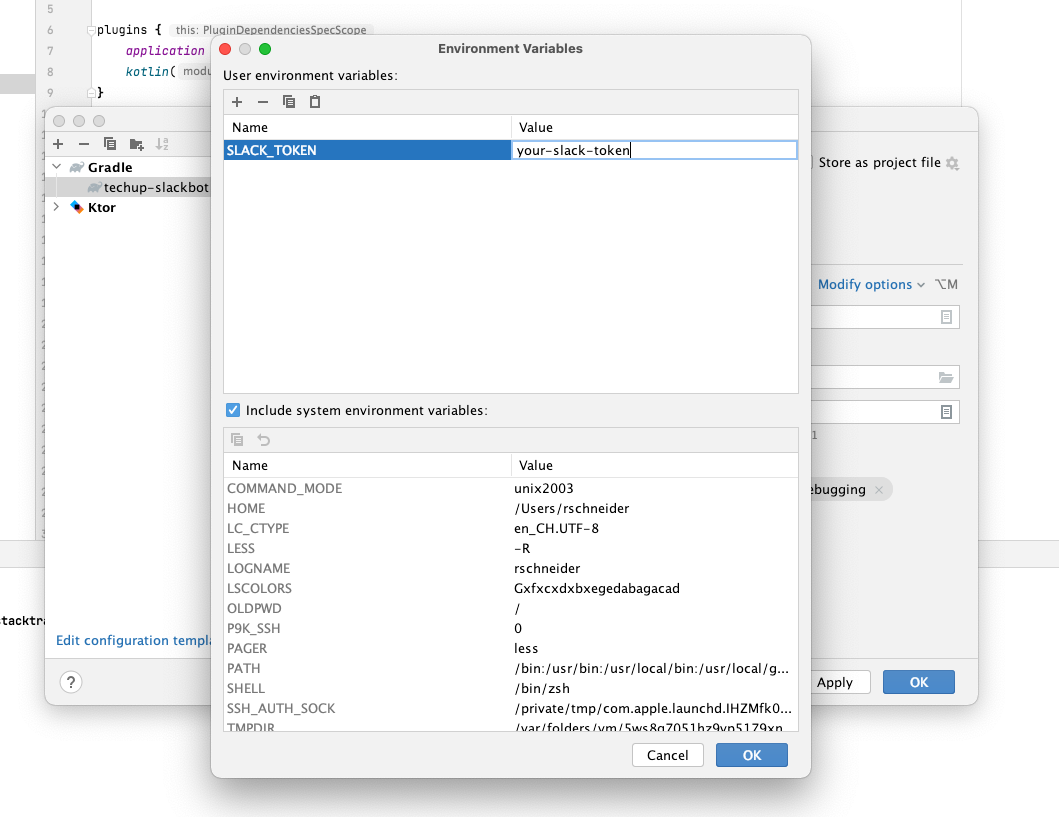
Now we can do a gradle run in IntelliJ as a Run \ configuration. Just make sure that an environment variable is set for the SLACK_TOKEN.
When it is triggered, the whole thing is deployed on http://0.0.0.0:8080.
|
|
When calling the http://0.0.0.0:8080 \ endpoint, a message should be triggered in the target channel in addition to a response to the GET call.
If not, it may be because the bot has not yet been added to the channel.
In this case an error not_in_channel is thrown. This can be done very easily by addressing the bot via @TechUp Slack Bot in Slack and then being asked by Slack to add the bot as a user.
Yupie! It worked, didn’t it?
If not, please just compare it with our TechUp-Repository on GitHub. Next, we want to deploy the application on Heroku and let it run so that it can be reached around the clock.
Heroku as an app provider
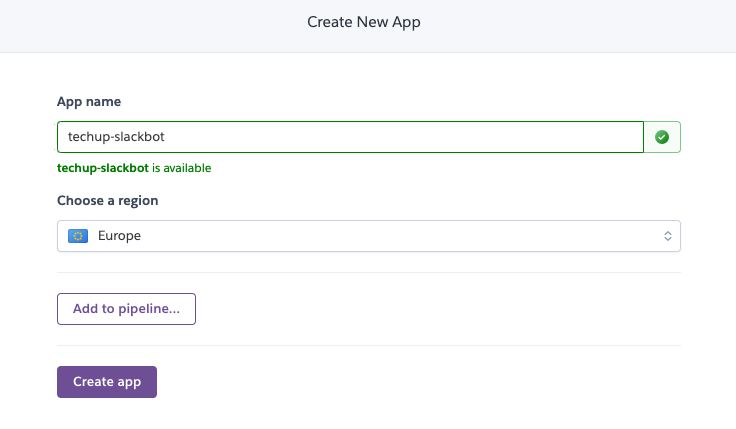
Heroku offers the possibility to deploy apps quickly and easily. To do this, we first have to create an account and declare the app.
First we create the app on Heroku. The name here is techup-slackbot which should be hosted in the Europe \ zone.
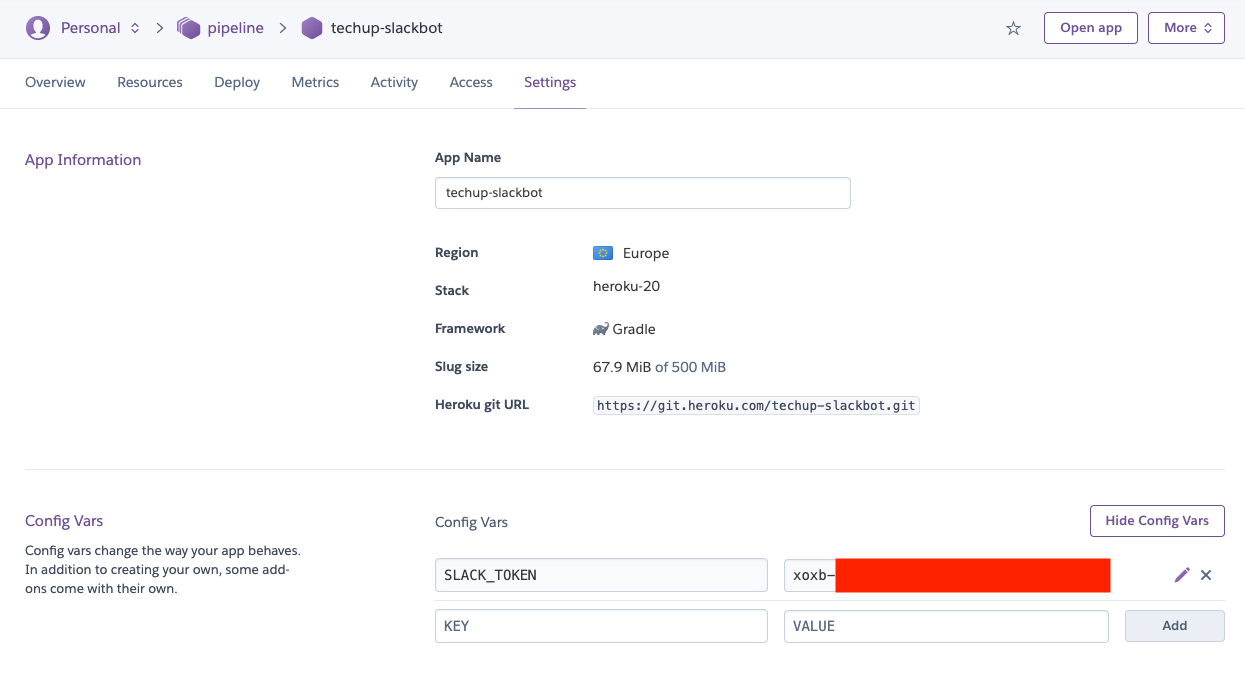
Then we configure the app as follows. The important thing is SLACK_TOCKEN.
Heroku expects a Procfile at project level when building. This should contain the path to our FatJar.
|
|
We will first run Heroku locally to test whether Heroku builds our app correctly.
This has the advantage that it is much faster and that there is no build time on the Heroku server. For this we have to define the environment variables in a .env \ file.
|
|
With the Heroku-CLI you can now conveniently log in and then have the whole thing built and tested locally.
|
|
The deployment to Heroku is easily initiated with a push of the Git repository.
|
|
As soon as this is done, the app should be deployed on Heroku and already running. When calling the app under https://{app-name}.herokuapp.com/ or directly via the Open App \ button

the Slack message is triggered again

Congratulation ! You have just built your first slackbot with Kotlin / Ktor and Heroku! 🥳
Conclusion
With the chosen stack, you can write a Slackbot relatively quickly and easily. Kotlin, Kotr and Gradle all look very modern and take the application to the next level
We at b-nova now have several such bots in use and will be able to expand them if necessary. Build a Slackbot and get to know the advantages of deploying on Heroku. Stay tuned! 📻
Further links and sources
https://plusmobileapps.com/2020/10/09/ktor-slackbot-heroku.html
https://devcenter.heroku.com/articles/heroku-cli
https://blog.heroku.com/rise-of-kotlin
https://github.com/chatbot-workshop
This text was automatically translated with our golang markdown translator.