Origin
Helm means something like rudder or steering wheel and has its origins in Helm Classic. The project was started by Deis (deislabs.io) in 2015 and the first release was presented at the first KubeCon.
In January 2016, the project was then merged with Kubernetes and also moved to Kubernetes. This year, the release 2.0 of Helm was published due to the merger and the associated code changes. Tiller was introduced with Helm 2.0. Tiller takes over the communication with the API server in Kubernetes. For example, a team was able to work on a distributed cluster.
In June 2018, Helm was finally accepted into the CNCF. Helm gradually got more and more components, including Monocular (Frontend), the <a href=“https://github.com/helm/charts “target ="_blank “>Helm Chart Repo, the Chart Museum and later the Helm Hub.
The Helm Chart Repo was archived in November 2020. The charts in the archived repo have not received any updates since then. Most of the charts have been moved to other repositories and can be found via the Helm Hub.
Helm 3 was released in November 2019. With this release Tiller (Helm Server) has been removed from Helm. Until then, this was used to establish communication between the Helm and the Kubernetes.
This brings Helm closer to the infrastructure of Kubernetes, as modern resources such as security, identity and authorization are used by Kubernetes.
Architecture
Helm was written in Go. Internally, the Kubernetes client is used to communicate with Kubernetes (REST + JSON). The information is stored in Kubernetes Secrets so that no separate database is required. All configurations are written in YAML.
Helm consists of only one “executable”, which however contains 2 components. The Helm Client and the Helm Library.
The Helm Client is responsible for creating charts and managing repositories and releases. It also provides the Helm Library with the chart and the config that is to be installed.
The Helm Library receives this chart and the config and combines them to build a release and deploy it in Kubernetes. The Helm Library generally handles all communication with Kubernetes.
Functionality and advantages
The condition for using Helm is an operational Kubernetes cluster. Helm 3.0.0 uses the Kubernetes client version 1.16.2 for communication, so it is compatible with Kubernetes version 1.16 (more information about compatibility here).
If you want to deploy an application in a Kubernetes cluster, you need a wide variety of resources (Pods, Services, Volumes, Deployments, …). This can quickly become very complex and confusing. This naturally increases the error rate when delivering applications.
Helm packs all of these resources and configurations into one package, which can then be conveniently and easily installed in your cluster. Helm also offers an update, delete and rollback function to update or delete charts accordingly or to restore the previous version in the event of an error.
If you want to use existing charts, you can search for, adapt and use existing charts. Of course, you can also create new charts and host them in your own chart repository.
Chart, Config, Repository and Release
A Helm chart is basically a package.
This package contains all the resources required to run an application. A Helm Chart is the Kubernetes equivalent of an apt dpkg or a yum rpm file.
As the name suggests, the Config contains configurations that are transferred to the chart. So you can adapt the chart to your needs.
Charts are collected and distributed in the Repository. It’s like an app store for Kubernetes packages.
One speaks of a Release as soon as a Helm Chart is running in a Kubernetes cluster with a certain Config. You can have several charts in a cluster, for example if you want to run two web servers in a cluster with different configurations. Each chart creates a new release with its own release name.
Summary, one can say:
Helm installs charts in a Kubernetes cluster and creates a new release with a specific config for each chart. You can search for specific charts in a repository.
Installation
The easiest way to install Helm is via a package manager, e.g. Homebrew for Mac or Apt for Debian
|
|
After Helm has been installed, you can add a Helm Chart Repository, which you can then browse.
|
|
Now we are ready to look for and install our first charts. To get a small overview of charts, you can list them as follows:
|
|
As we can see here most of the charts are “DEPRECATED”. As mentioned above, this is due to the fact that the Helm Chart Repo was archived in November 2020.
Our first release
Now we want to focus on our first release. We install a Nginx chart in our cluster. In the Helm Hub we are looking for nginx. As we find out, there are several directly under which we have to choose. I choose the one that was last updated.
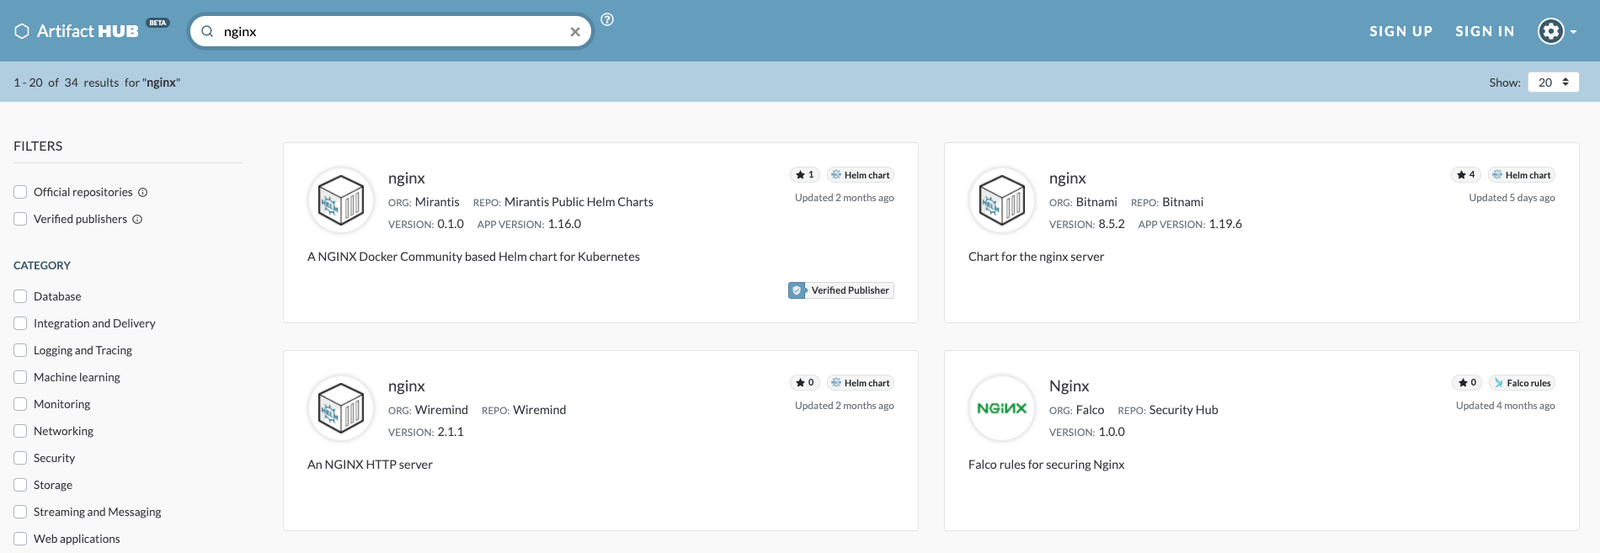
On the detail page of the chart we can see which repo we need to add so that we can install the chart.
|
|
Now we can install the chart and get the following output.
|
|
We can retrieve this information at any time with helm status my-nginx.
We can look at the status with the following command:
|
|
The Helm CLI also offers us our own way to find out what was released with Helm.
|
|
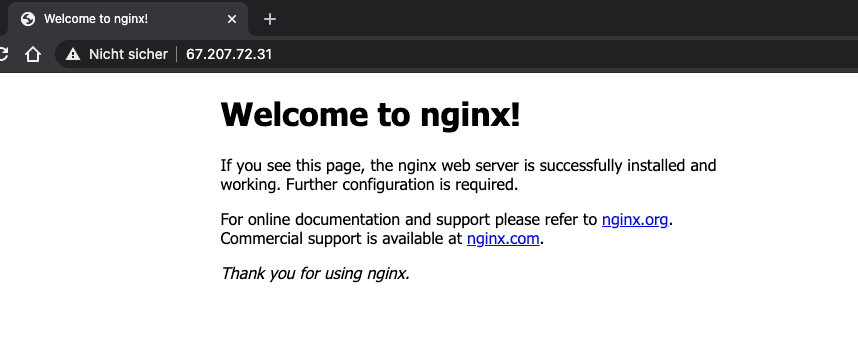
After the deployment is complete, we can use the given commands to find out the IP and port and call up the application.
|
|
If we have the chart, resp. want to delete the deployment again, we can do this simply with the following command. This deletes all resources that are related to the release and also the release history.
|
|
If you want to keep the release history you can specify –keep-history.
There are several aliases (uninstall, del, un) for the delete command. You can get additional information about the command with –help.
|
|
All resources are then deleted from the cluster again.
|
|
Let’s adjust the chart
Our example showed us how to install a chart and delete it again. Now we don’t just want to use existing configurations, we want to use our own. To do this, we first have to find out which options can be configured in our chart. The following command will help us with this.
|
|
We now see a very long list of options that can be adjusted in the chart. In order to adapt these settings, we can specify a YAML file during installation, which contains the configurations.
As an example we want to change the HTTP port to 8080. So we create a YAML file values.yaml with the following content:
|
|
Then we specify this file as a parameter when installing the chart:
|
|
We can also override configurations with the set argument.
|
|
Further information is available in the Helm documentation.
We see in the service that port 80 is no longer mapped, but port 8080. After the deployment is complete, we can access the server via HTTP via port 8080.
|
|
Upgrade and Rollback
Helm gives us the option to update a release or restore a previous version. As an example we take the nginx chart again. We received the request from the WAF team that the nginx must run on port 8081 again.
Let’s take a look at the current release first:
|
|
We see revision 1 here, which means that there is only a release version. Now let’s do our upgrade and see what happens.
In our values.yaml we first have to change the port to 8081.
|
|
After that, we call the following command to perform the upgrade.
|
|
As we can see, the release has been successfully updated and the version has been incremented. The port has now been switched successfully.
“Murphy’s Law”. Shortly after we rolled out the change, the WAF team called that there were problems with the change and that we need to undo our changes.
Fortunately, Helm helps us here again and offers a rollback function with which we can easily go back to the previous version.
|
|
We have now seen where to find an existing chart (Helm Hub) and how to install it on a Kubernetes cluster. We know how to transfer your own configurations to the chart and how to upgrade and rollback.
Next steps:
In the next TechUp we want to look at how we can create our own chart and then install it in the cluster.
Have fun and stay tuned!
This text was automatically translated with our golang markdown translator.
Stefan Welsch – Pionier, Stuntman, Mentor. Als Gründer von b-nova ist Stefan immer auf der Suche nach neuen und vielversprechenden Entwicklungsfeldern. Er ist durch und durch Pragmatiker und schreibt daher auch am liebsten Beiträge die sich möglichst nahe an 'real-world' Szenarien anlehnen.